


Remarks: This card-burning guide applies to M1 and M2 miners.
1. Preparation before burning the card
Prepare a TF card with a memory of 1G or more, and then download the corresponding card swipe package from the official website of MicroBT https://www.microbt.com. Unzip the Win32DiskImager-0.9.5-binary file.

Insert the TF card into the computer, and then run the Win32DiskImager application after decompression.

After running, the following interface will be displayed.
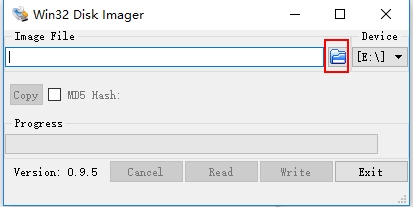
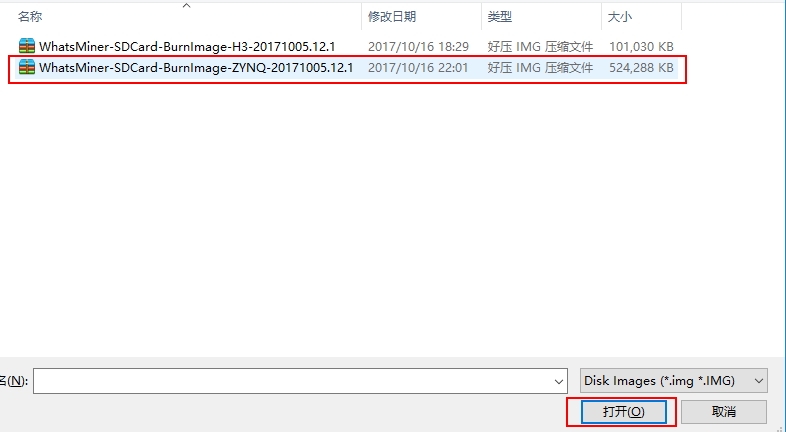
Click the icon that resembles a book, select the "ZYNQ" identifier in the SD card image, and then click Open to import it into Win32DiskImager.
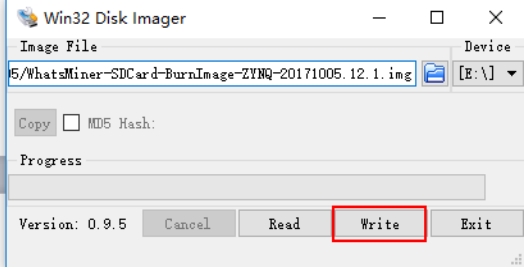
Back to the Win32DiskImager interface, click "Write" to burn the card.
After the card is successfully burned, the following interface will pop up.
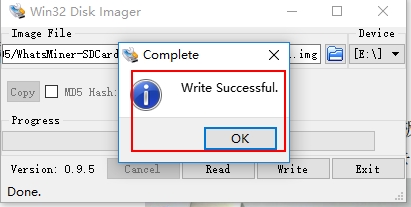
So far, the SD card of the ZYNQ control board has been made.
2. Card burning process
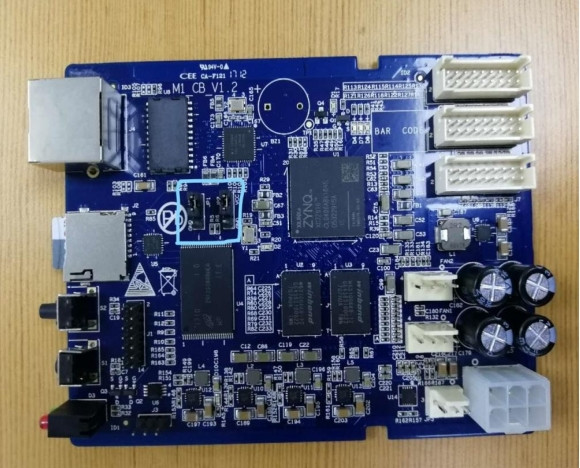
Power off the miner, take out the control board, jump the jumpers of the JP1 and JP2 middle pins on the control board to VCC, set the firmware version burning mode, insert the SD card with the firmware version into the SD card socket, and connect the power supply cable.
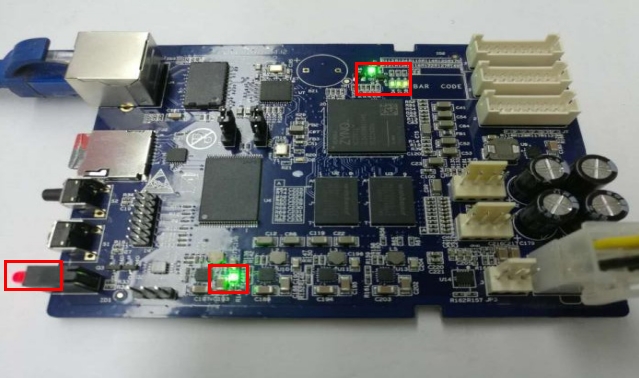
Turn on the power switch and power on the control board. After the power is on, the SMD LED light on the control board will be on. The plug-in's red and green indicator lights will stay on for about 15-20 seconds and then turn off for about 40 seconds. Currently, the control board is burning the firmware version from the SD card into NAND flash. After burning, the red and green LED lights will flash once for 1 second.
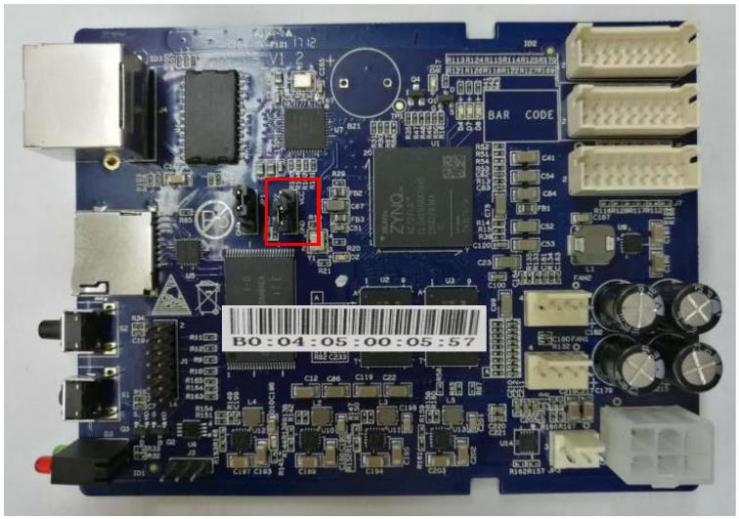
After the firmware version is burned, turn off the power, remove the SD card, and jump the JP2 middle pin jumper to GND. Next time the power is on, the control board will start from NAND flash and run the burned firmware version.
3. Test or verify the firmware version burning result
1) IP address acquisition check.
The control board is plugged into the Internet cable and connected to the router (or DHCP server) network with dynamic batch IP addresses.
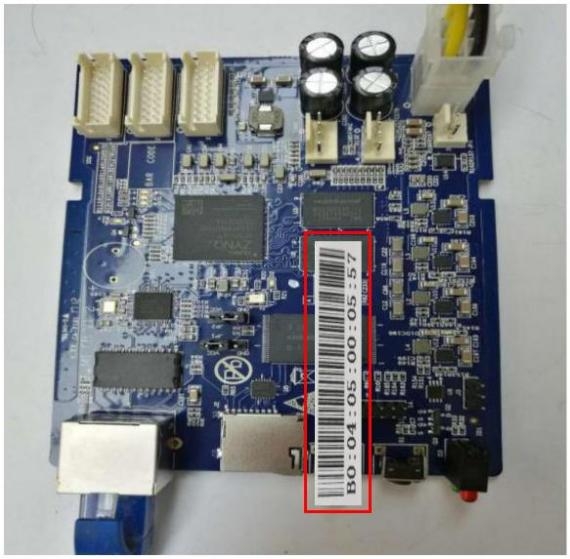
The control board is powered on, and after running for 30 seconds, press and hold the IPFOUND button on the control board for more than 5 seconds. Under normal circumstances, the red and green LED lights of the plug-in will flash several times. Likewise, under normal circumstances, you can see the IP detected in the whatsminer tools software and the reported IP And MAC address.
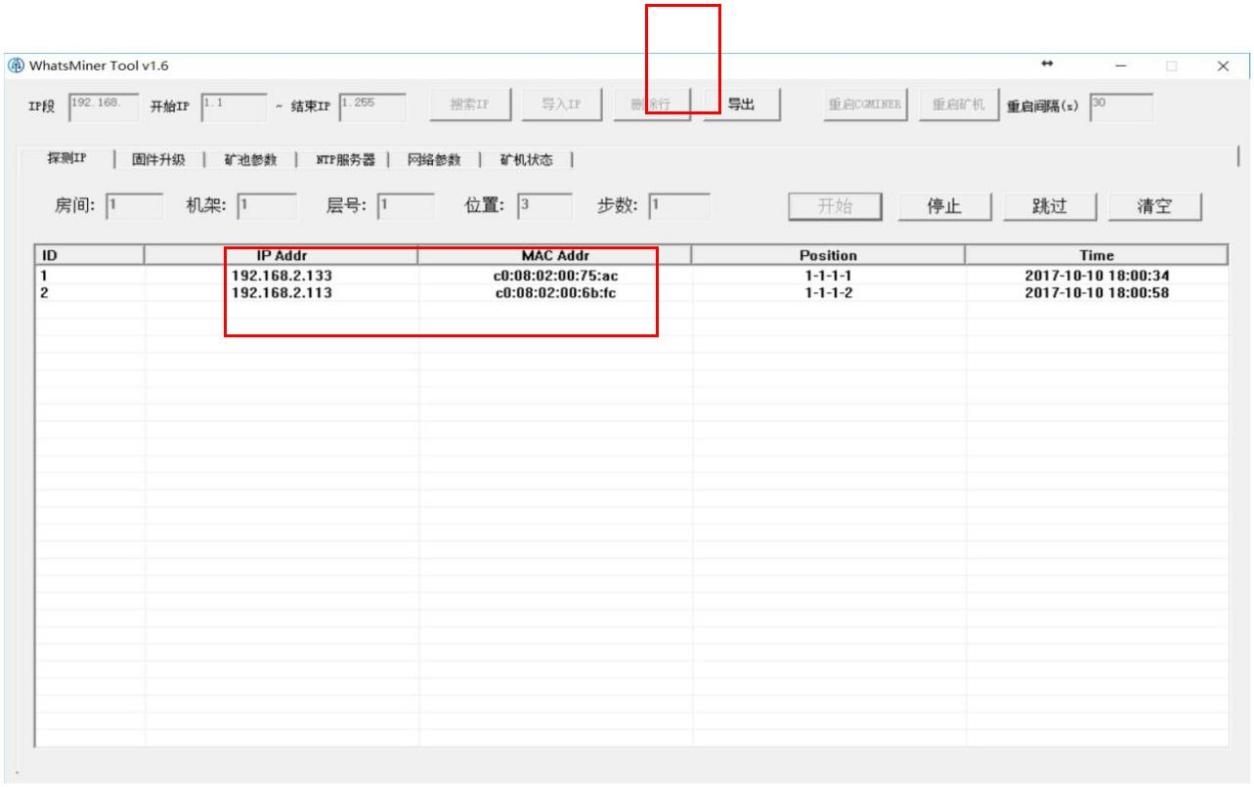 2) Check the firmware version.
a. Enter the IP address corresponding to the MAC address of the control board in whatsminer tools above in the test operation computer browser, enter the user name: root in the login interface, enter the default password: root, and click "Login" to log in to the control board.
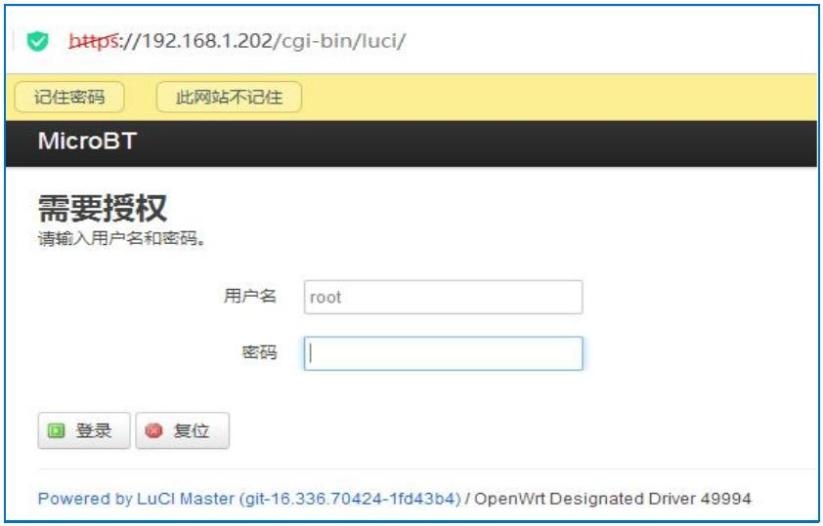
b. In the control board interface, select Status -> Overview to enter the system status interface. Check the host model, hostname, firmware version.
Dear Customers,
Hello, April 4, 5 and 6, 2025 (GMT+8) are the traditional Chinese festivals - Qingming Festival. Our company will suspend shipments during these 3 days and resume shipments on April 7 (GMT+8). We are deeply sorry for the inconvenience. Thank you for your understanding and support.
Best wishes,
ZEUS MINING CO., LTD