


Disassembly and Assembly Methods of T2T PSU
In this article, we will introduce the disassembly and installation process of the Innosilicon T2T power supply in detail to ensure that the miner can operate normally after replacing the power supply.
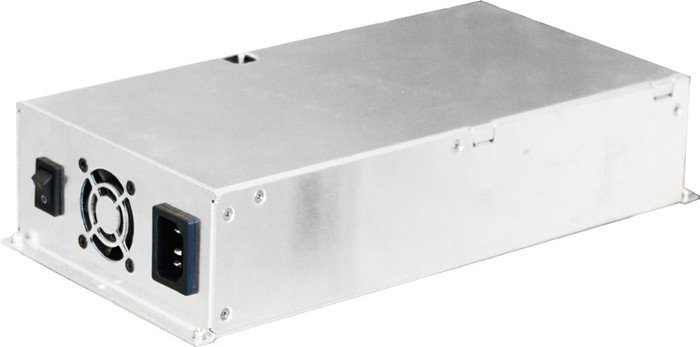
I. Disassembly method
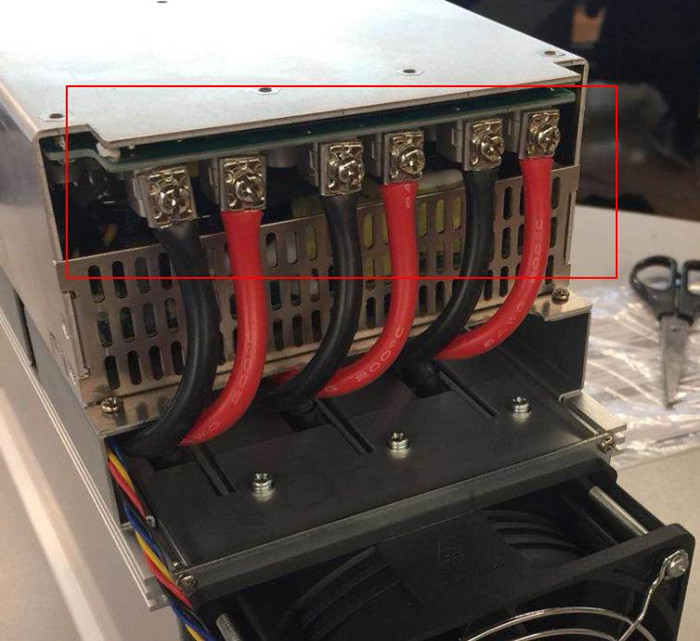
1. Disassemble the cables which connect PSU and hash board
There are three pairs of PSU cables. Please remove the screws with a screwdriver, then remove the spacer for fixing.
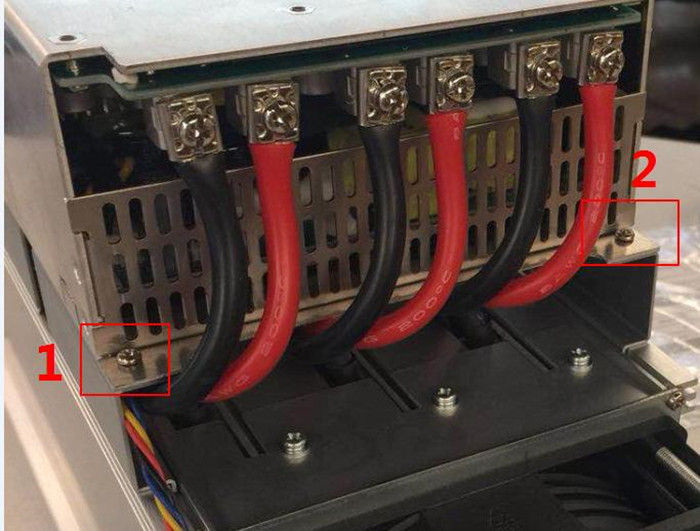
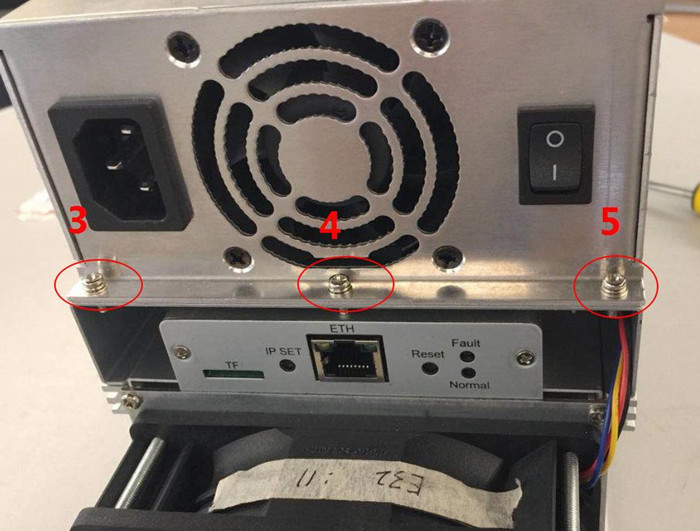
2. Disassemble the screws which fix the PSU
Five screws fixed the PSU. Please remove them.
3. Disassemble the connectors between PSU and control board
Attention! Do not tug the PSU after disassembling the screws which fix it, and there are still two connectors between PSU and the control board.
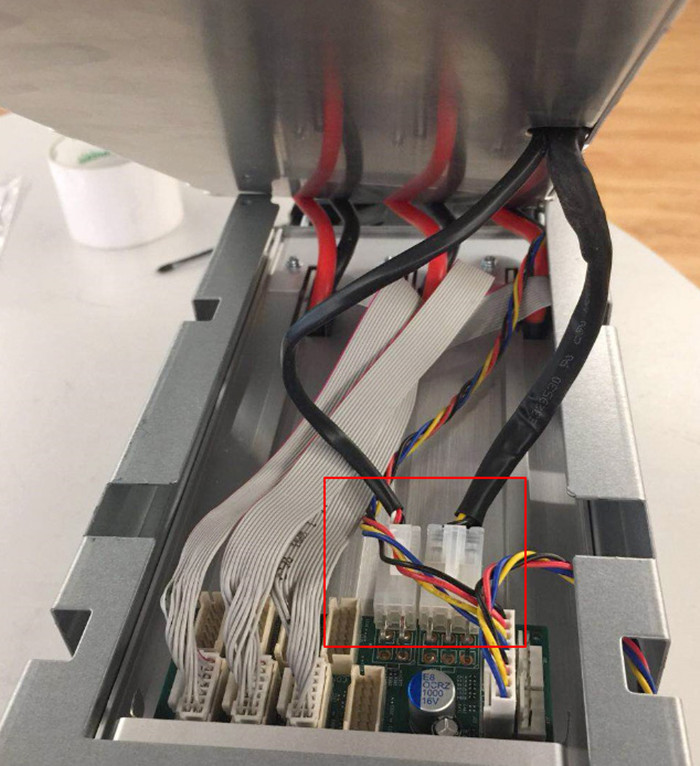
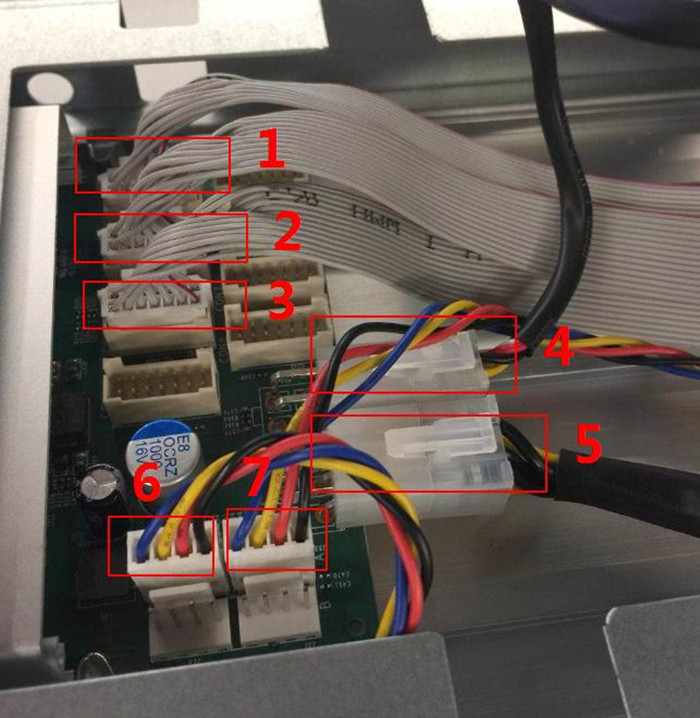
4. Disassemble the control board
Please remove the connectors on the control board before you disassemble the control board. There are seven connectors. Among them, 1-5 is designed with buckles. Therefore, you should press the buckles before you pull out the connector.
After removing the connectors on the control board, pull the metal card buckles to the outside of the control board, and remove the control board slowly.
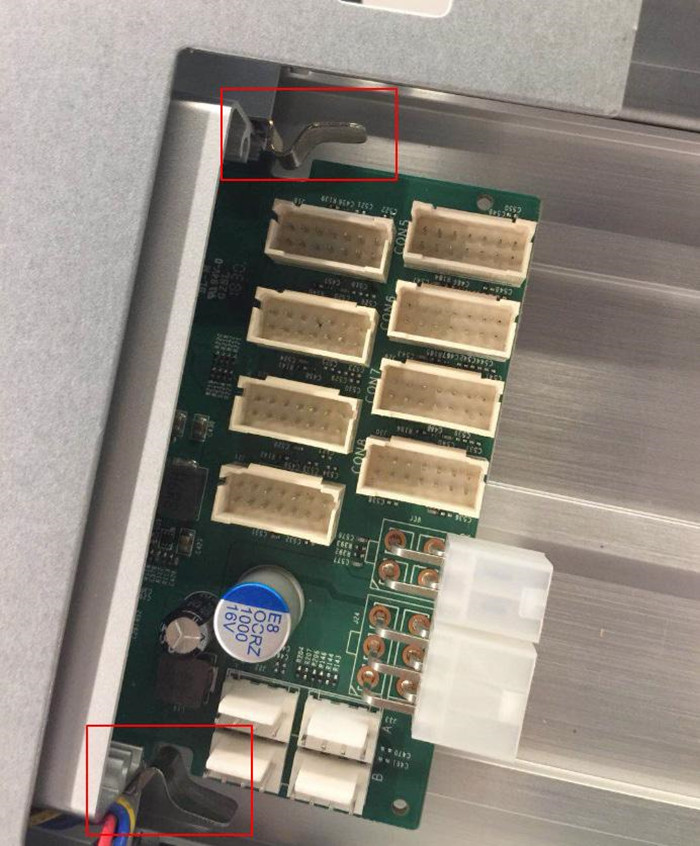
At this point, the control boards and PSU are totally disassembled.
II. Assembly method
1. Install the control board
Insert the control board along the card slot, until the two metal buckles are suitable in the two slots of the control board. If you install the control board correctly, the Ethernet port will be strictly stuck at the ETH signal of the control board.
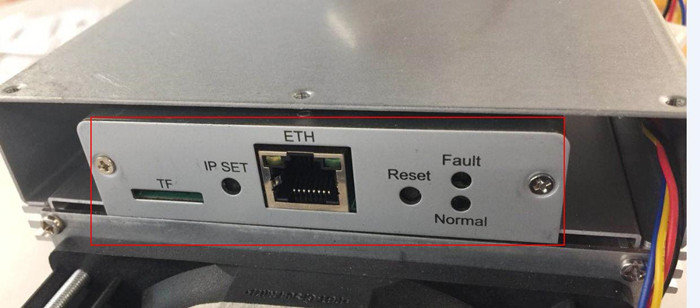
2. Install the connectors between PSU and control board
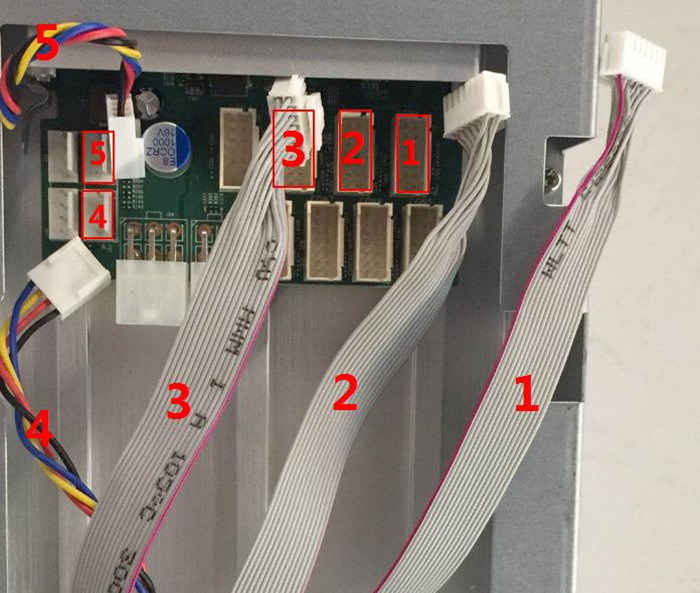
Connect data cables 1~5 to slots 1~5 in order; The connectors are designed with an anti-reverse connection. Please pay attention to the direction of the connectors.
3. Install the PSU
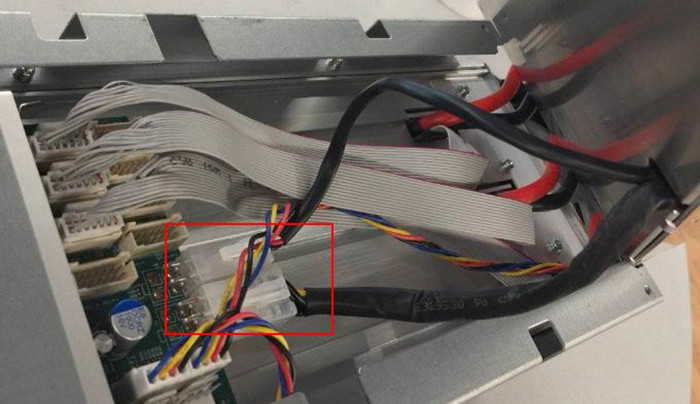
Connect the PSU to the socket of the control board.
4. Fix the PSU
Fix the five screws.
5. Connect the PSU and hash board
Connect the PSU cables to PSU via fixing screw and spacer in order. Do not miss the spacer and tighten the screws as much as possible.
Dear Customers,
Hello, April 4, 5 and 6, 2025 (GMT+8) are the traditional Chinese festivals - Qingming Festival. Our company will suspend shipments during these 3 days and resume shipments on April 7 (GMT+8). We are deeply sorry for the inconvenience. Thank you for your understanding and support.
Best wishes,
ZEUS MINING CO., LTD