


Miner friends may encounter the situation that they cannot log in to the webpage normally and cannot connect to the Raspberry Pi when the miner starts. Here, I will explain the correct way to access the Raspberry Pi IP in detail.
The default IP of the Raspberry Pi is 192.168.0.100, which is network segment 0, which may be different from the IP network segment of our computer. If the computer network segment is an IP other than 0, It will cause the Raspberry Pi backend to be inaccessible.
Given the above, there are three reference ways to set and change IP:
Router settings
Take the existing network segment 192.168.1.1 and the Raspberry Pi network segment 192.168.0.* as an example:
1. To change the router's network, log in to the router settings first;
192.168.1.1 is the login address of the router;
2. We click on the network parameters-LAN port settings;
In the exemplary interface, generally, we only need to change the gateway address. Set as follows:
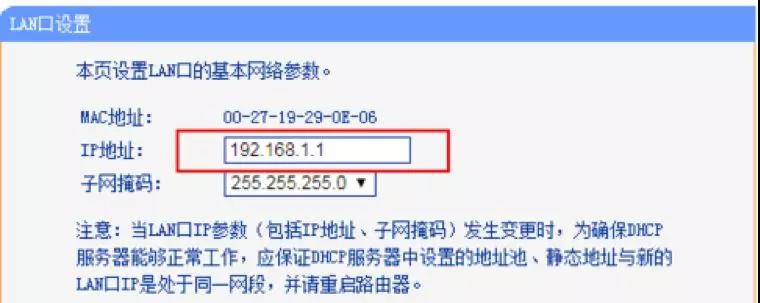

(1) Change the IP address in the LAN port settings to network segment 0.1, and then click save;
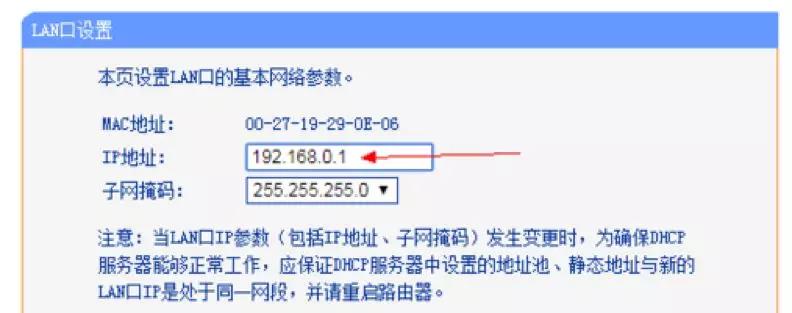
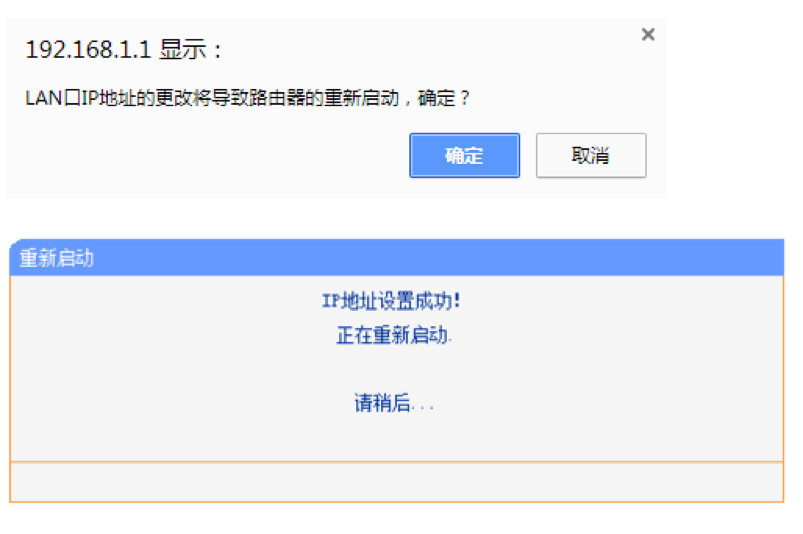
(2) Click Confirm to restart, and reconnect after restarting;
3. In the computer browser, enter the default IP of the Raspberry Pi: 192.168.0.100 in the URL bar. You can directly access the Raspberry Pi running backstage and change the information.
Step 1: Query the computer IP
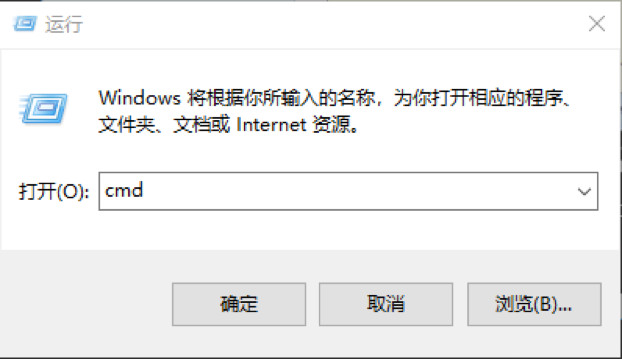
1. Right-click the start menu and click Run;
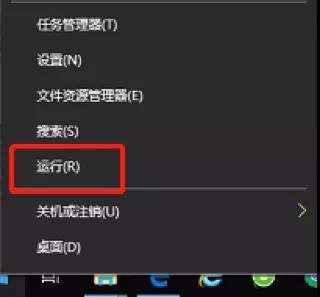
2. Then search for cmd (type cmd and press enter);
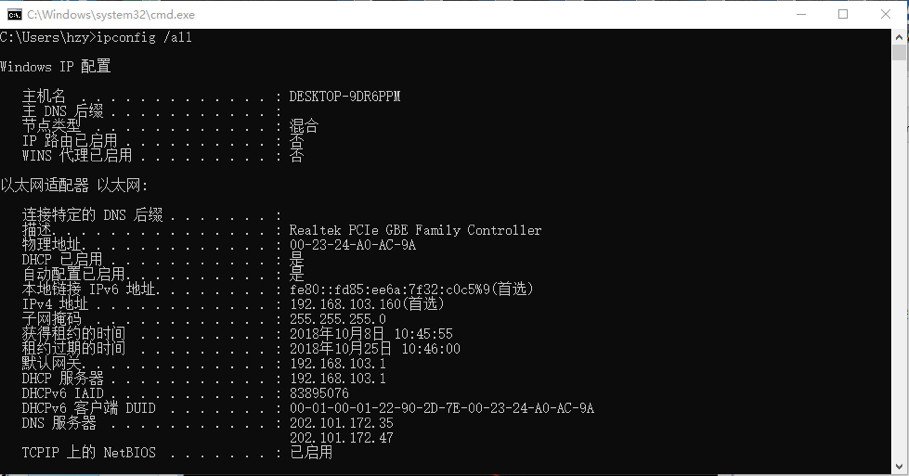
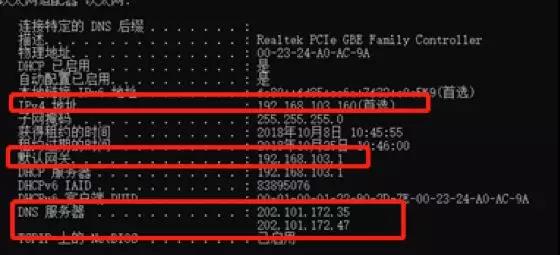
3. A black frame window appears. This window is commonly known as a DOS window. Enter ipconfig /all at the flashing ‘_’ in the window (note ipconfig space /all, this command can also copy ipconfig /all), and press the keyboard to enter key;
4. At this time, there will be a large number of data, pull up to find IPv4 address and DNS, etc.;
Step 2: Find out the setting IP interface
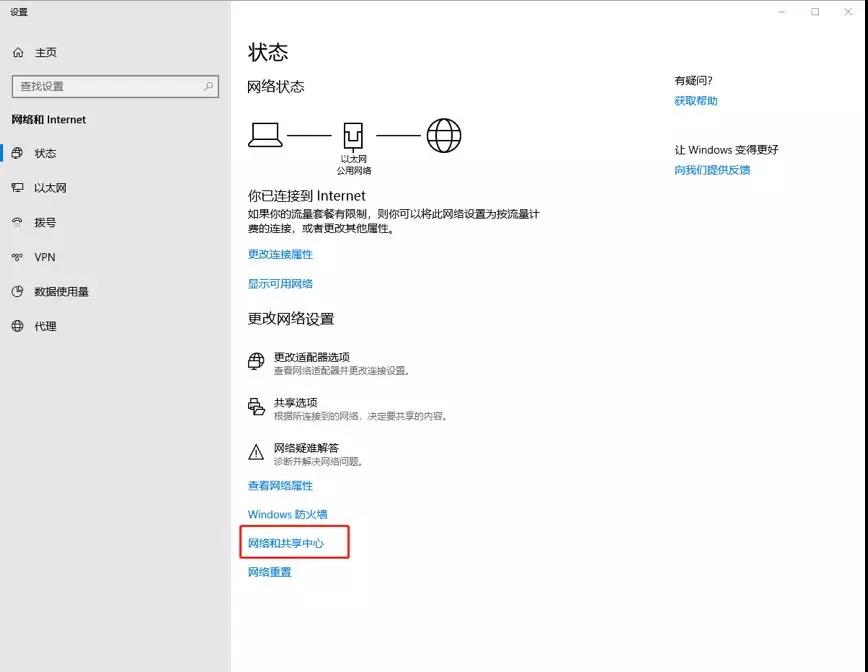
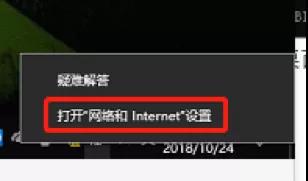
5. Right-click on the small computer in the lower right corner of the desktop to open the "Network and Internet" settings;

6. Click on Network and Sharing Center;
7. Click Ethernet;
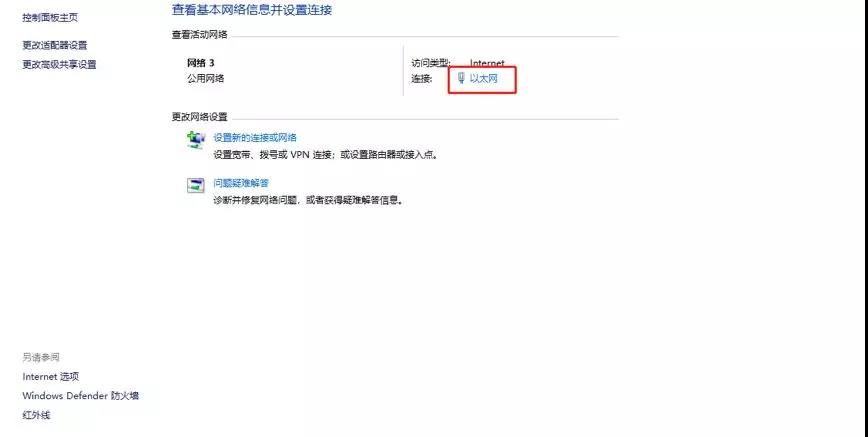
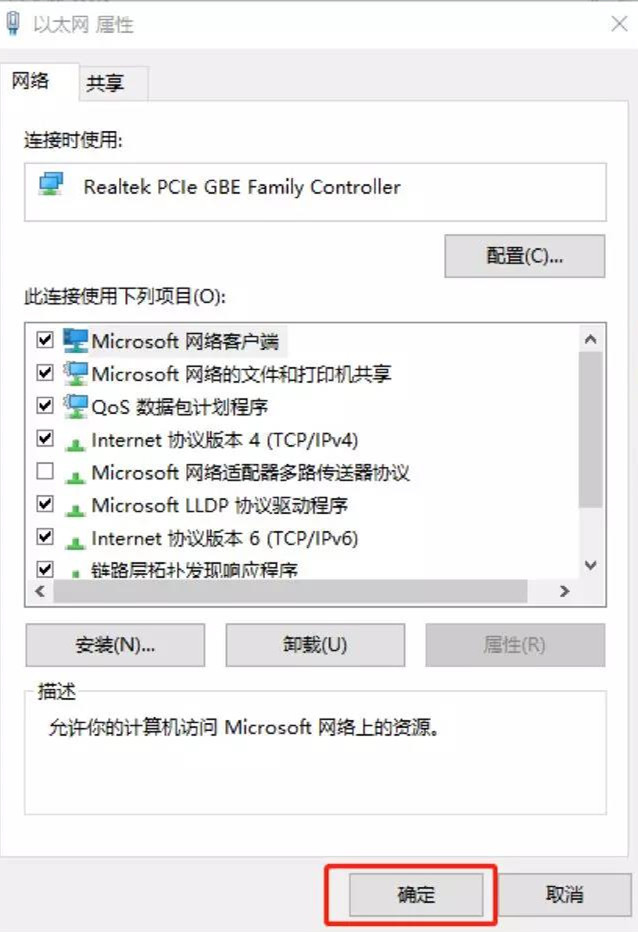
8. Click on properties;
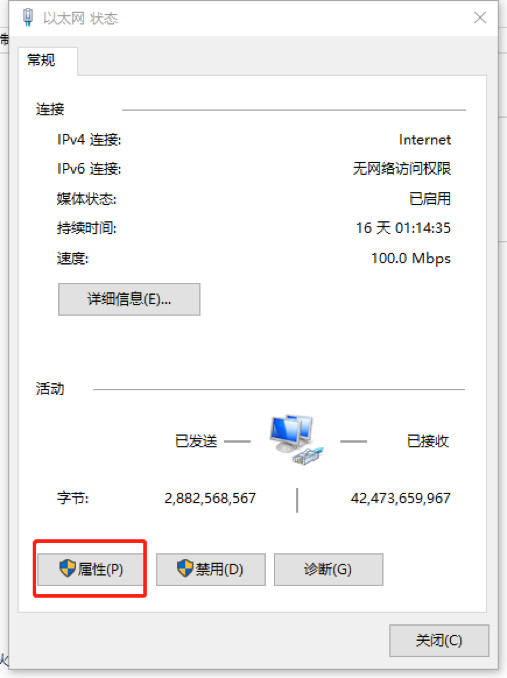
9. Click Internet Protocol Version 4;
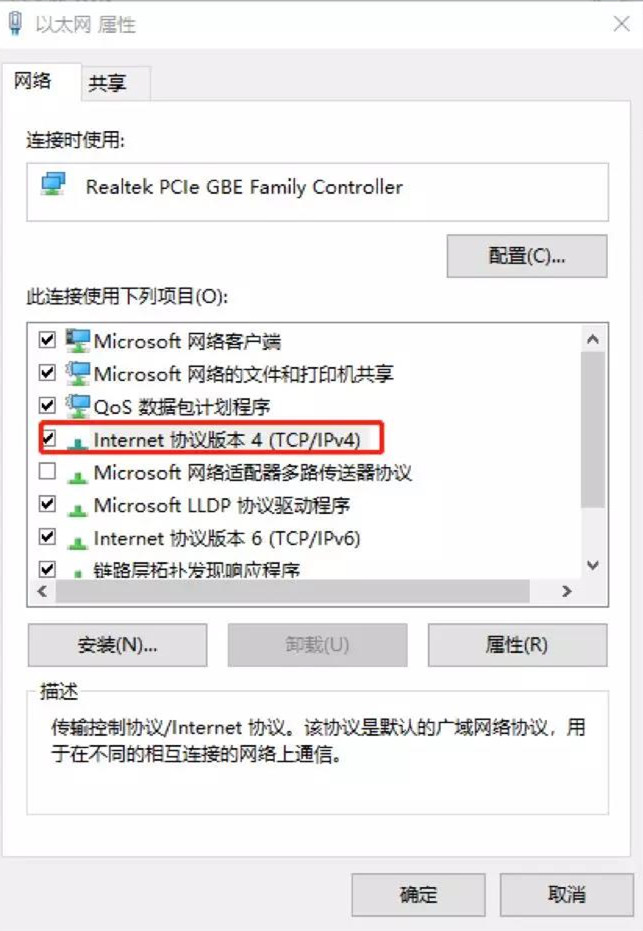
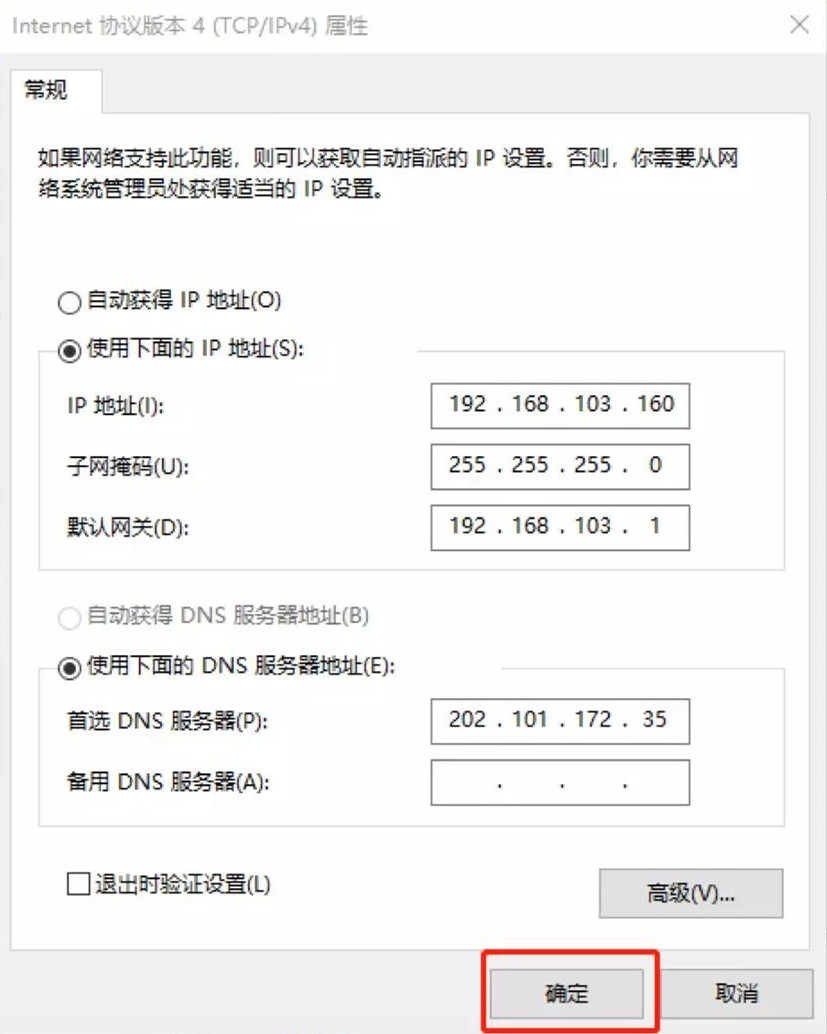
10. Click "Use the following IP address" to change;
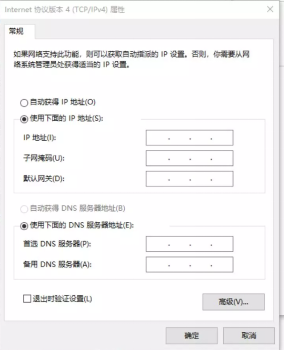
Step 3: IP settings
11. Fill in the corresponding IPV4 address data in the DOS program window, as shown below:
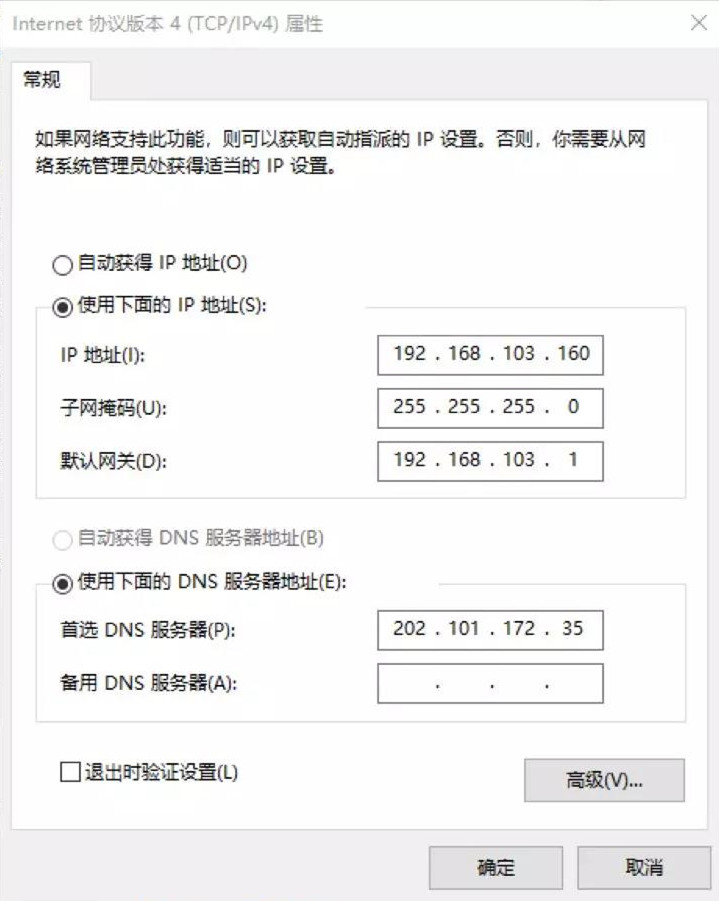
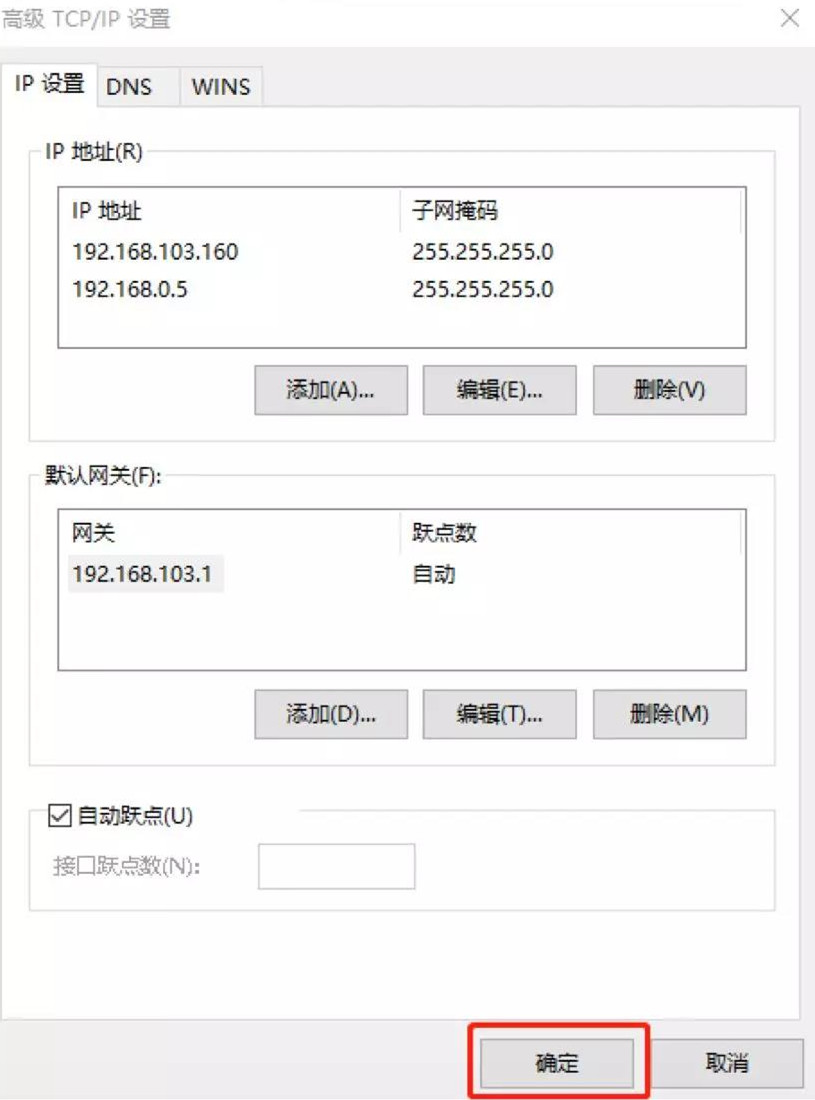
12. After filling in, click Advanced;
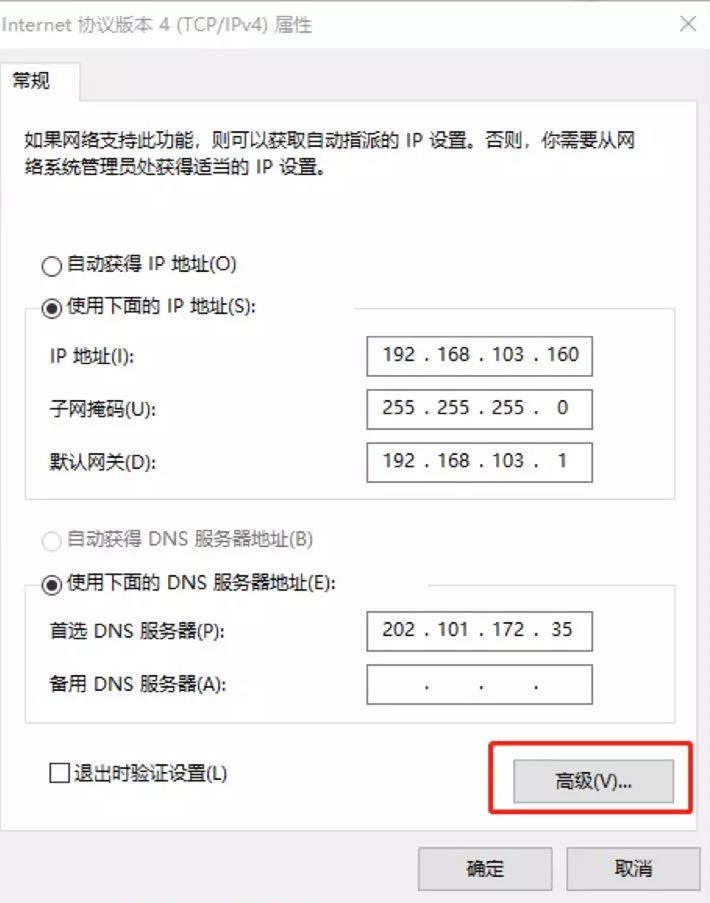
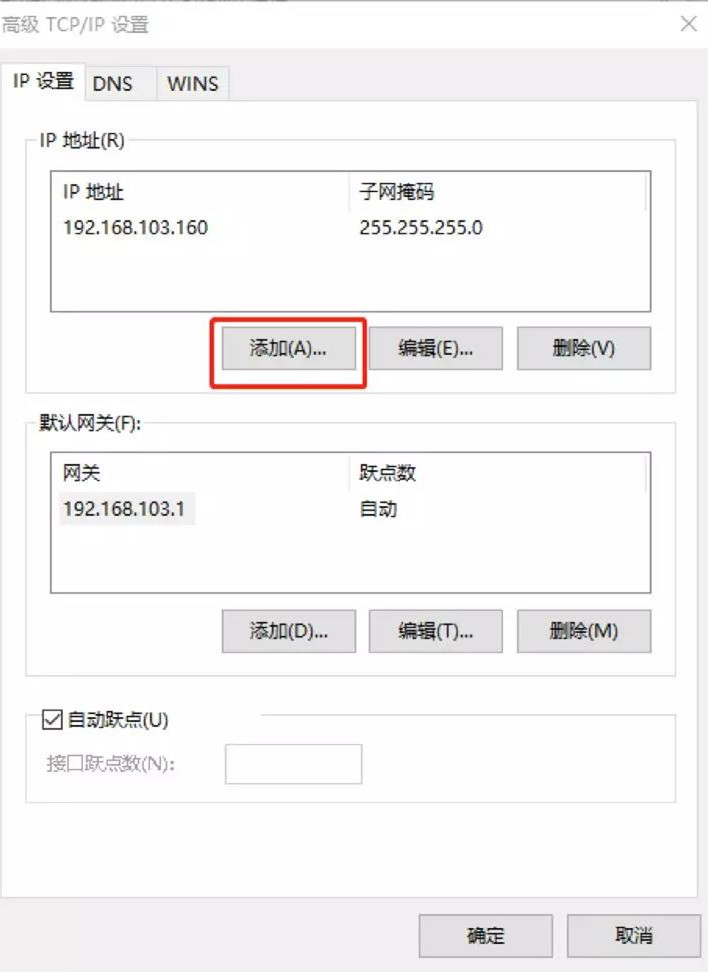
13. In the advanced interface-IP address-add a 0-segment access IP, the added IP suffix cannot be 100 (that is, it cannot conflict with the used IP, the example of the principle: the default IP suffix of the Raspberry Pi is 0.100, if there is a conflict, You can’t access the Raspberry Pi IP usually), press the computer’s default subnet mask directly;
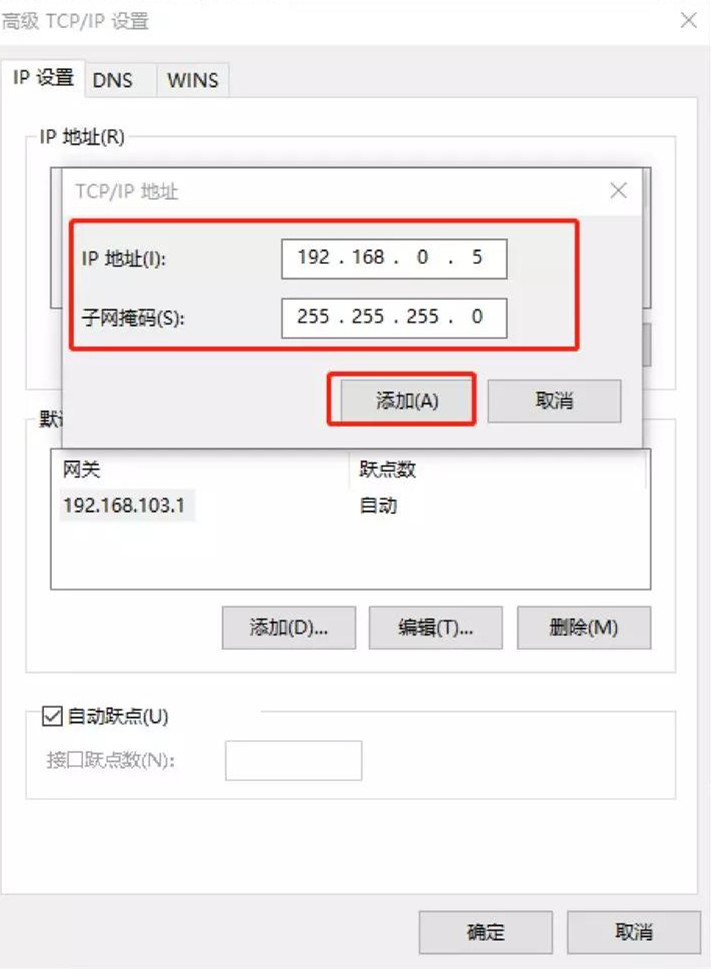
14. After adding, click OK;
15. After the IP setting is confirmed, you can enter the default IP of the Raspberry Pi: 192.168.0.100 in the web address bar in the computer browser, and you can directly access the Raspberry Pi running backstage and change the information.
Step 1: Power on the Raspberry Pi and connect to the computer
Step 2: Find out the setting IP interface
1. Right-click on the tiny computer in the lower right corner of the desktop to open the "Network and Internet" settings;
2. Click on Network and Sharing Center;
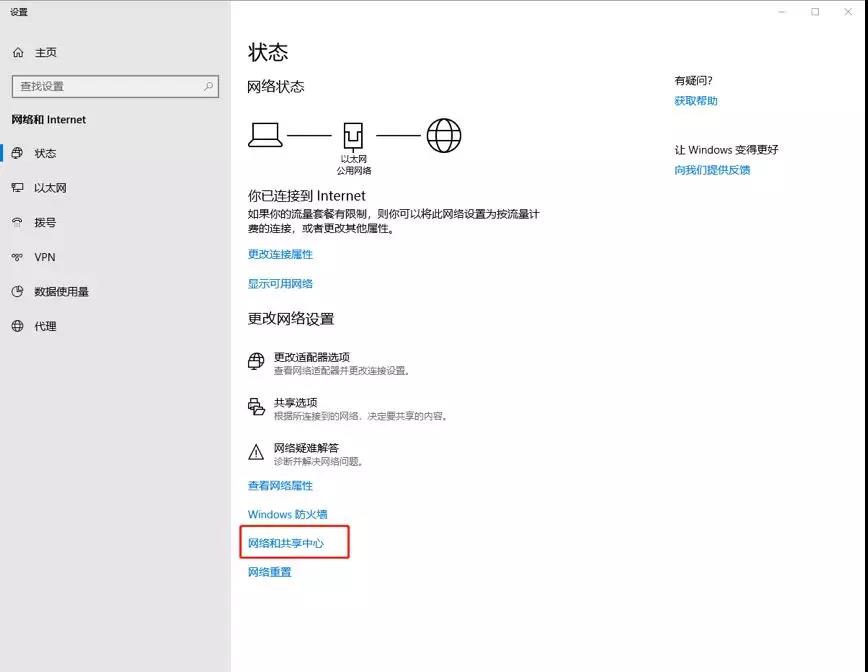
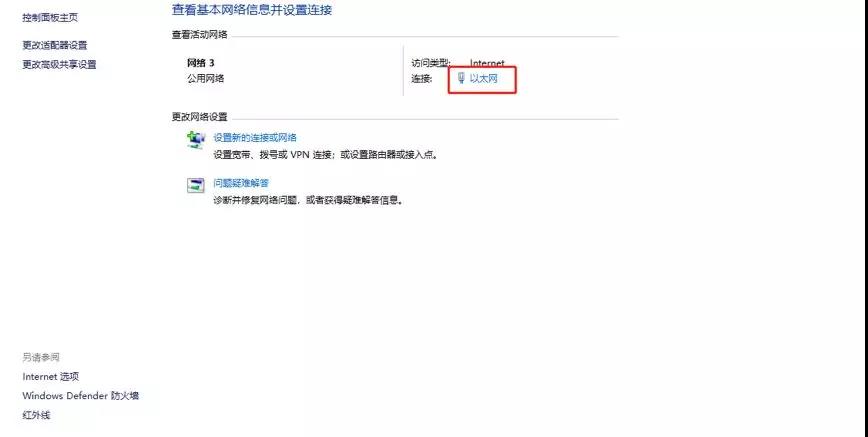
3. Click Ethernet;
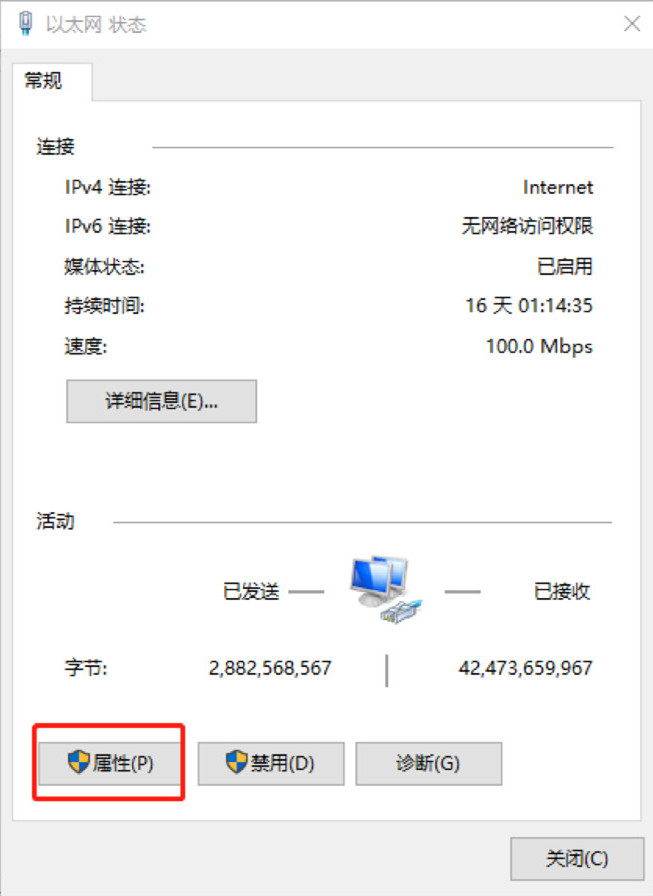
4. Click on properties;
5. Double-click to click Internet Protocol Version 4;
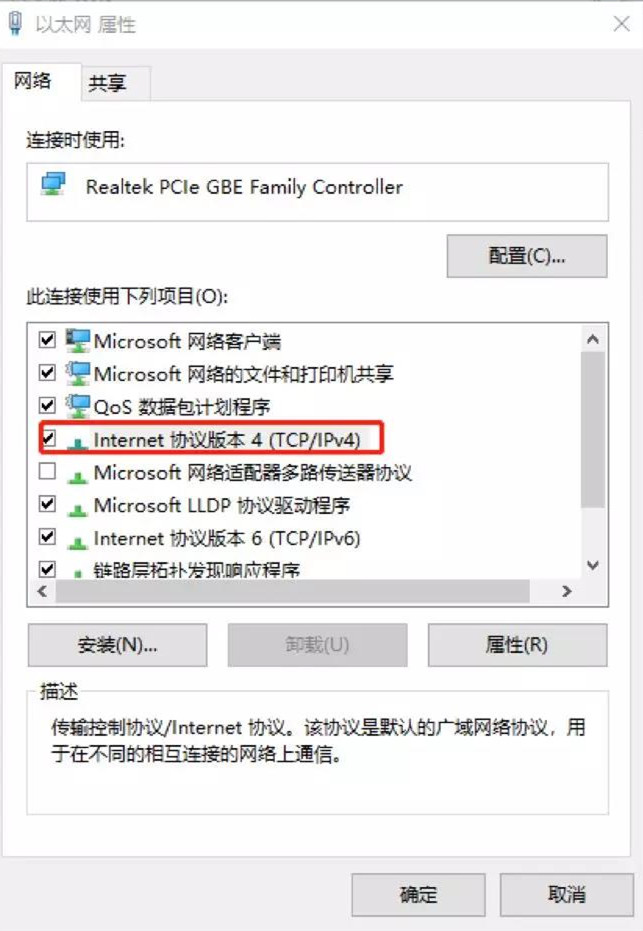
6. Click "Use the following IP address" to change;
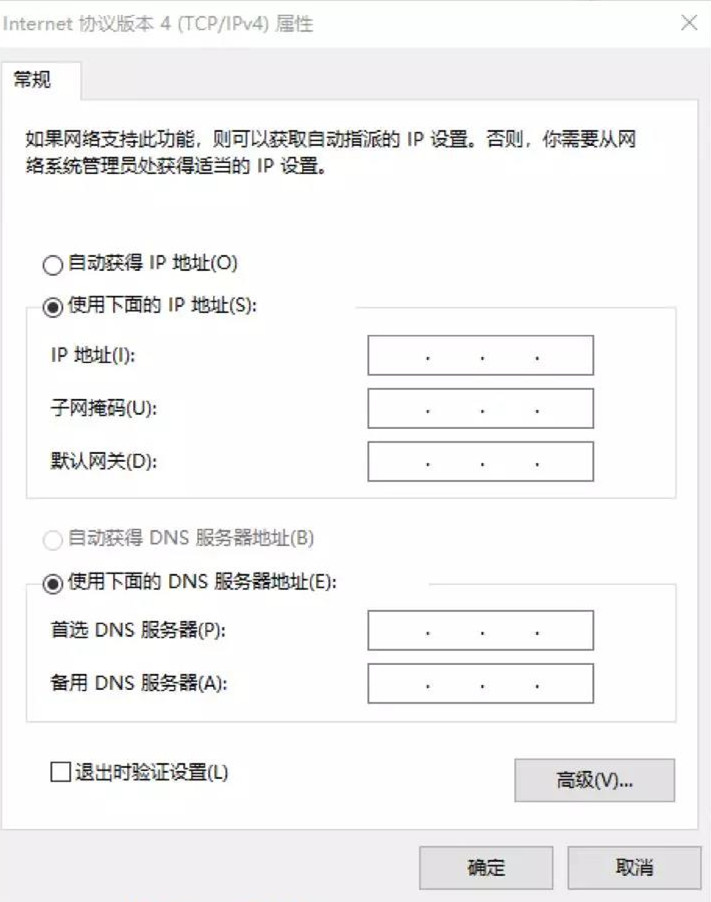
Step 3: IP settings
7. Then change the IP address to 192.168.0.X (X cannot be 100), here DNS does not need to be filled in, click OK after completion;
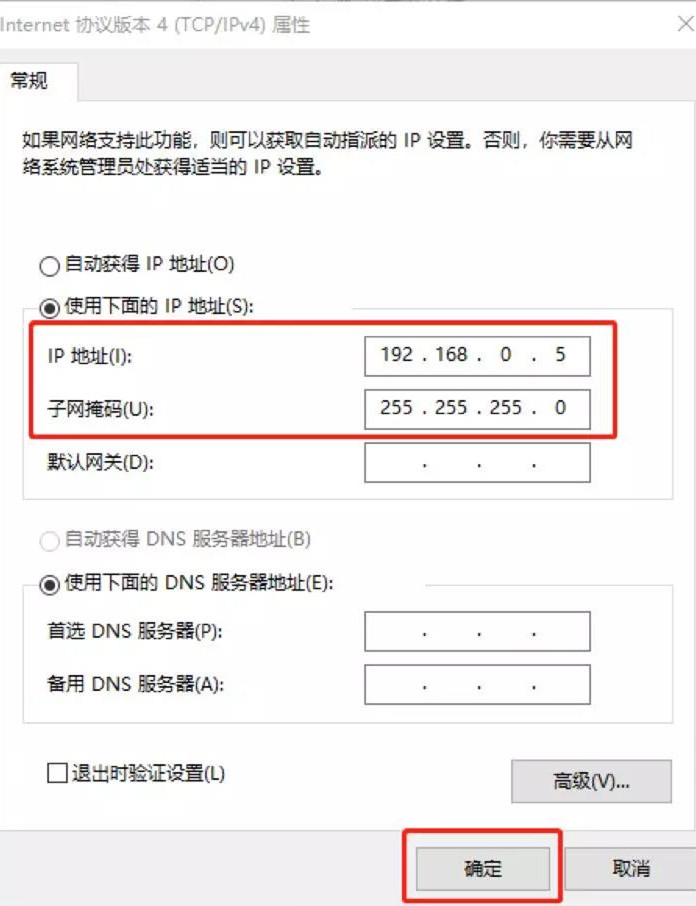
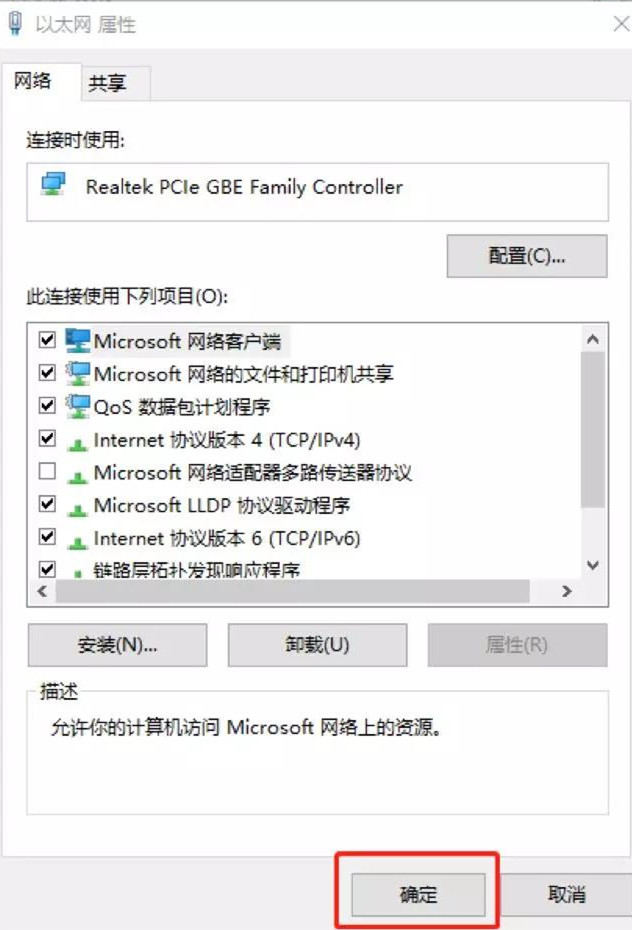
8. After the IP setting is confirmed, you can enter the default IP of the Raspberry Pi: 192.168.0.100 in the web address bar in the computer browser, and you can directly access the Raspberry Pi running backstage and change the information.
The above are the three ways to access the Raspberry Pi IP correctly.
The content of this article is from the Internet, compiled and edited by ZEUS MINING.
Dear Customers,
Hello, April 4, 5 and 6, 2025 (GMT+8) are the traditional Chinese festivals - Qingming Festival. Our company will suspend shipments during these 3 days and resume shipments on April 7 (GMT+8). We are deeply sorry for the inconvenience. Thank you for your understanding and support.
Best wishes,
ZEUS MINING CO., LTD