


Remarks: This method is suitable for Whatsminer M10, M10S, D series miners. This article takes Whatsminer D1 as an example to explain in detail the disassembly and installation steps of the Whatsminer adapter board.
Disassemble the adapter board
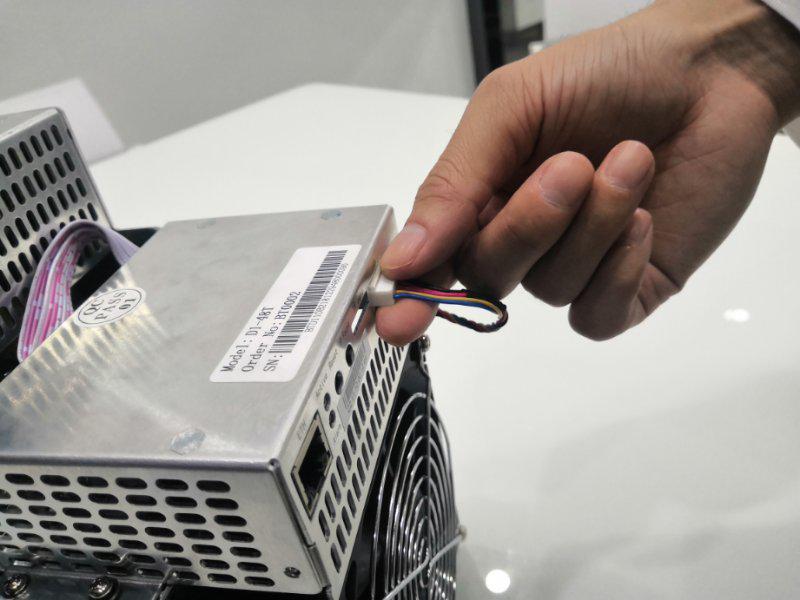
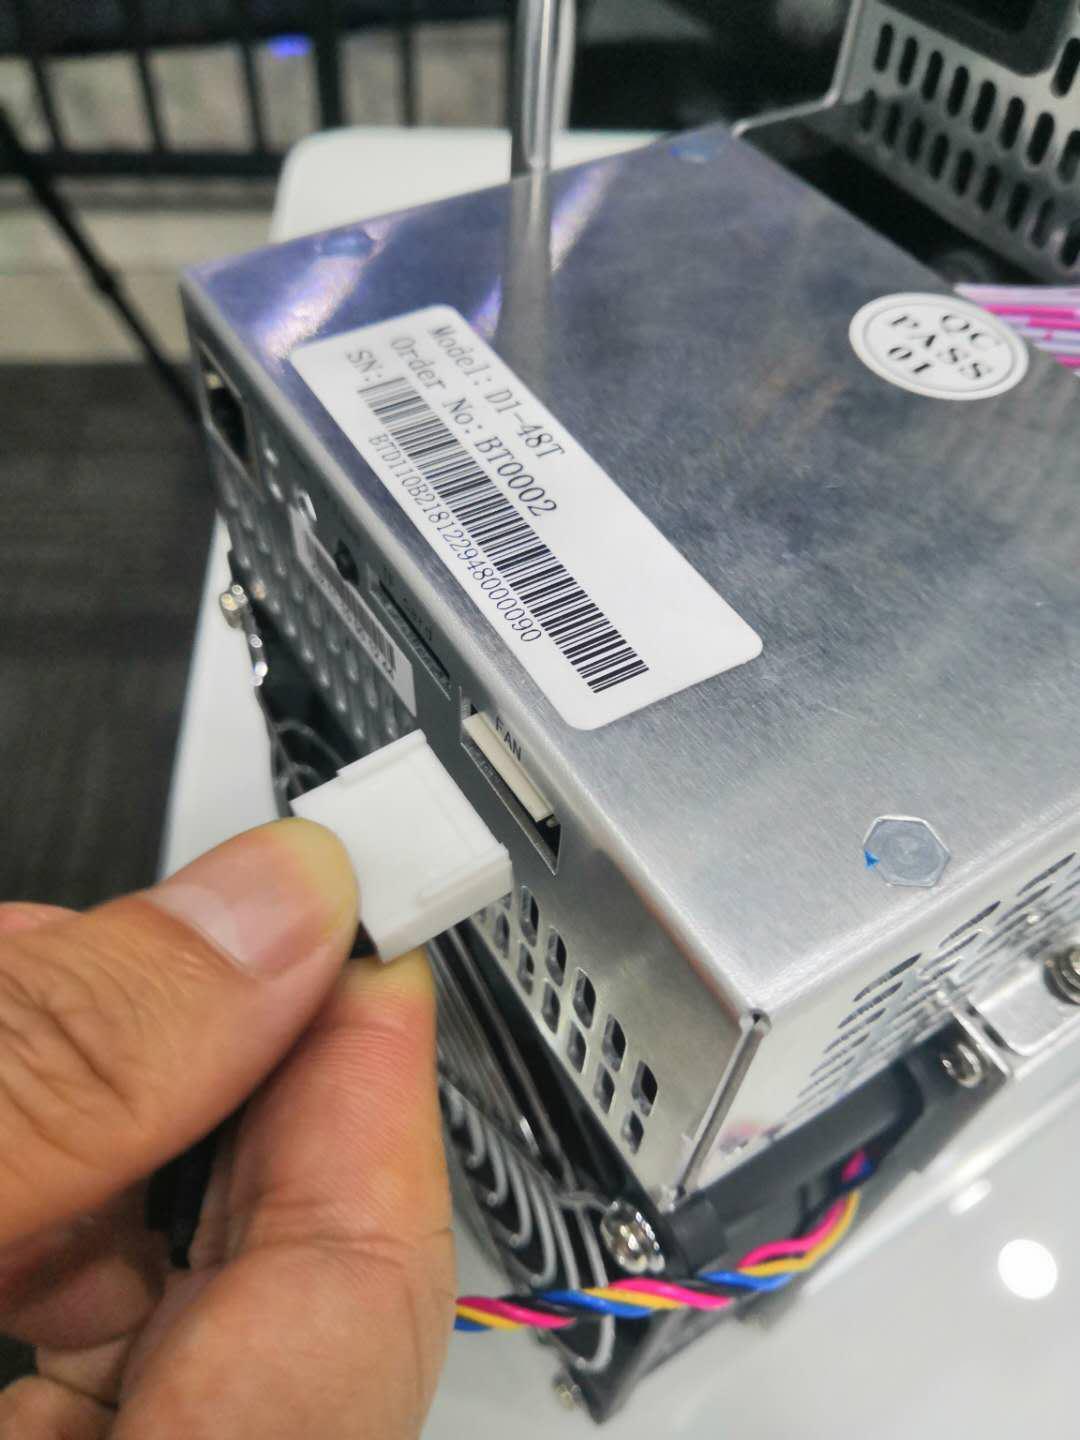
Step 1: Unplug the fan data cable of the air inlet, as shown in the figure below (note: press the thumb on the top of the plug and the index finger on the bottom side);
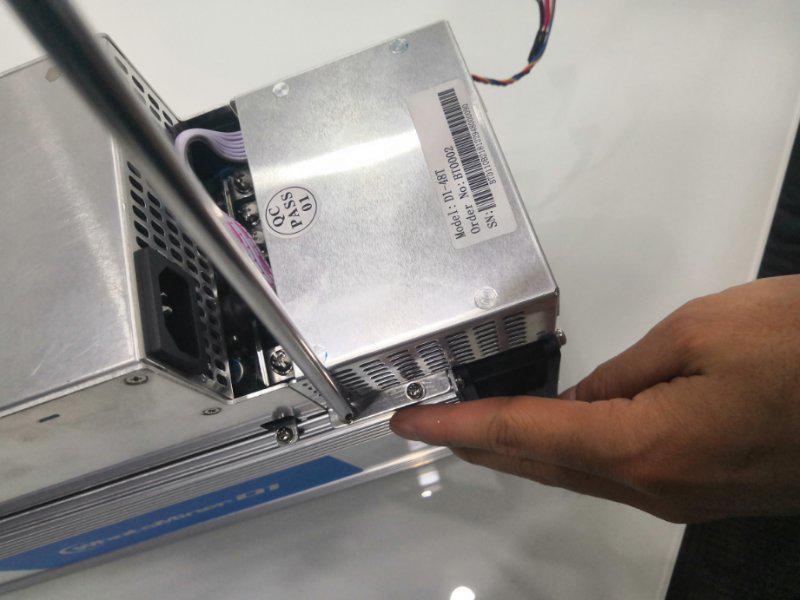
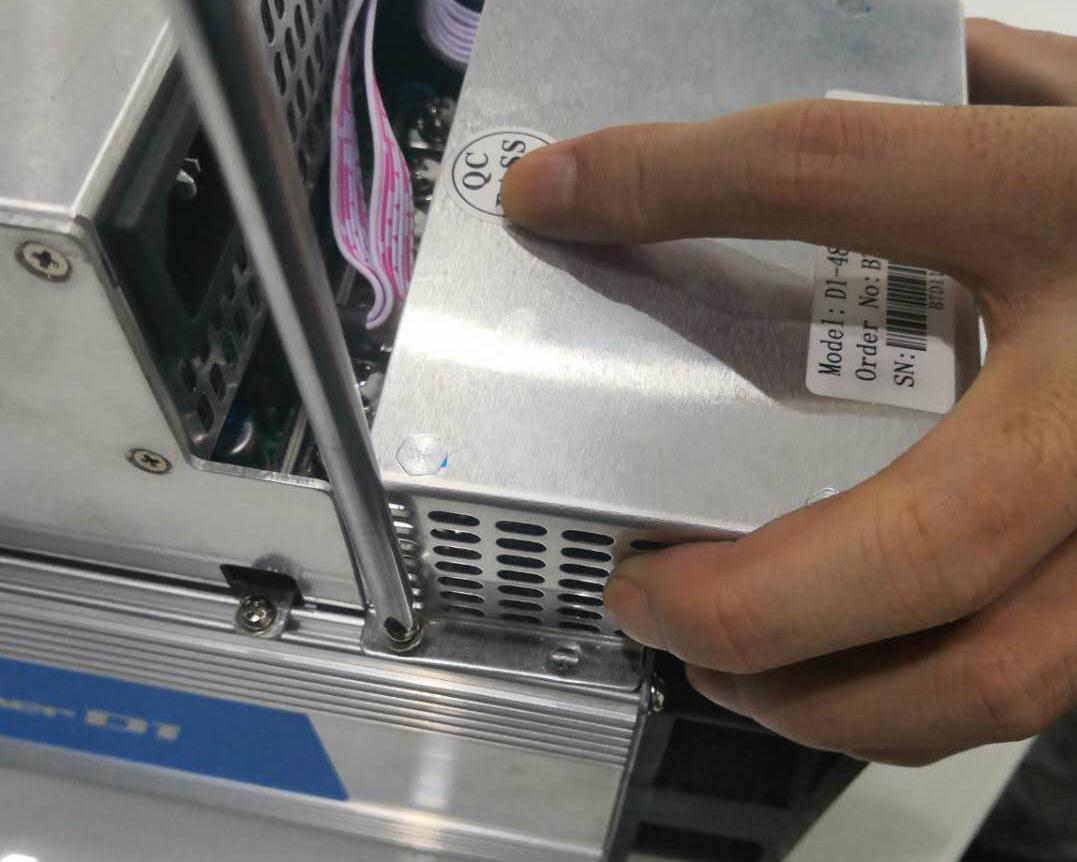
Step 2: Use a portable electric screwdriver to loosen the 4 screws around the control board cover, as shown in the figure below;
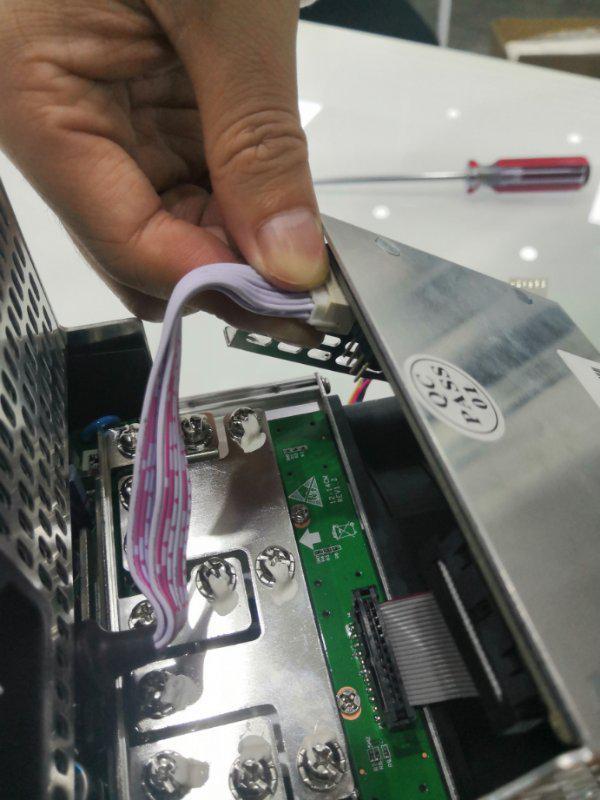
Step 3: Unplug the data cable of the power supply and control board (the figure is the pink and white data cable, some of which are white), as shown in the figure below (note: press the thumb on the upper end of the cable interface, and the index finger against the bottom of the cable );
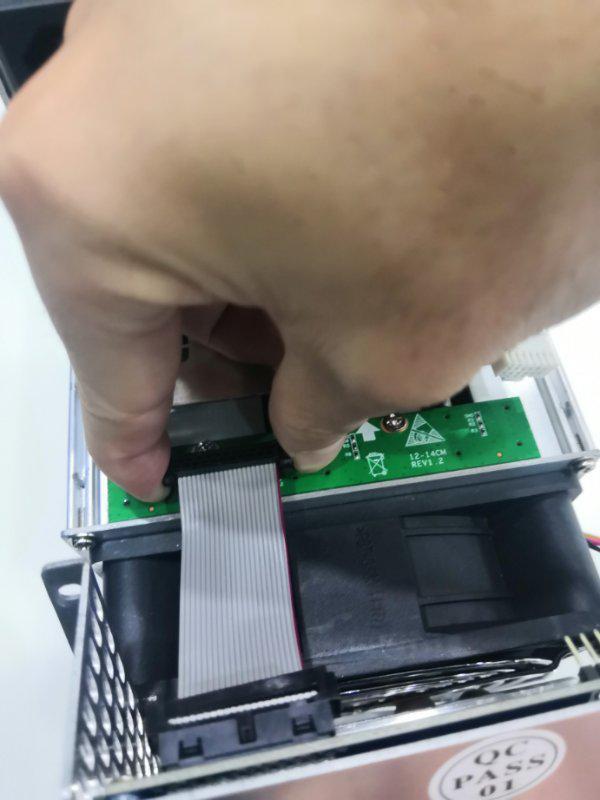
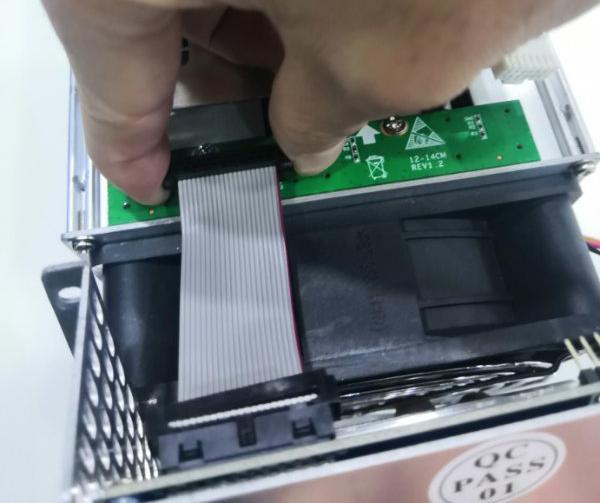
Step 4: Unplug the data cable at one end of the adapter board, press both sides of the data cable with your thumb and index finger, as shown in the figure below (Note: Do not use too much force when pulling out, the adapter board is an easily damaged component, please be careful ), put the removed control board (including data cable and control board cover) aside temporarily;
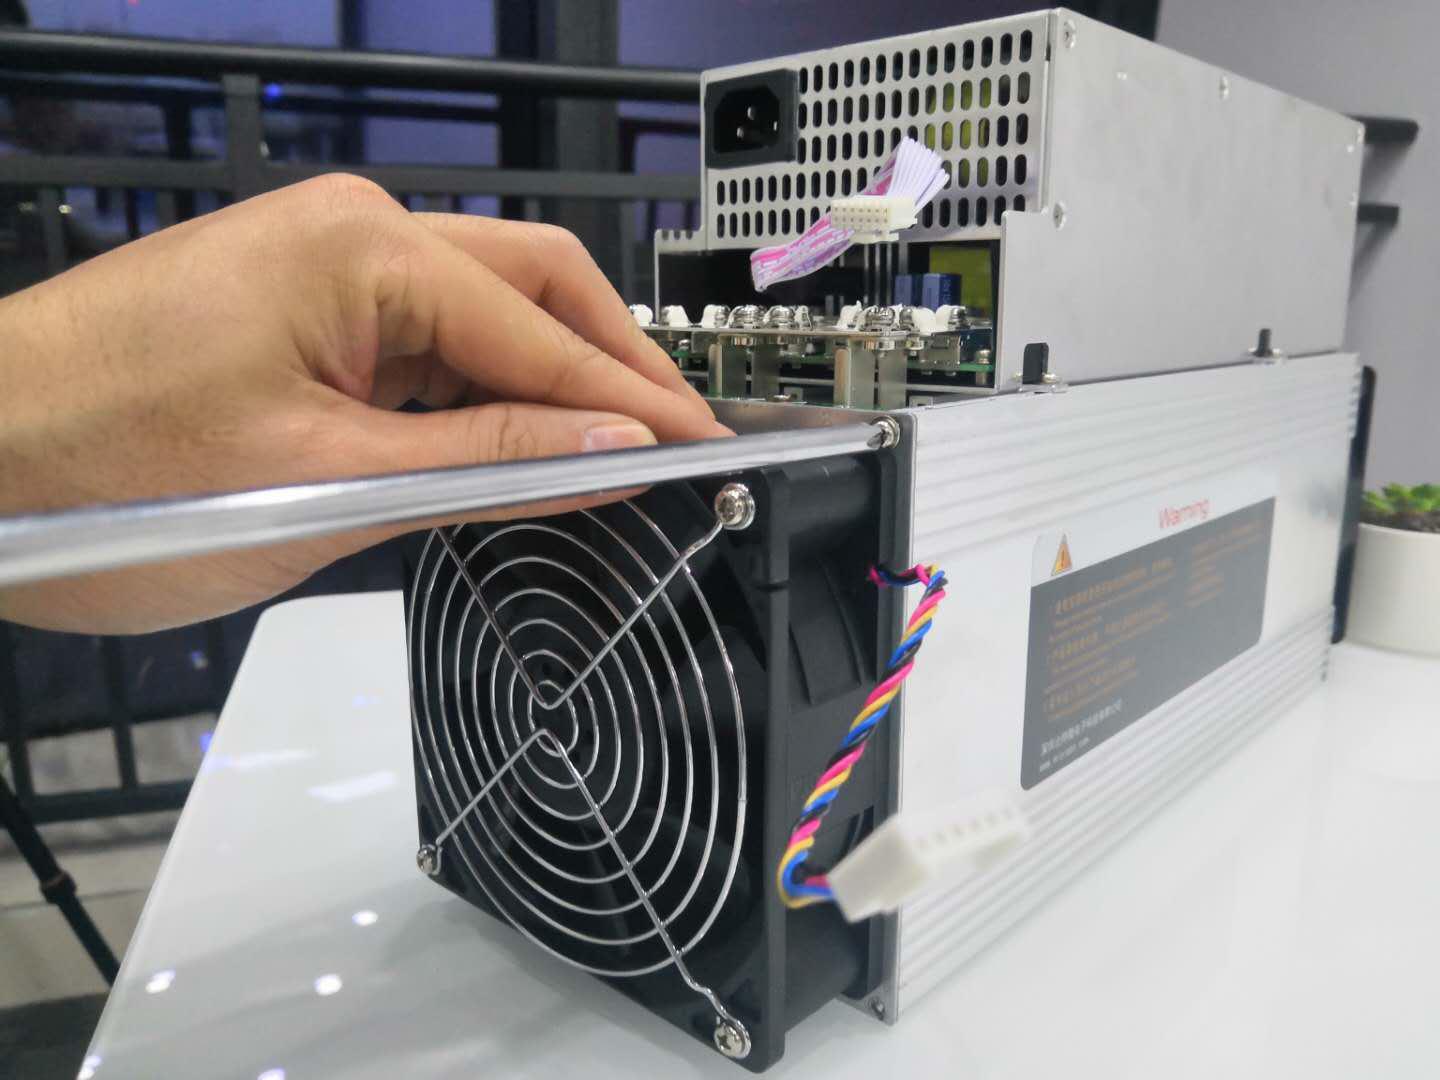
Step 5: Use a portable electric screwdriver to unscrew the 4 screws on the outer side of the air inlet fan and remove the fan. After removal, just like the control board, put it aside temporarily;
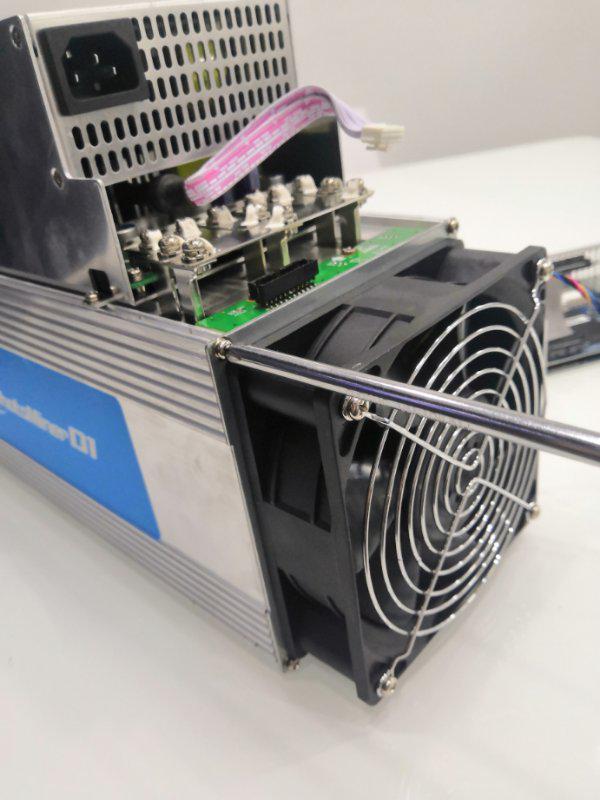
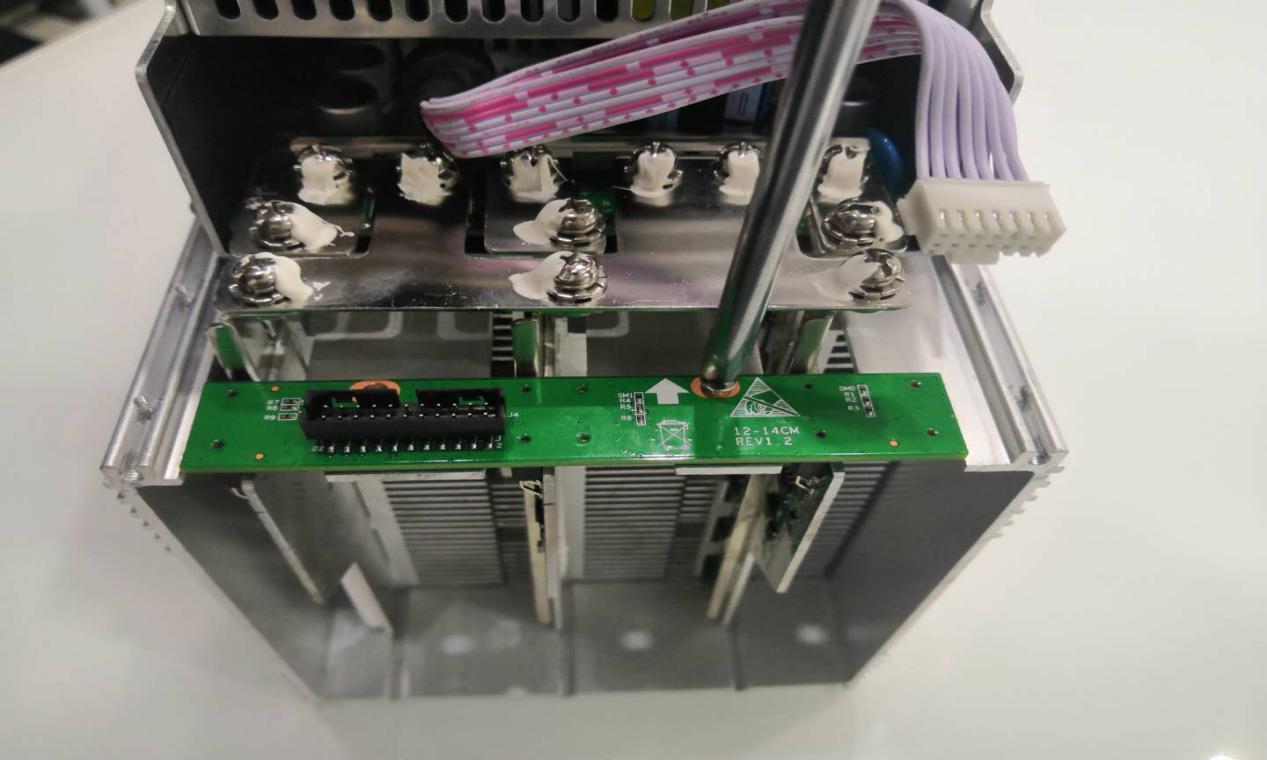
Step 6: Use a portable electric screwdriver to gently loosen the 2 screws on the adapter board (note: do not use excessive force when screwing, the adapter board is a fragile component, please be careful);
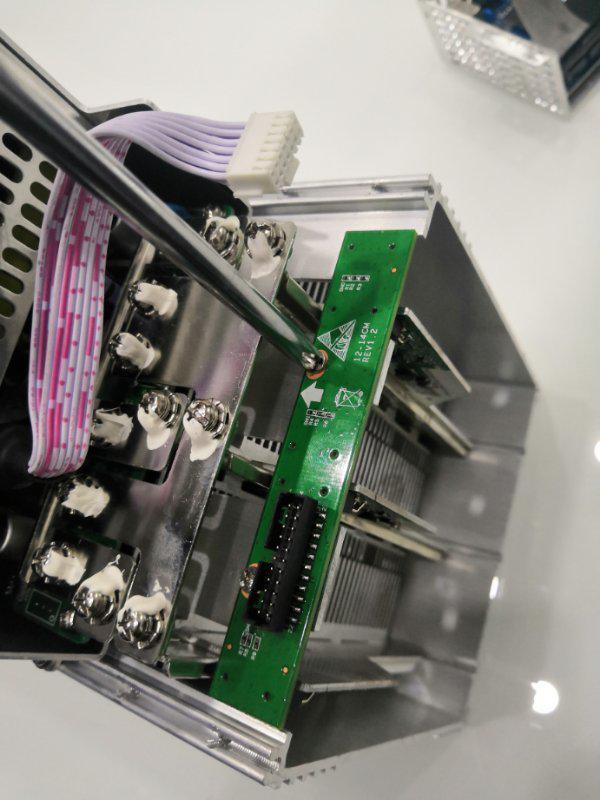
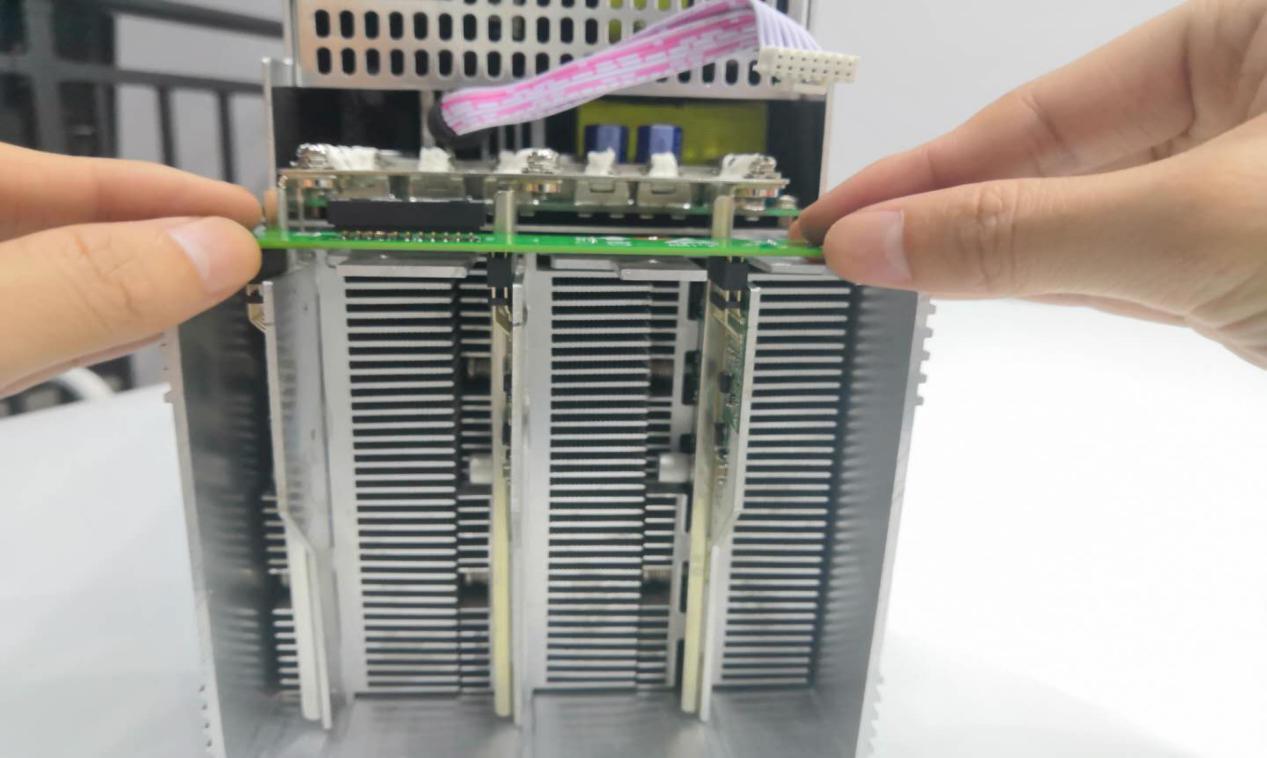
Step 7: Hold the thumbs of the left and right hands against the inner sides of the adapter board, and press the index fingers of the left and right hands on the upper two sides of the adapter board (to prevent the adapter board from popping up when the thumb is lifted, damaging the adapter board), and slowly move the thumb Lift, as shown in the figure below (Note: Don't use too much force when you lift your thumb, the adapter plate is easy to damage the components, please be careful);
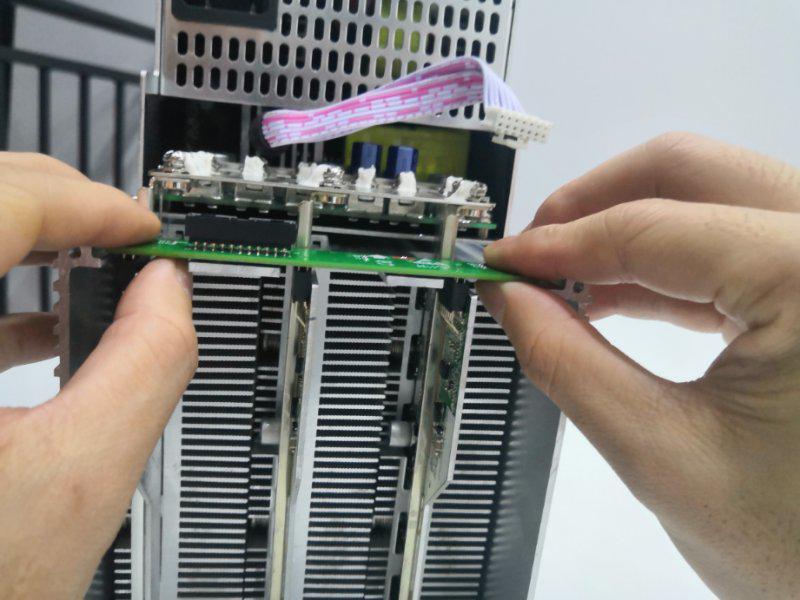
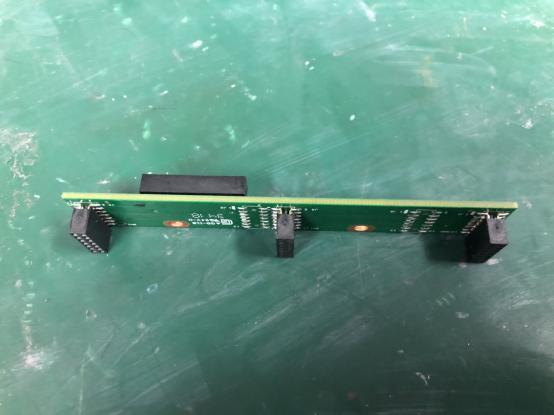
Follow the above steps, and you will completely disassemble the miner's adapter board!
Install the adapter board
Step 1: After the card slot and row pins are aligned correctly, install the adapter board, as shown in the figure (Note: Please be sure to align the pins of the hash board, and avoid excessive force that may damage the adapter board);
Step 2: Use a portable electric screwdriver to tighten the two screws on the adapter board, as shown in the following figure (Note: The adapter board is a fragile component, and you must not use excessive force to damage the adapter board);
Step 3: Connect the air inlet fan and tighten the four screws, as shown in the figure below (note: the data cable of the fan is on the right side to avoid installing the fan in the wrong direction);
Step 4: Connect the data cable of the transfer board. As shown in the figure below (Note: Do not use excessive force to cause damage to the adapter board components);
Step 5: Plug in the power supply and the data cable of the control board, as shown in the figure below (Note: Please be sure to plug it in tightly to prevent the illusion of miner failure caused by the loose data cable);
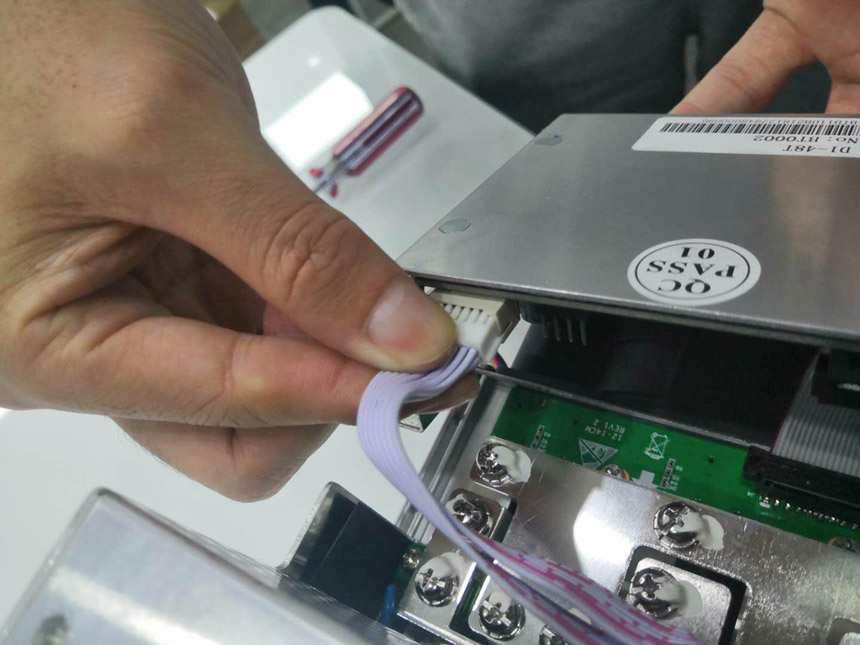
Step 6: Screw on the four screws around the control board cover, as shown in the figure below (note: the screws must not be crooked or tightened too tightly);
Step 7: Connect the air inlet fan data cable shown in the figure below (note: the two ends of the data cable interface are convex upwards).
Precautions
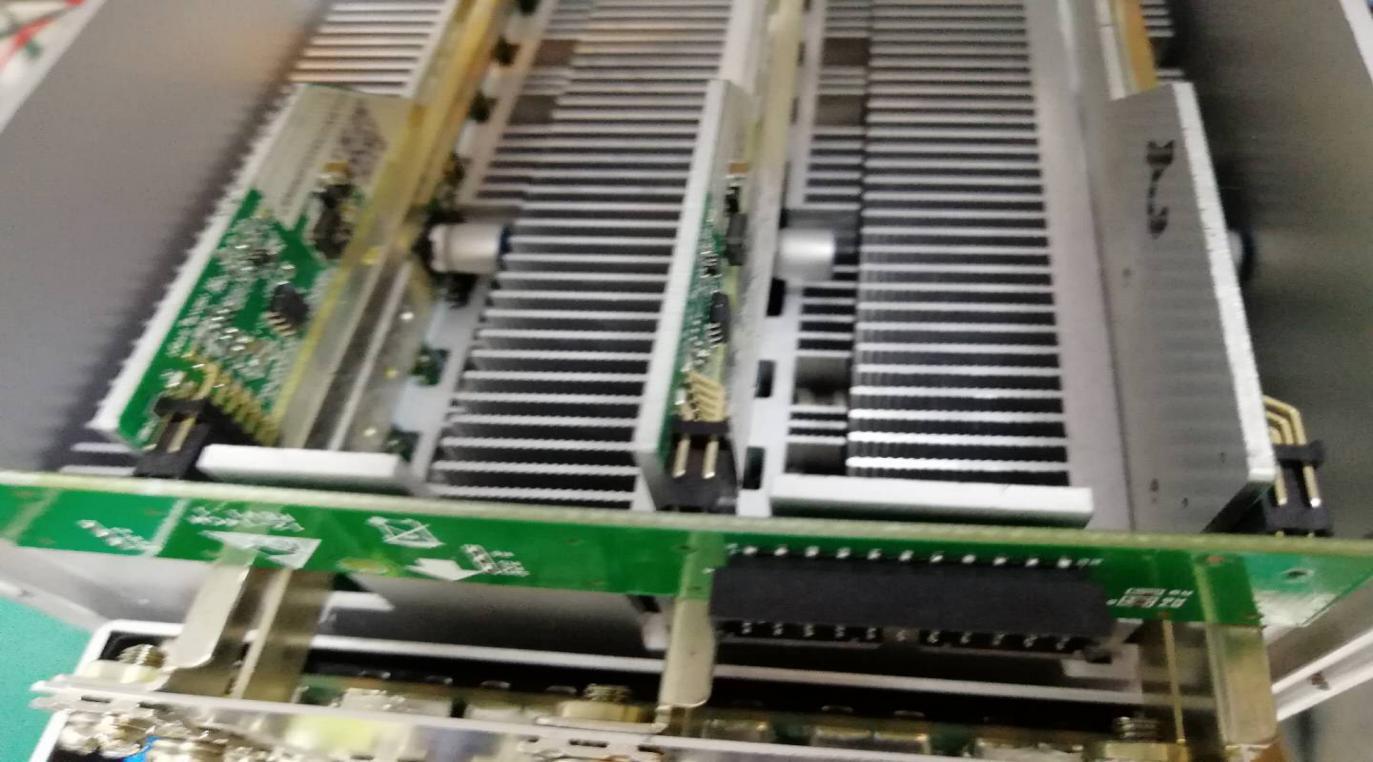
1. When plugging in or replacing the adapter board, be sure to align the interface of the hash board to avoid miner failure due to misalignment, as shown in the figure below;
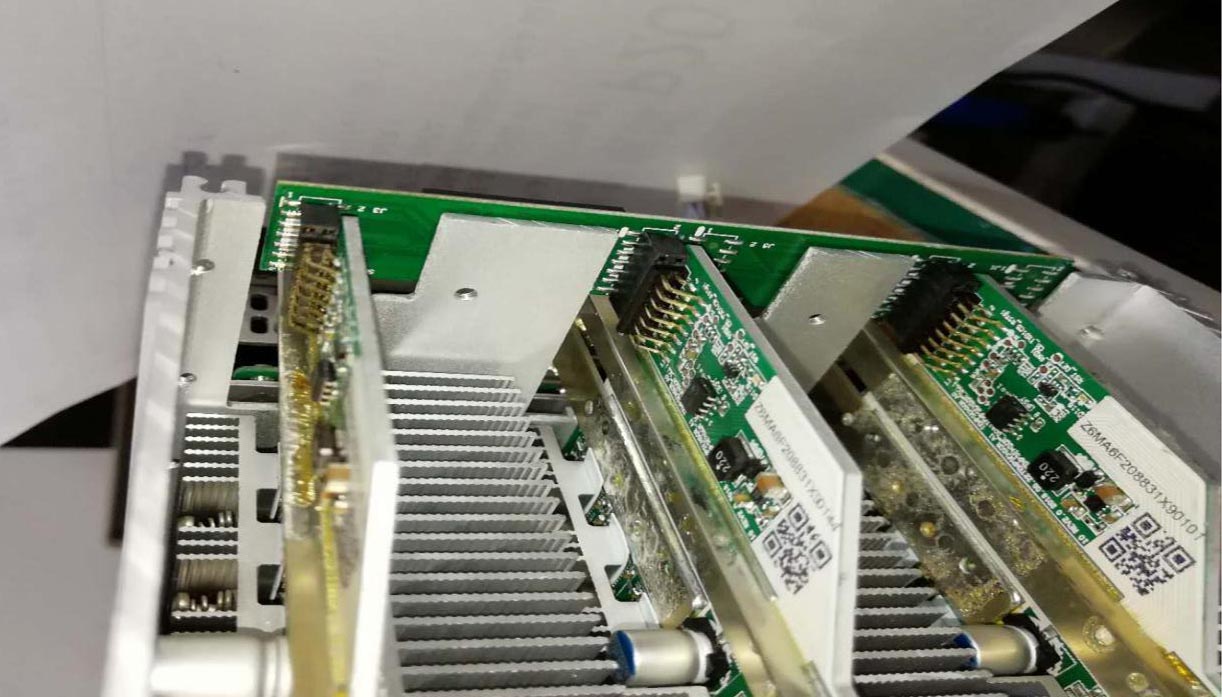
2. If you need to buy an adapter board, please place an order on the ZEUS MINING official website.
Dear Customers,
Hello, April 4, 5 and 6, 2025 (GMT+8) are the traditional Chinese festivals - Qingming Festival. Our company will suspend shipments during these 3 days and resume shipments on April 7 (GMT+8). We are deeply sorry for the inconvenience. Thank you for your understanding and support.
Best wishes,
ZEUS MINING CO., LTD