


1. Detect miners in the specific IP range
A: Click on“Miner Manager” to switch to the miner management interface
B: click to activate “IP Editor.”
C: click “+” to obtain the IP range
D, E, F: double click on each IP sector to modify
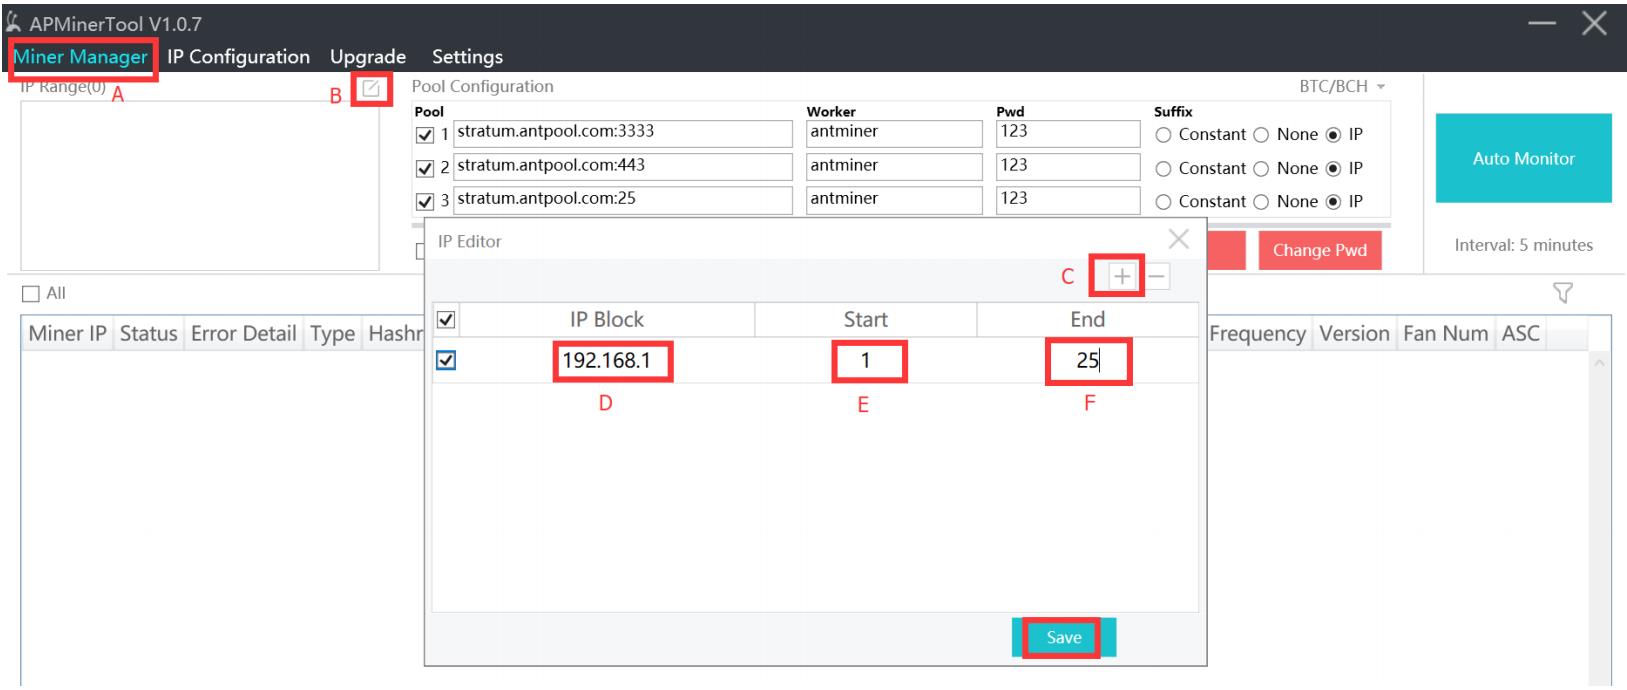 Click “Save.”
2. Click "Start Scan" to scan and detect the miners (all the miners scanned are already configured)
After the entire segment is scanned, a pop-up window will prompt (normal, low hash rate, disconnected, failed) the number of miners in each state.
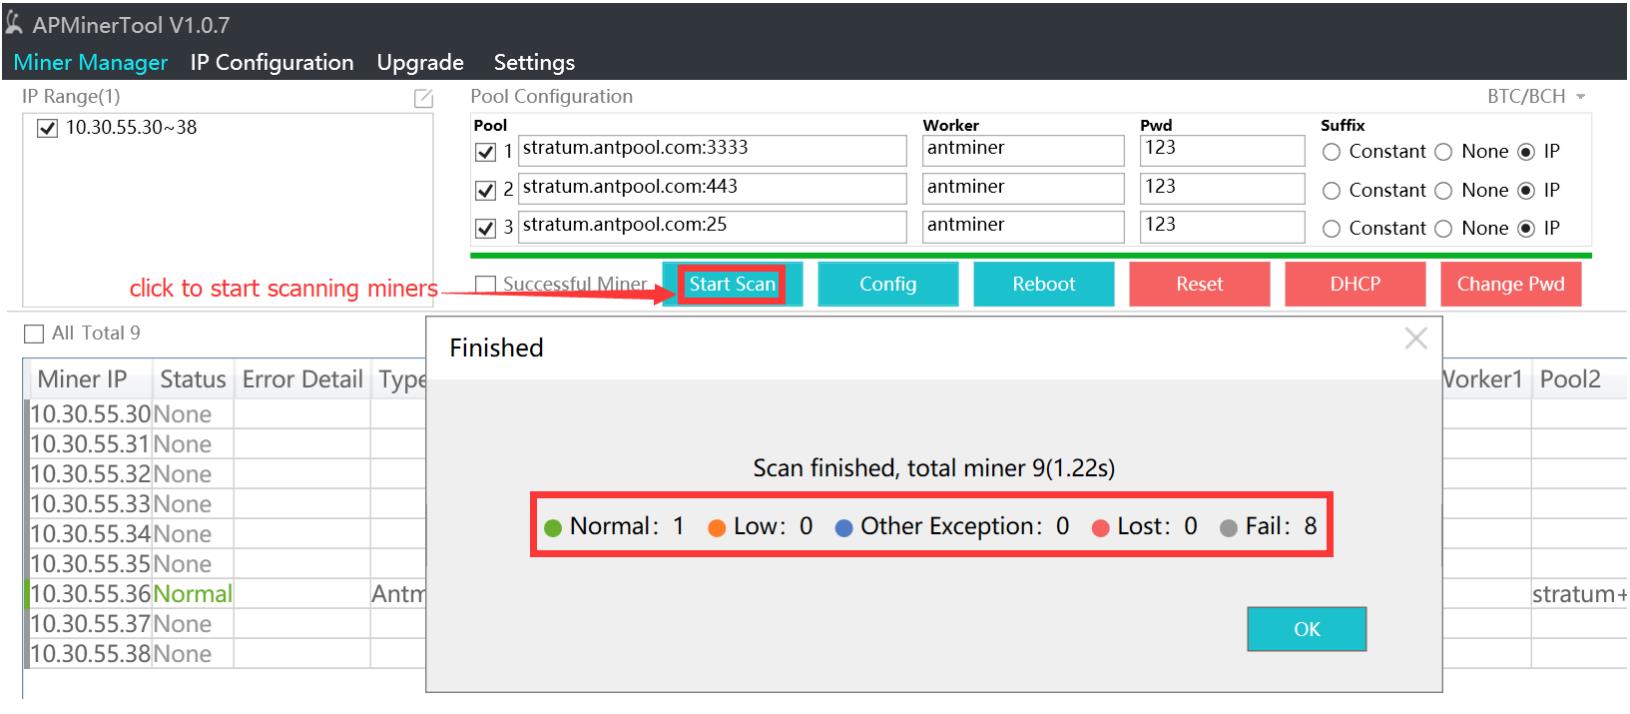
You can choose only to display miners successfully scanned based on your own needs.

3. Configure miners
A: Switch the currency. After the switch, the software automatically fills in the mining service address, and you can also modify it yourself. (The currency switch should be switched when monitoring is not turned on or stopped).
B: Press "ctrl" or select "Select All," select the miner of the corresponding currency you want to configure, you can change the service address, miner name, password, etc. for configuration;
C: Click Configure Miner, the selected currency will be configured; after the configuration is completed, a window will pop up displaying the number of miners in the state "config success" or "config failed."
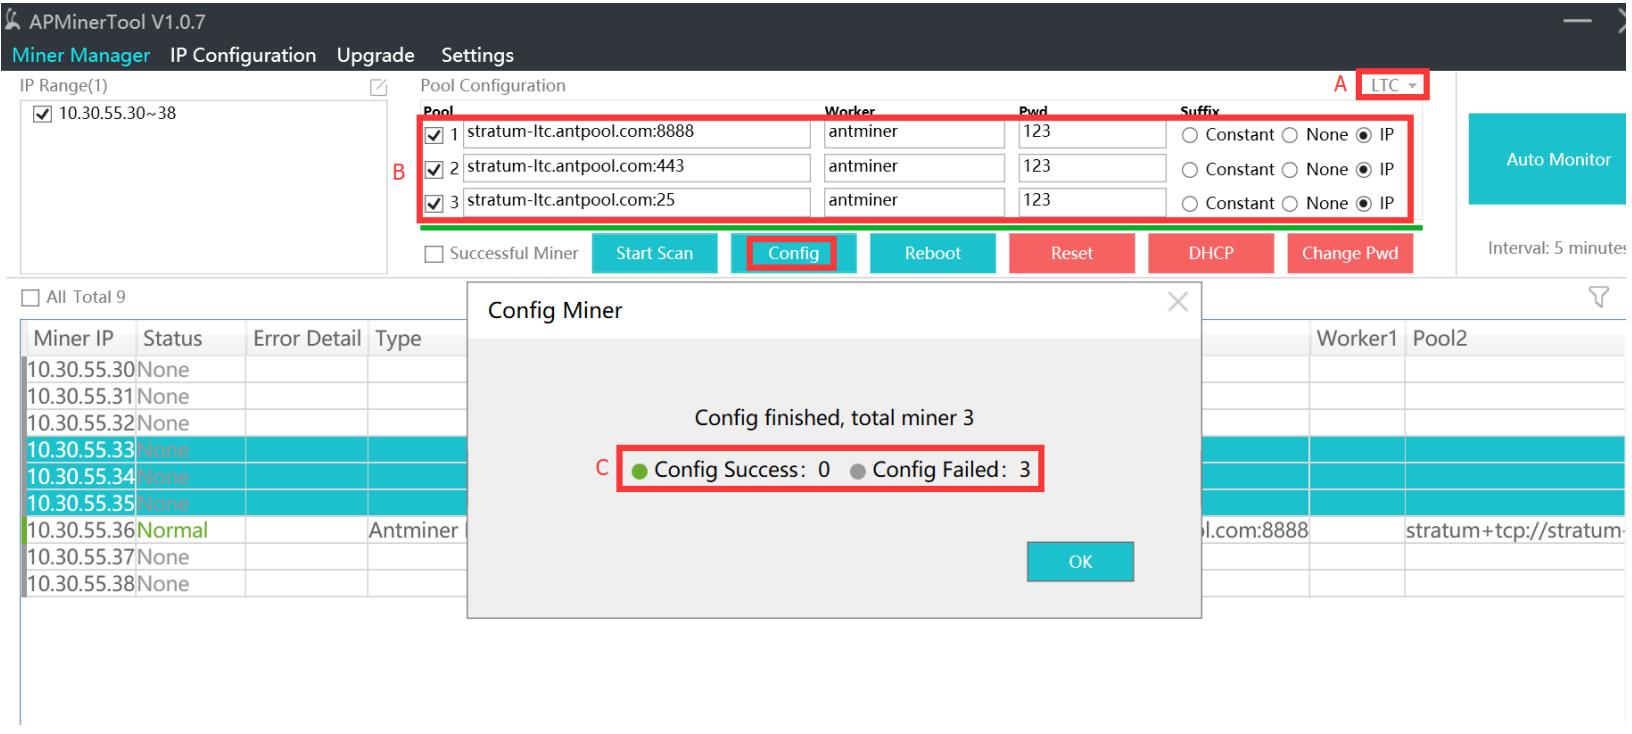 The miner name suffix can be modified in the "Miner name suffix" option. Currently, the default is that the miner name suffix is the same as the IP segment. After the modification is confirmed, click "Configure" it will be automatically configured, and after the configuration is completed, a pop-up box will prompt the number of successful and failed configurations; then click "Auto Monitor".
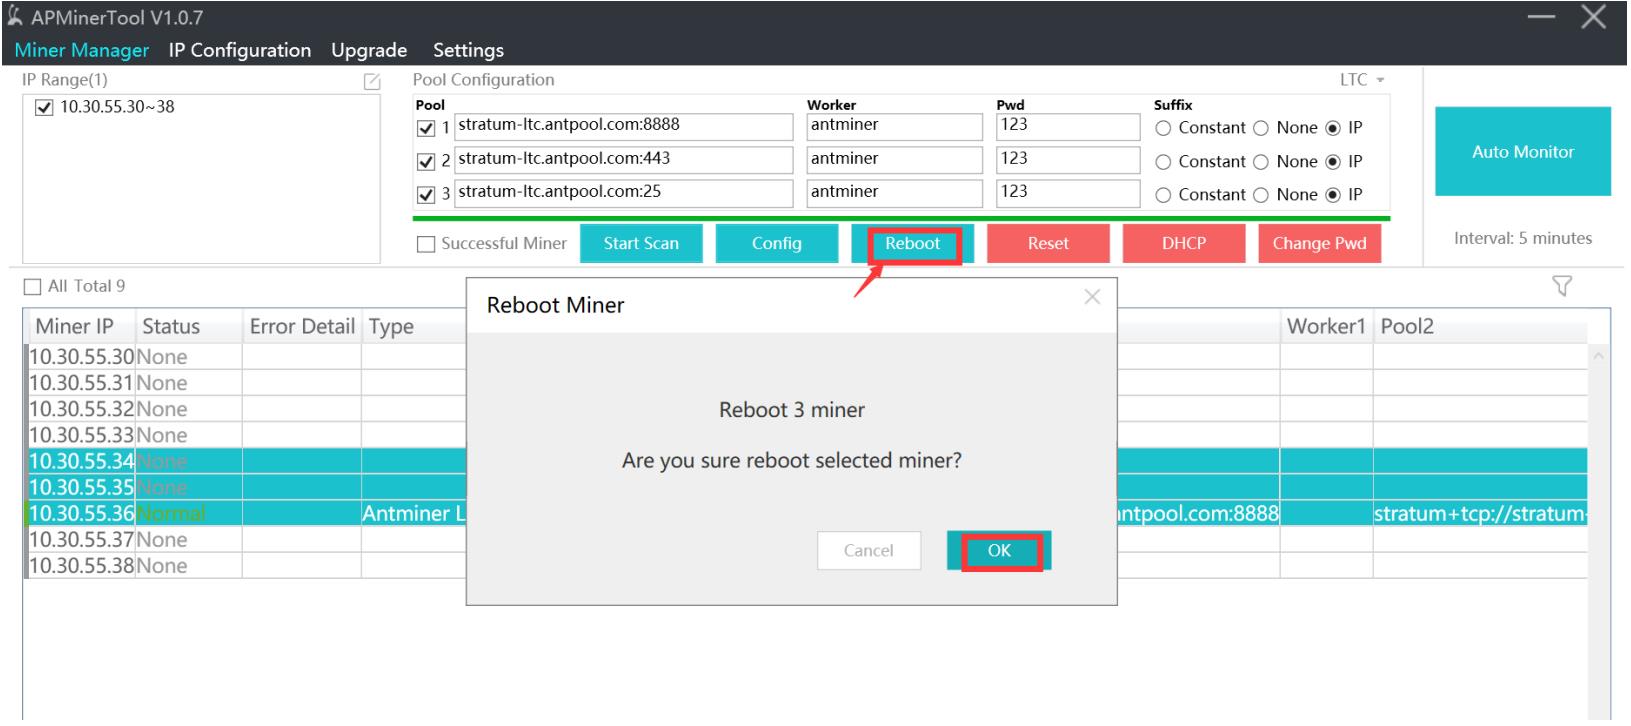
4. Batch rebooting miners
If you want to restart a miner, you can select the miner and click "Reboot" to restart the miner. If multiple miners are selected, hold down the “ctrl” key, click the mouse to select the miner to restart, click restart and a pop-up box will appear, click OK;
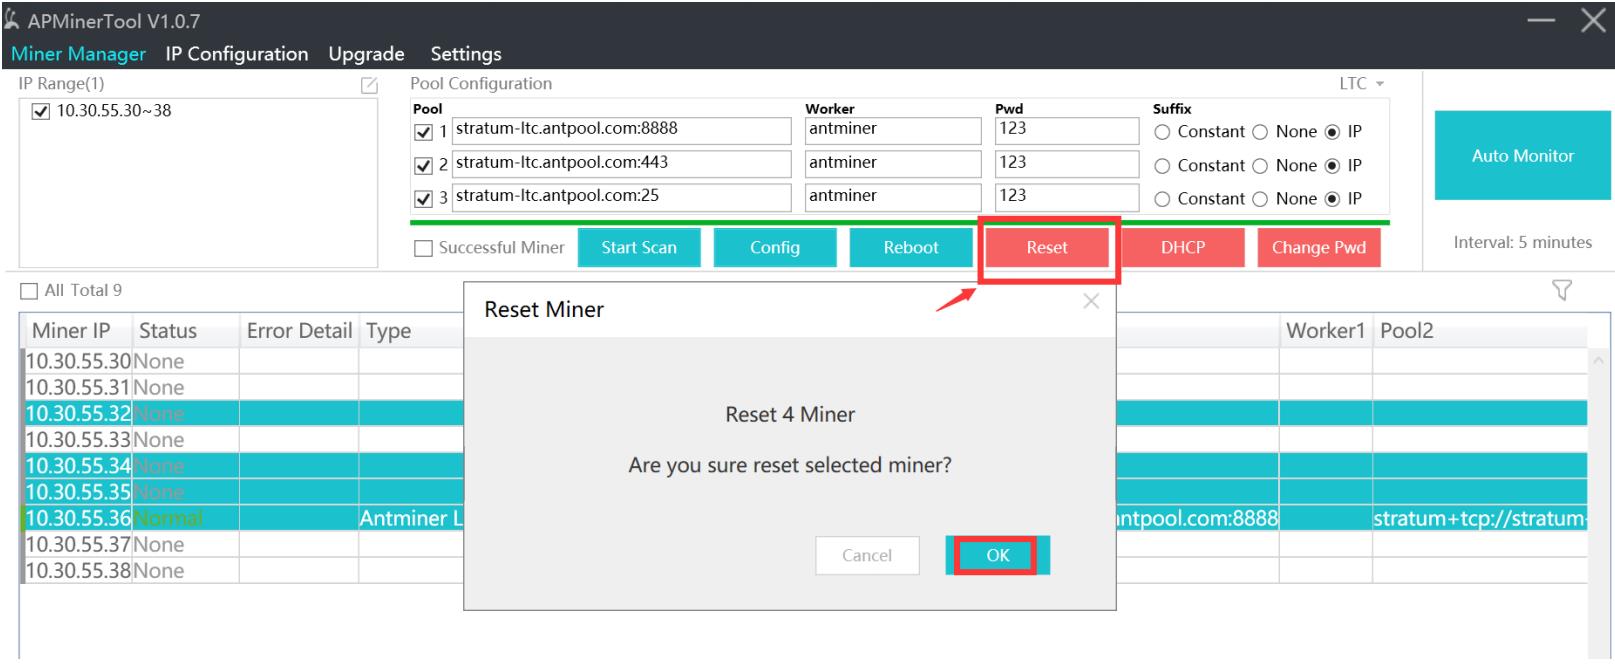
5. Batch resetting miners
If a miner needs to be reset to factory settings, you can select the miner, and then click "Reset" to restart the miner, a pop-up box will appear, click OK; if you select multiple miners, press "ctrl" " key and hold, click the mouse to select.
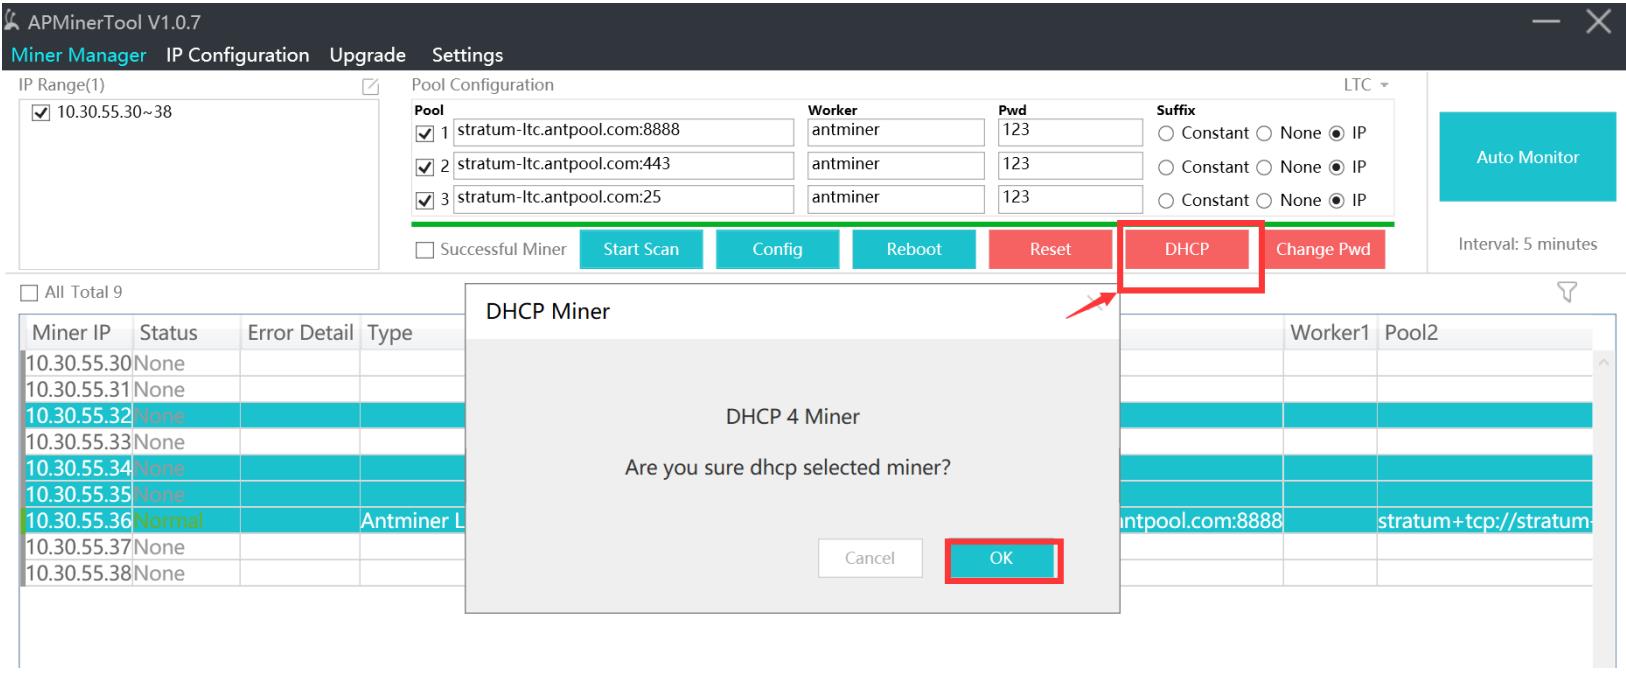
6. Batch restoring DHCP mode
If the miner has already set a static IP and needs to be restored to the DHCP mode obtained automatically, you can select the miner to be restored, click "DHCP," and click OK.
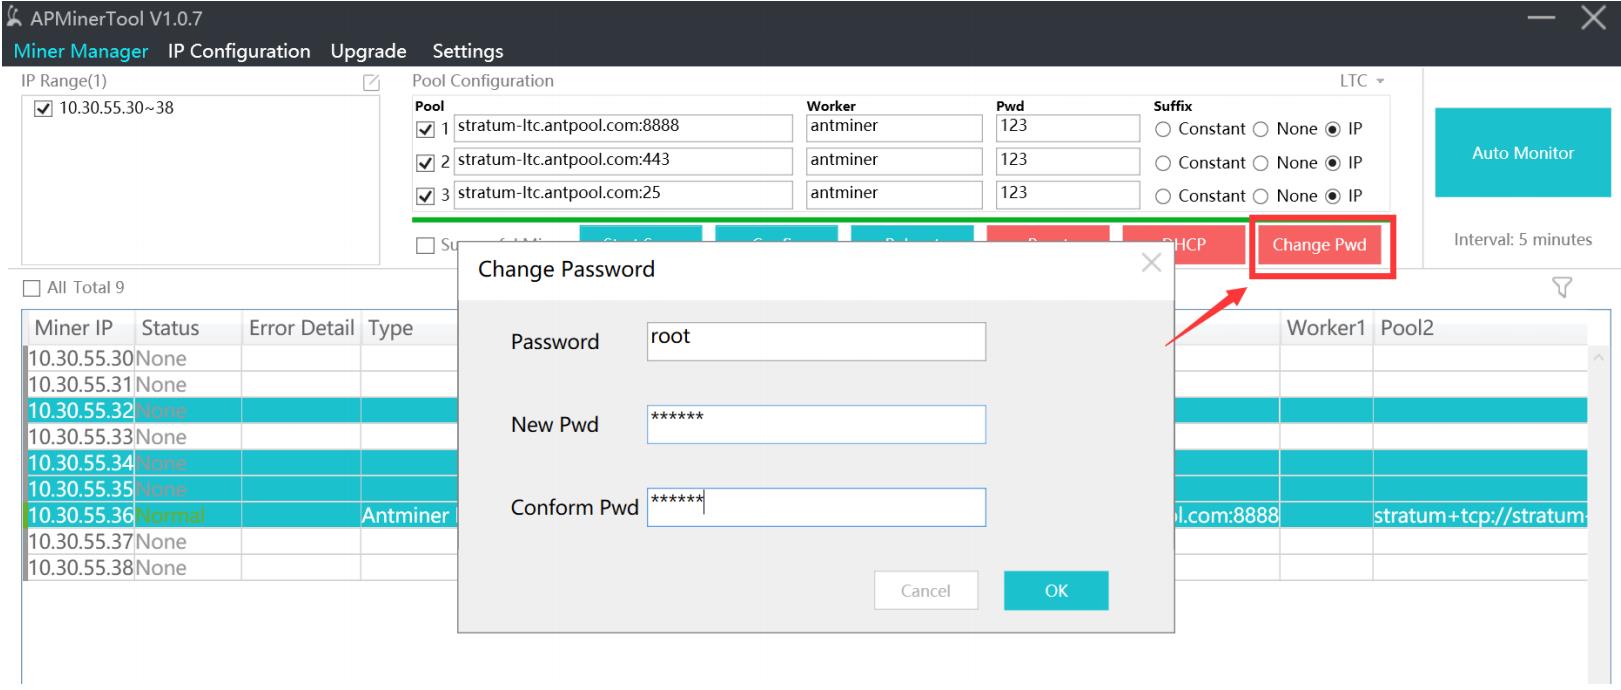
7. Batch changing password
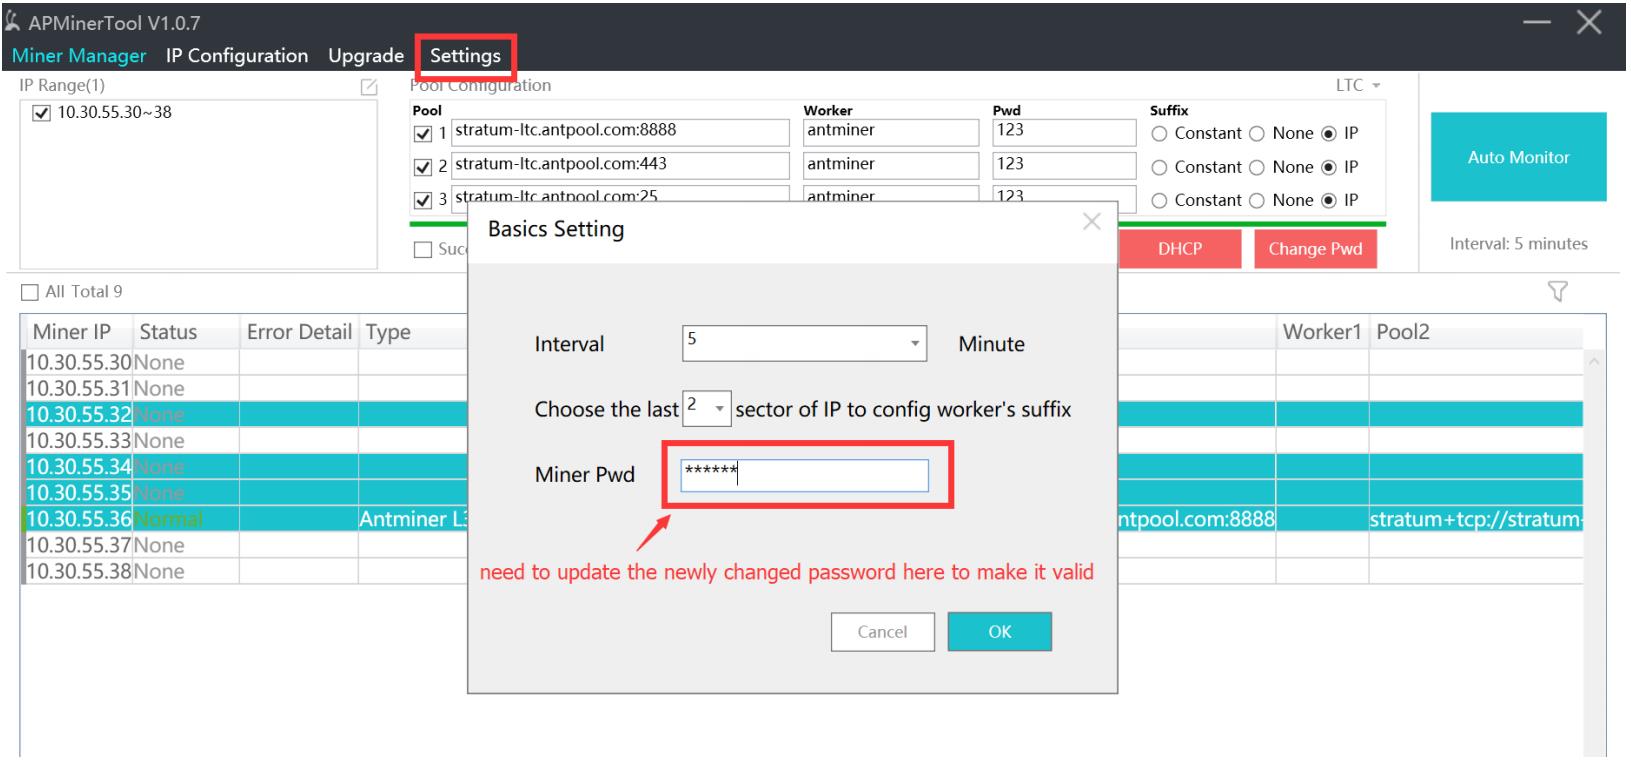
If you want to set a new password for miners, select the miners and click on “Change Pwd.” After the change is done, you also need to update the new password under “Settings-Basic Settings-Miner Pwd” to make it effective.
For example default password (root), new Pwd (123456), confirm Pwd (123456)
(Note: Please do not forget the password once changed. If you forgot the password, miners would need to be restored to factory settings before you can log into miner backstage again.)
8. After the miner needs to be set, click on “Auto Monitor” to start monitoring the miners; the default is to refresh every 5 minutes; the font color display is normal (green), low (orange), other exception (blue), lost (red).
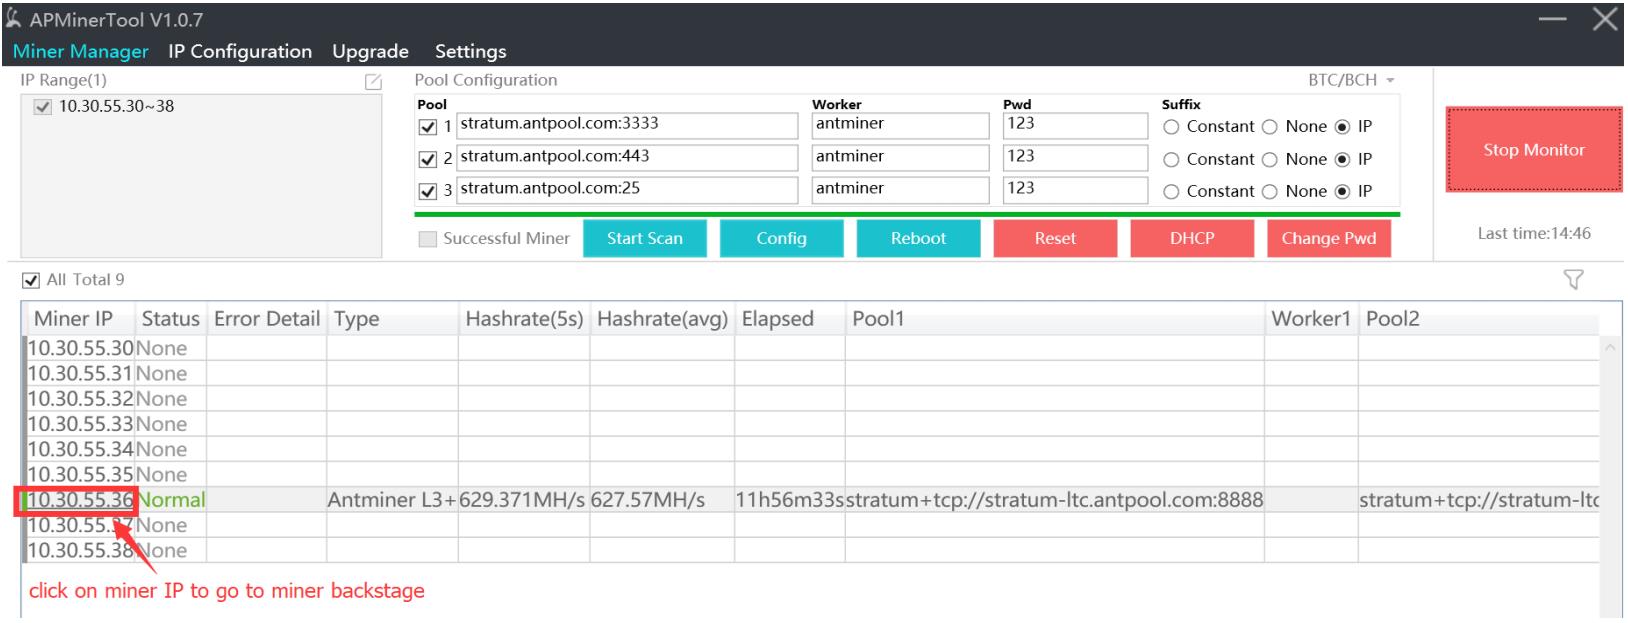
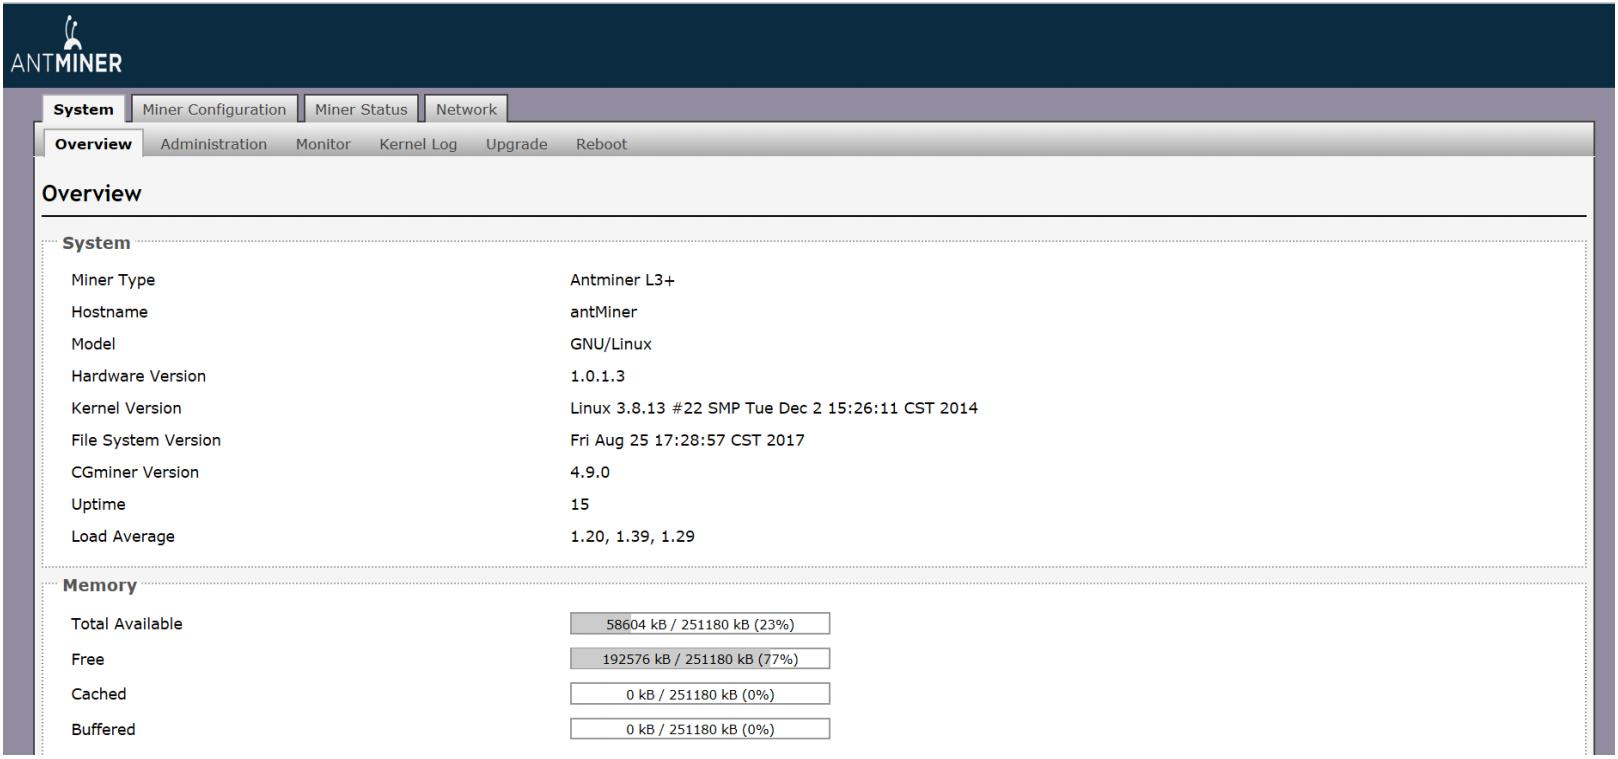
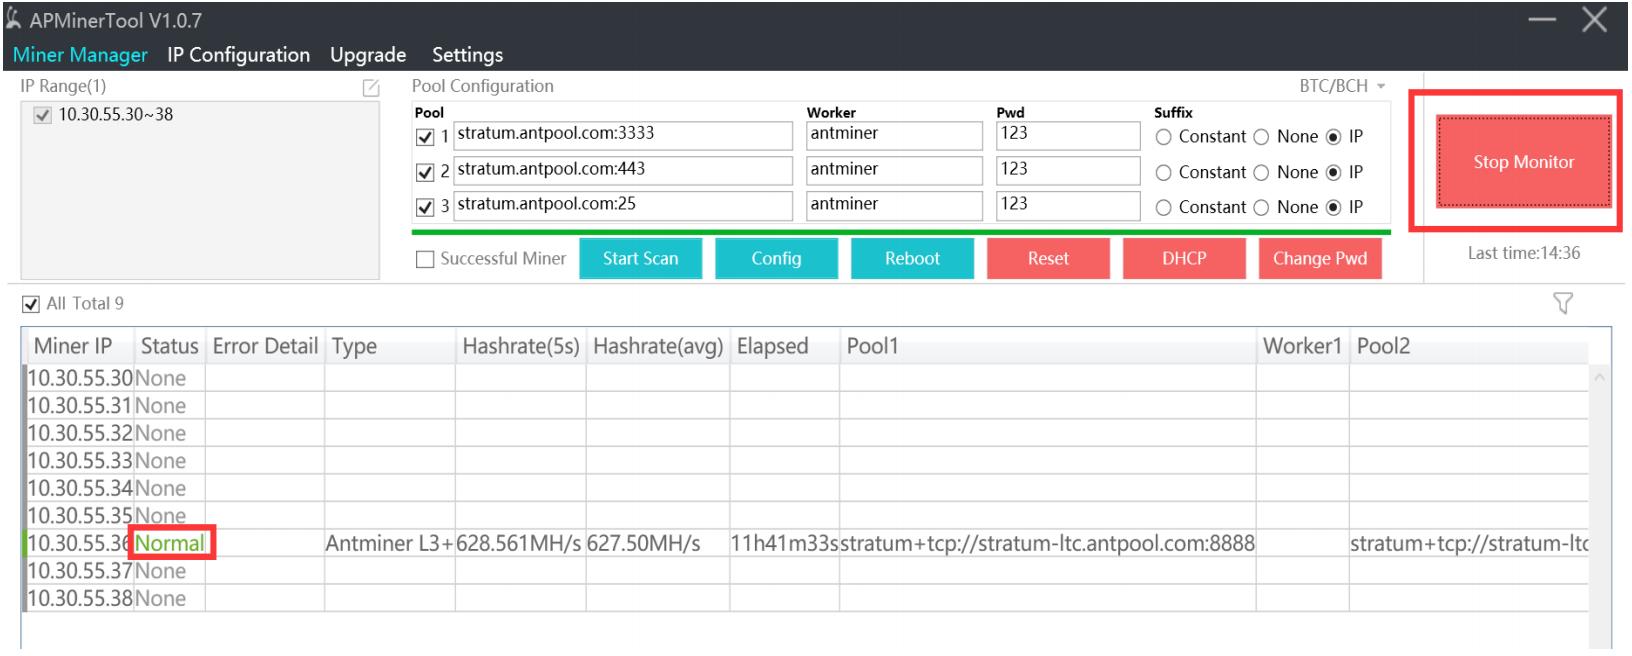 9. Click on miner IP, you will be directed to the miner backstage page.
Dear Customers,
Hello, April 4, 5 and 6, 2025 (GMT+8) are the traditional Chinese festivals - Qingming Festival. Our company will suspend shipments during these 3 days and resume shipments on April 7 (GMT+8). We are deeply sorry for the inconvenience. Thank you for your understanding and support.
Best wishes,
ZEUS MINING CO., LTD