

Squeeze steps:
1. Check again that the exhaust valve plug and the ball valve are closed;
2. Close the No. 7 ball valve (isolate the water tank and the rehydration pump to prevent air pressure leakage);
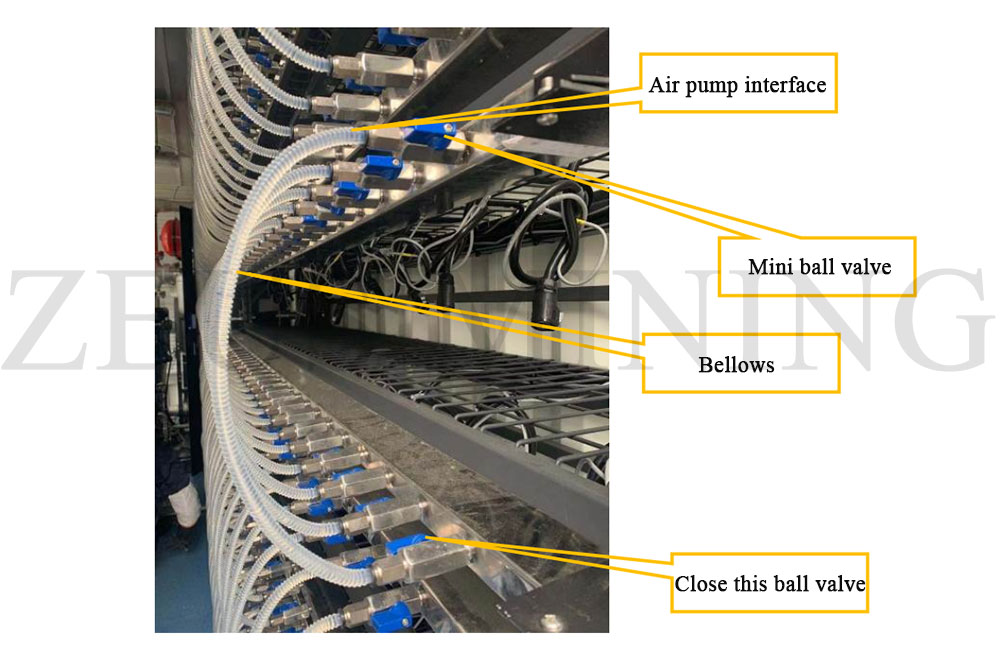
3. Open all mini ball valves on the water distributor;
4. Use the trachea to connect to any quick-plug interface and close the corresponding ball valve;

Figure 1 system—line connection ball valve
5. Use an air compressor to press down to 7bar, stabilize for more than 12h, and check for leaks;
6. The critical inspection parts are as follows:
a) The connection between the push-in connector and the mini ball valve;
b) Quick plug ball valve and bellows connection;
c) The connection between the mini ball valve and the water distributor;
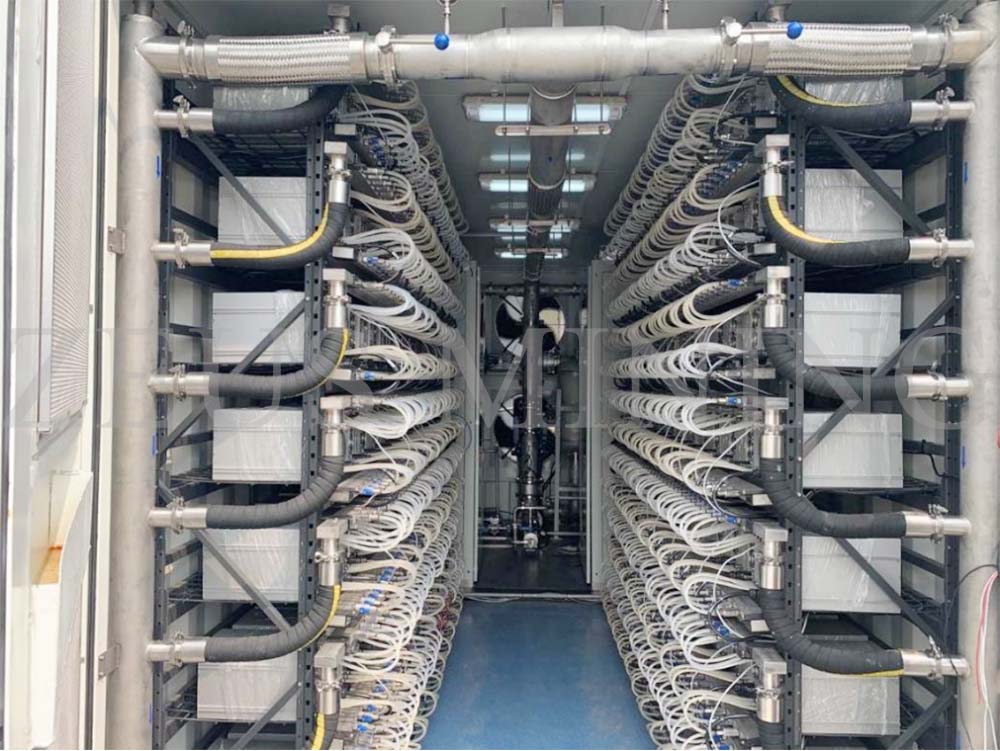
d) The connection between the quick plug and the computing device.

Figure 2 system - chuck connection

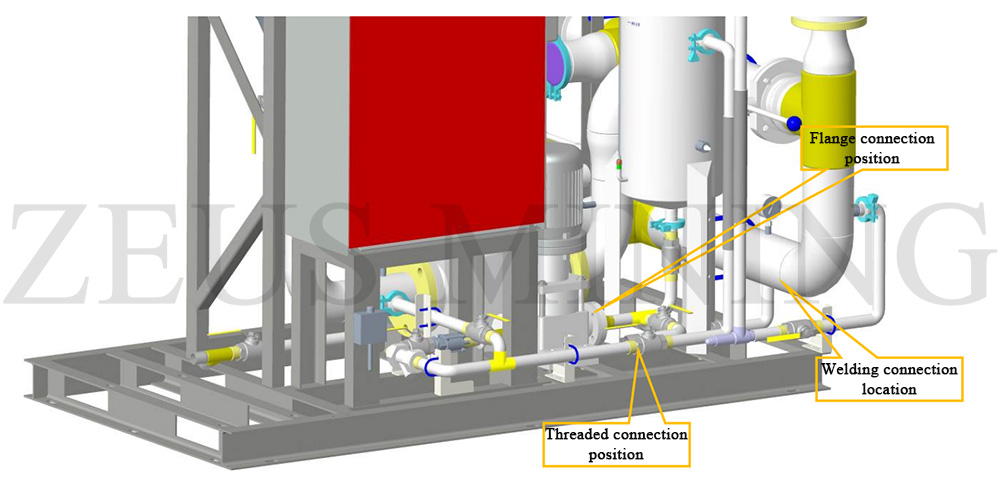
Figure 3 system - flanged/threaded/welded connections location
7. The inspection method is as follows:
a) See, hear, and touch to check for leaks;
b) Choose one soap, washing powder, and detergent, add water to make a soap solution, and apply it to the suspected leakage point, especially the interface; the part with bubbling bubbles is the leakage point.
*Note: This is the water-cooled container parameter of the AVIC 1.3 version. If your product is from other manufacturers or versions, it may differ slightly from this parameter. This parameter is for reference only.
Dear Customers,
Hello, April 4, 5 and 6, 2025 (GMT+8) are the traditional Chinese festivals - Qingming Festival. Our company will suspend shipments during these 3 days and resume shipments on April 7 (GMT+8). We are deeply sorry for the inconvenience. Thank you for your understanding and support.
Best wishes,
ZEUS MINING CO., LTD