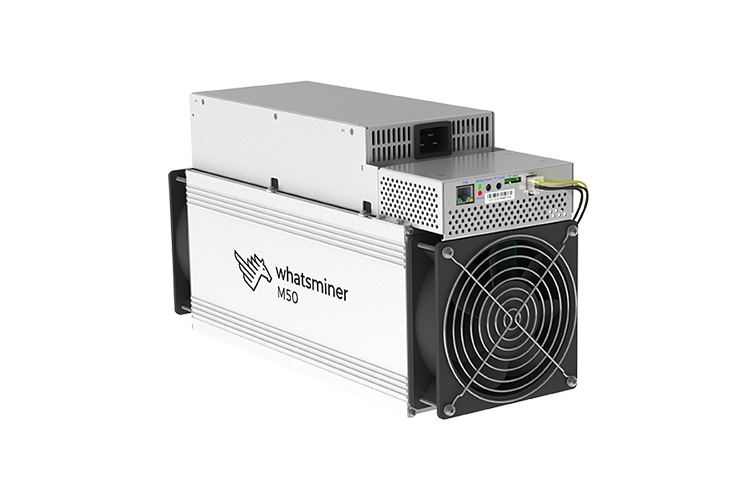


The Microbt Whatsminer M50 series was launched in 2022. With its efficient performance and excellent power consumption, it has achieved significant market performance in the Bitcoin mining field. This article will analyze the precautions, configuration and disassembly of the use of the miner.

Model | Hashrate(TH) | Power efficiency(J/TH) | Power on wall(W) |
Whatsminer M50 | 112 | 28 | 3136 |
Whatsminer M50S | 128 | 26 | 3328 |
Whatsminer M50S+ | 138 | 24 | 3312 |
Whatsminer M50S++ | 140~144 | 22 | 3080 |
1. Cable connection check: Check whether the miner power cord, adapter board control cable and fan data cable are connected correctly. When inserting the cable, make sure the pins are correctly inserted into the corresponding sockets, and do not connect the sockets violently. If the cable interface is connected incorrectly, it will affect the stable operation of the miner, and the power supply may burn out components such as cables and control boards!
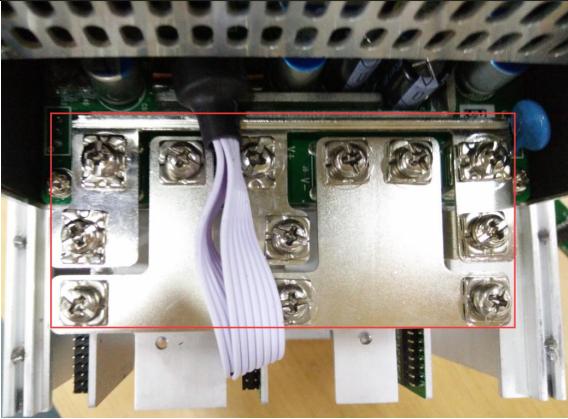
2. Copper bar inspection: When connecting the hash board, be sure to connect the positive and negative poles of the copper bar correctly, and the screw washers that fix the copper bar must be aligned parallel to the edge of the copper bar. Otherwise, it may cause a short circuit and damage the miner. At the same time, make sure the screws are fixed to avoid poor contact.

3. Inspection before powering on the miner: Before powering on the miner, be sure to check whether any parts have fallen off or become loose, such as radiators, cable connections, etc. Make sure there are no loose parts and the cables are connected correctly and securely before powering on.
1. Obtain IP address
① Whatsminer M50 series miners use DHCP to obtain dynamic IP by default, so a DHCP server is required or DHCP can be enabled through the router to dynamically allocate IP addresses.
② After the Whatsminer M50 series miner is powered on for 50 seconds, the yellow light at the network port is always on, and the green light flashes to indicate the normal state. Press and hold the IPFOUND function button on the control panel for more than 5 seconds. The two LEDs on the right side will flash several times, indicating that the machine has broadcast its IP and MAC address to the network.
③ In the same network segment, use a computer to view the obtained dynamic IP, MAC address, miner location, and other information reported by the miner through the WhatsMinerTools software. You can also use WhatsMinerTool software to perform batch data configuration, status checks, and firmware upgrades on the miner.
2. Pool configuration
① Log in to the Whatsminer dashboard and select "Configuration" → "Miner Configuration" page. On this page, you can configure 3 mining pool addresses and names. After updating the configuration, click the "Save&Apply" button to save the configuration.
② After modifying the mining pool configuration, restart the miner program in "Miner Status" and check whether the modified configuration takes effect.
③ After the configuration is modified and saved, if the miner is not restarted, the control board can be restarted to make the configuration take effect. Select the "System" → "Reboot" page and click "Perform reboot" to restart.
3. Other configurations (optional)
① NTP Synchronization Server Address modified
Log in to the Whatminer backend interface, select "System" → "System Configuration", enter the miner configuration page to add or modify the NTP server address.
② Static IP address configuration
Enter the dynamic IP address obtained by DHCP in the browser, and use the default account name and password to log in to the miner interface. After logging in, select "Configuration" → "Interfaces" page, and select "Edit" to enter the editing page. On the configuration editing page, select the "static address" protocol to switch, and then modify the corresponding information to the planned address. After completing the modification, click Save and use the newly set static IP to log in to the Whatminer, otherwise, the page will appear to be loading.
4.Status check
After the miner is connected to the network, you need to check whether the miner's operating status is normal.
In the miner interface, select the "Status" → "Miner Status" page to view the overall operating status of the miner.
Tips:
① When the miner is connected to the network correctly, the miner will automatically conduct a frequency search test for about 15 minutes after powering on, and then the formal mining phase will begin.
②Maintaining good ventilation and heat dissipation is the key to the continuous operation of the miner. The best ambient temperature is below 30 degrees Celsius. If the temperature of the air outlet of the miner is too high and the fan speed is higher than 6100 rpm, the miner will run at a reduced frequency and the power will be lower than normal operation.
1. Control board
① First unplug all the cables connected to the control board, then remove the four fixing screws connected to the chassis and remove the panel bracket.
② Remove the 4 screws fixed on the control panel bracket, and finally remove the control board.
③ When installing, you also need to use 4 screws to fix the control board on the bracket first, then insert the power control cable and the adapter board control cable, fix the bracket to the chassis, and finally insert the fan cable.
2. Power supply
① When disassembling the power supply of the Whatsminer M50 series miner, you need to first remove the 4 screws fixed to the chassis. Then remove the screws fixed to the power copper bar and the fan cable.
② After completion, pull the power supply out a short distance. Note that the power control cable is still connected to the control board at this time. Therefore, you need to unplug the data cable connected to the control board and then remove the power supply.
③ When installing the power supply, you need to first plug in the data cable that communicates between the power supply and the control board. Then connect the 6 positive and negative terminals of the power supply to the copper bar and fix it with screws. Make sure that the screw washers are aligned parallel to the edge of the copper bar to avoid short circuit. Finally, install the 4 screws fixed on the chassis to complete the installation.
3. Hash board
① Before disassembling the hash board, need to remove the control board and front fan. Then remove the adapter board and the copper bar fixed to the control board, and then pull the hash board out and take it out.
② When installing the hash board, need to align the hash board with the corresponding card slot to secure it. After installing the three hash boards into the corresponding card slots, install the adapter board and align the sockets of the adapter board with the sockets of the hash boards to avoid poor contact. After the adapter board and hash board are installed correctly, connect the conductive copper bars. (When installing the copper bar, you need to ensure that the positive and negative poles are connected correctly, and the screw washers fixing the copper bar must be aligned with the edge of the copper bar and tightened.) Finally, connect the control board and fan to complete the installation of the hash board.
Note: Be careful during disassembly and assembly to ensure that all components are safe and intact.
The above is the relevant content about Microbt Whatsminer M50 series miners. I hope this guide can provide help and guidance for your mining behavior.