


With its excellent thermal conductivity, the water cooling system is significantly better than the traditional air cooling method, allowing Antminer D7 to dissipate heat faster and more effectively, then miners to have higher operating efficiency. Due to its high heat dissipation performance, water cooling has become one of the best cooling solutions for miners. Effective cooling methods are not only crucial for increasing mining efficiency, but also for protecting hash board from overheating damage. This article will explain the process of installing a water-cooling plate for Antminer D7.
Typically, the Antminer D7 water cooling kit contains:
Water cooling radiator, D7 water cooling plate, hash board thermal grease, fan speed simulator, water separator, water pipe, stainless steel worm gear hose clamp.
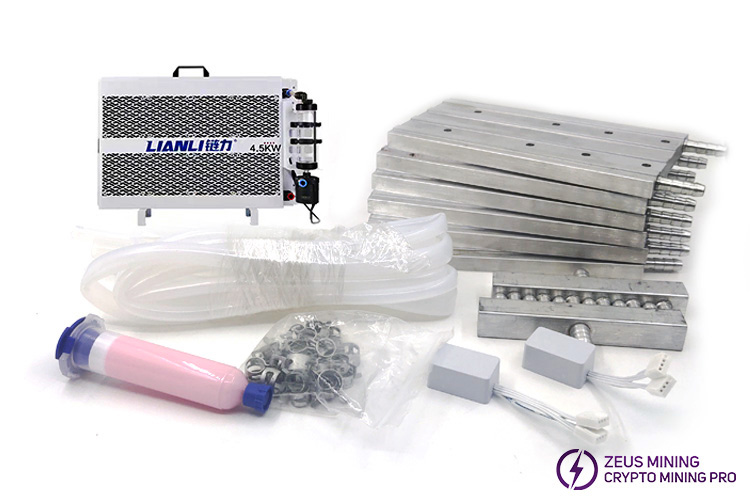
Steps to upgrade Antminer D7 to water cooling system:
1.Install the water cooling board
• Power off the miner, remove the top protective cover plate, unplug the fan plugs, and then remove the cooling fans at the air outlet.
• After removing the fixing screws of the conductive copper sheet, take out the three hash boards from the Antminer D7 miner case, and then remove the heat sink on its front.
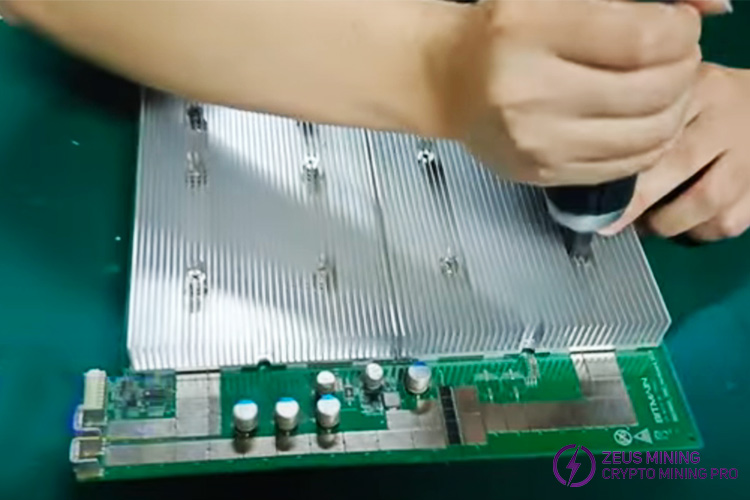
• Use circuit board cleaning fluid to clean the remaining silicone grease on the surface of the ASlC chip, and re-apply new 4W thermal conductive silicone grease on the chip surface. If conditions permit, we can use the D7 hash board thermal grease mold to apply It faster and more evenly.
• After applying silicone grease, we need to align the water cooling plate with the screw holes on the hash board and fix it with screws.
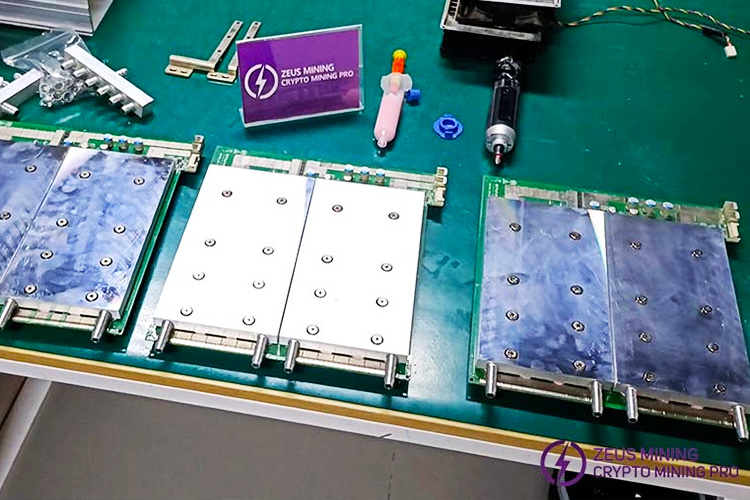
• Put the modified hash board back into the Antminer D7 chassis, install the conductive copper sheet and fix it with screws to prevent the hash board from loosening or falling off, then connect the corresponding cables.
2. Assemble the water-cooling radiator
• Remove the original fans and install 2 2-in-1 fan simulators for the D7 miner control board.
• Then we need to install the water pipes to the water outlet and water inlet of the water cooling plate respectively. The length of the water pipe can be cut according to the actual situation, the water pipe with the water-cooling plate can be firmly connected with a hose clamp.
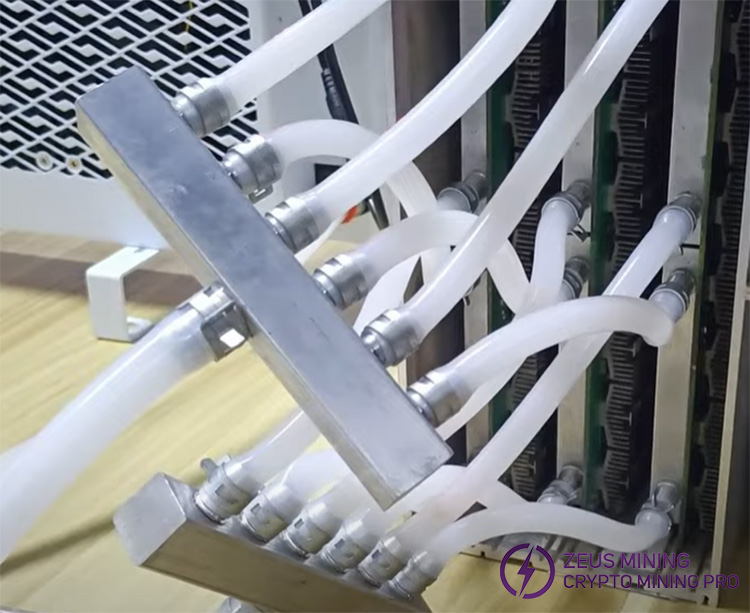
• Use two 1-to-6 water manifold to connect 12 pipes respectively and fix them with hose clamps.
• Install the base bracket and water pump bracket on the radiator, secure them and then install the water pump.
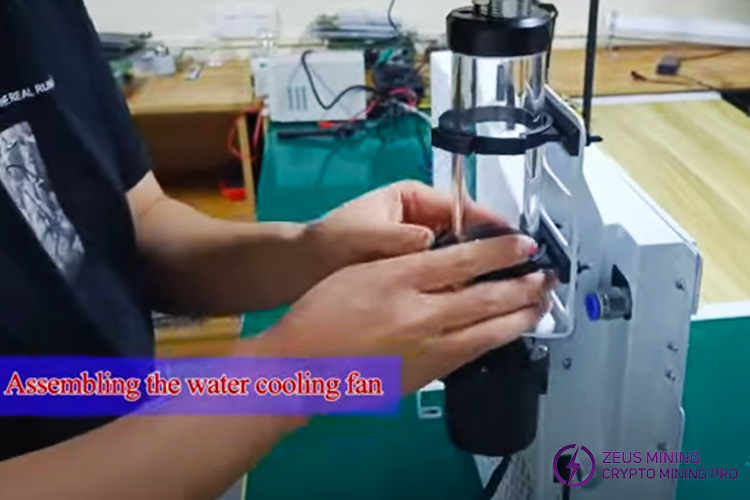
• Connect the water pipe to the water pump outlet and the upper splitter, which is the water inlet of the water cooling plate; the other water pipe is connected to radiator water inlet and the lower splitter, it is the water outlet of the water cooling plate.
• Add coolant to the water pump. When adding coolant for the first time, the water pump needs to be filled with water.
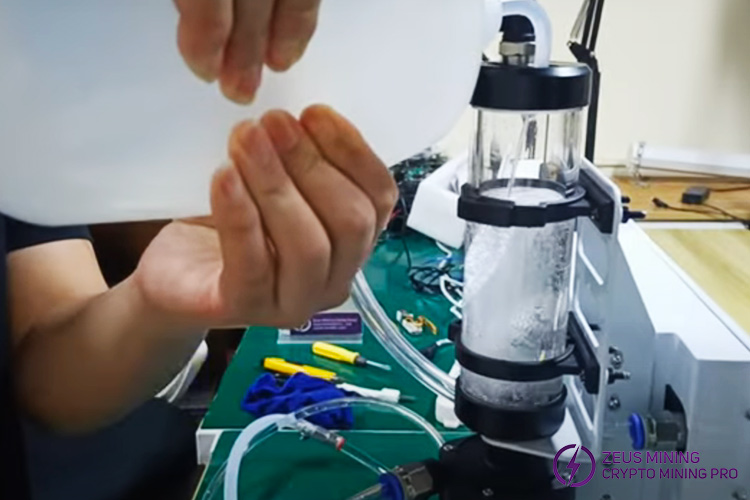
• Connect the power cord of the water-cooling radiator and turn on the switch to adjust the fan speed. At this time, the coolant in the water pump has flowed into the water-cooling plate. During the first run, the water level will drop, we need to continue adding coolant until the water level does not drop. At this time, the highest water level is about 5-10cm from the top of the pump.
• Finally, connect the miner to the power supply and start testing the miner.
Note: To prevent air bubbles and damage to the pump, it is recommended to fully insert the water inlet pipe into the pump when installing the pump.
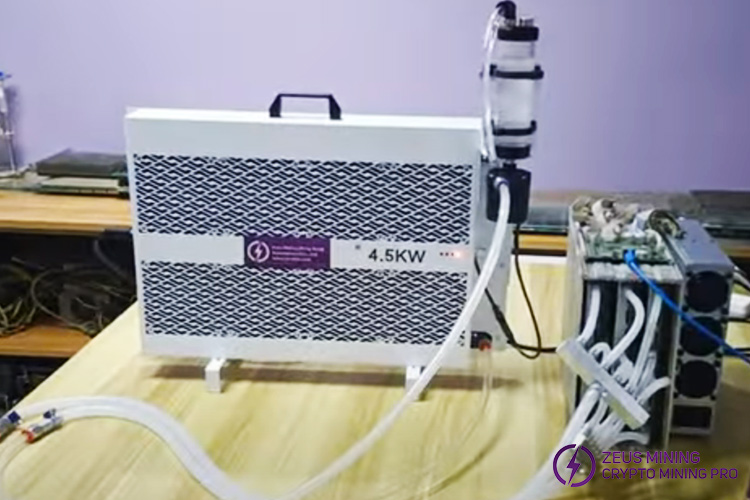
Upgrading the water cooling system can significantly reduce the operating temperature of the Antminer D7 hash board and eliminate a lot of noise generated during the operation of the miner. Improve operating performance, extend service life and obtain more benefits.
Dear Customers,
Hello, April 4, 5 and 6, 2025 (GMT+8) are the traditional Chinese festivals - Qingming Festival. Our company will suspend shipments during these 3 days and resume shipments on April 7 (GMT+8). We are deeply sorry for the inconvenience. Thank you for your understanding and support.
Best wishes,
ZEUS MINING CO., LTD