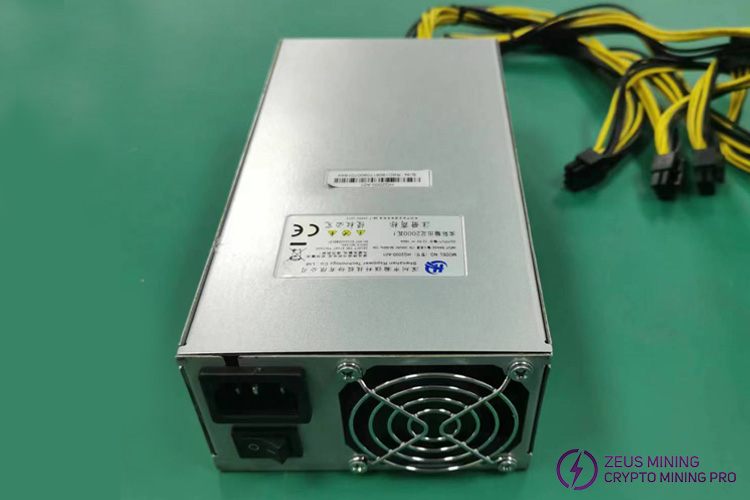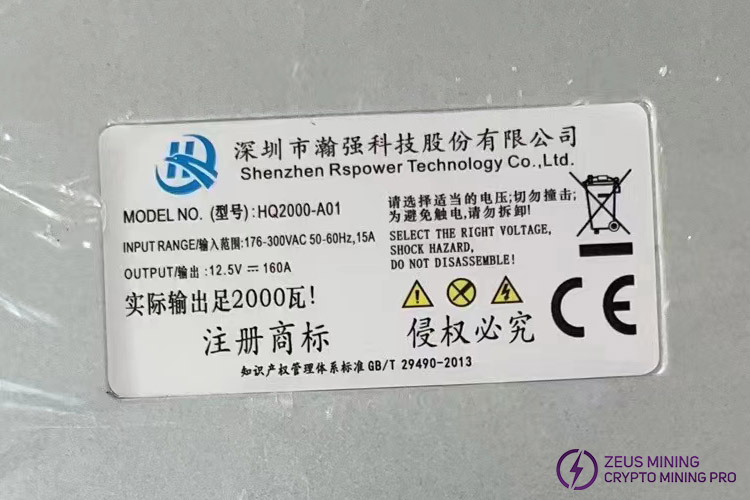


HQ2000-A01 2000W PSU suitable for Iceriver KS1 KS2 power supply replacement, operating at a voltage range of 176-300V AC and 50-60Hz, with a maximum of 15A. It has an output current range of 0-160A and an output voltage 12.5V.
Prolonged operation of the KS1 and KS2 miner power supplies may affect their performance, leading to potential failures of the HQ2000-A01 PSU. Such failures can cause the miner to stop operating; if data is being written, may result in data loss or corruption and could potentially damage other components of the miner. Frequent power supply failures and an unstable powering environment can shorten the lifespan of the miner, unable to continue making profits. More critically, it can cause overheating or short circuits, posing a fire risk.


Symptoms of power supply unit failure in Iceriver KS1 and KS2 miner:
1. The miner does not respond when pressing the power button, the fan stops spinning, and the indicator light is off.
2. The miner frequently restarts or is powered off and restarted during operation.
3. Abnormal noises from the psu fan or internal components.
4. Abnormally high temperature for PSU or miner casing.
5. Decreased mining performance, significantly reduced hash rate, unstable hash rate, and increased error feedback from the mining pool.
6. Power supply indicator light displays an abnormal color (such as red light) or keeps flashing.
7. Blown power fuse, preventing the miner from starting or operating.
8. Sudden power outage during operation, requiring a manual restart to recover.
Steps for replacing the faulty power supply unit in KS1 and KS2 miner:
1. Ensure the miner is turned off and disconnected from the power source. Use a screwdriver to unscrew the screws securing the miner casing. Carefully remove the casing to avoid damaging internal components.
2. Unplug the cables from the faulty power supply, then unscrew the screws securing the conductive copper sheet, and remove any other fixtures. Take out the power supply from the miner along the chute toward the air outlet.
3. Align the new PSU with the chute, gently push back to the original position in the direction of the air inlet of the miner, and secure it with screws to prevent it from falling out.
4. Reconnect the PSU to all hash boards using the conductive copper sheet, and tighten the screws.
5. Connect the corresponding cables to the HQ2000-A01 PSU, then reinstall the protective cover plate into the corresponding position.
6. Plug in the power cord, press the switch, power up the entire machine, and observe its startup process to ensure all indicator lights are normal and the miner is operating correctly.
7. Monitor and test the operation, allowing the miner to run for a period to observe its stability, ensuring the new power supply has no abnormal noise or overheating.
Preventive Measures for Power Supply Failures:
1. Regularly inspect the power supply to ensure there are no signs of wear or looseness.
2. Ensure good heat dissipation for the miner.
3. Ensure all connections are secure, with no loose or poor contacts.
4. Regularly clean dust from the PSU and the inside of the miner to maintain a good cooling environment.
5. Ensure stable input voltage to the PSU to avoid damage from voltage fluctuations.
6. If a power supply failure is confirmed, promptly replace it with a new power unit.
Dear Customers,
Hello, April 4, 5 and 6, 2025 (GMT+8) are the traditional Chinese festivals - Qingming Festival. Our company will suspend shipments during these 3 days and resume shipments on April 7 (GMT+8). We are deeply sorry for the inconvenience. Thank you for your understanding and support.
Best wishes,
ZEUS MINING CO., LTD