

PICKIT 4 is a stable, highly compatible, and easy-to-use online debugging programming tool. It is suitable for reading, saving, and writing PIC files for ASIC miner hash board.

What are the features of PICKIT 4 programmer?
PICKIT 4 is used for developing embedded systems, and developers can use the graphical user interface of MPLAB X Integrated Development Environment (IDE) for debugging and programming
It offers faster programming speed than its predecessors and is ready to support PIC and dsPIC MCU devices.
And it supports advanced interfaces such as 4-wire JTAG and Serial Line Debugging with Streaming Data Gateway, as well as backward compatibility with demo boards, headers, and target systems using 2-wire JTAG and ICSP.
It also has a unique plug-and-play feature that adds a microSD card slot for saving project code and is powered by the target.
The steps for reading, saving, and writing with PICKIT 4:
Reading and Saving:
1. Observe the wiring of the debugging programming cable, insert the black wire on the cable into the black triangle of the PICKIT 4 programmer, and then insert the pin corresponding to the black wire into the corresponding square hole on the hash board.
2. Connect the other end of the PICKIT 4 programmer to the computer, turn on the computer, and open the burning software.
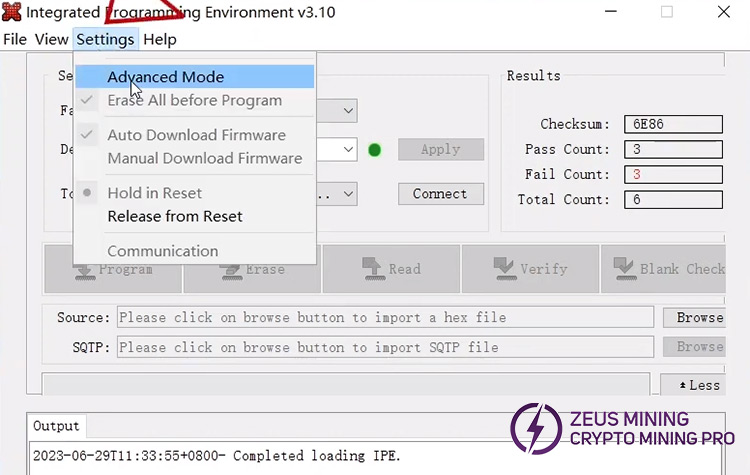
3. Confirm the model of the PIC chip and select the corresponding model at the "Device" section. Then click "settings" and "Advanced Mode" in the pop-up window and enter the password (microchip) to log in.


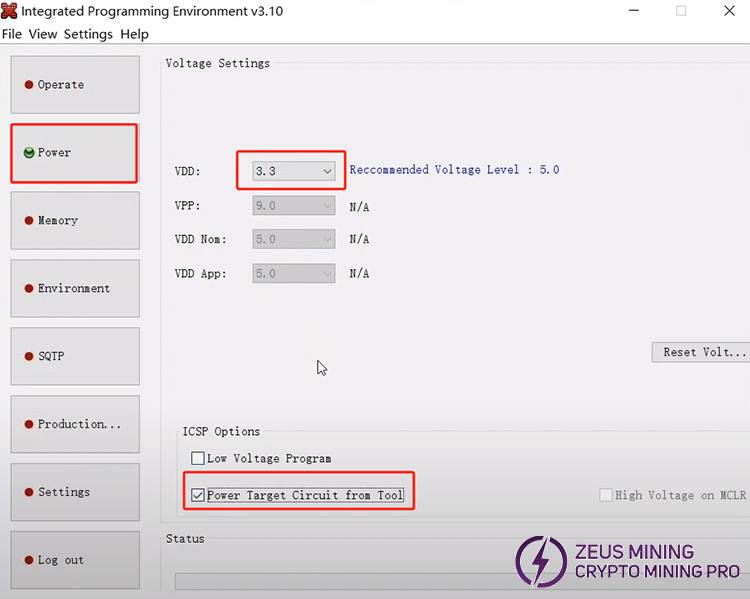
4. After logging in, click "Power" and adjust "VDD" to 3.3V, tick the "Power Target Circuit from Tool" box in the ISCP Options.

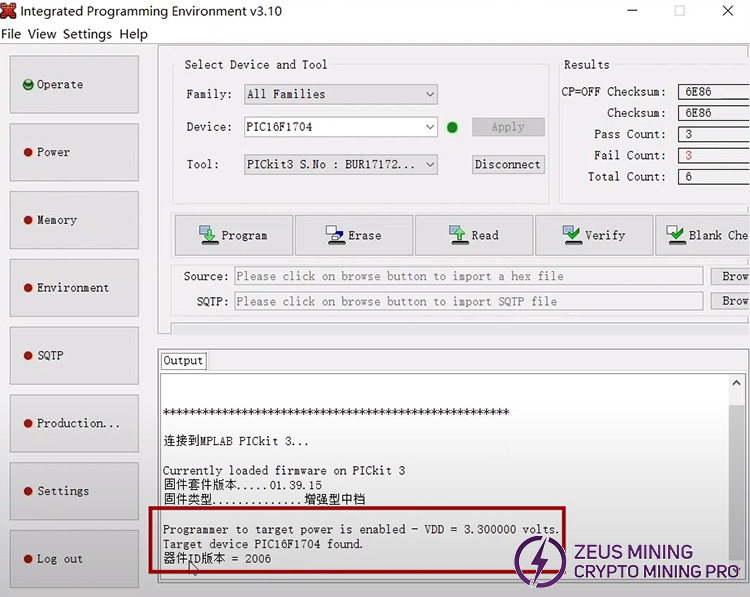
5. Once the settings are complete, click "Operate" and then click "Connect" in the popped-up window to connect. (During this process, it is necessary to hold the joint of the cable and hash board to prevent poor contact)
6. When the following screen appears, it indicates that the PIC chip has been successfully recognized.

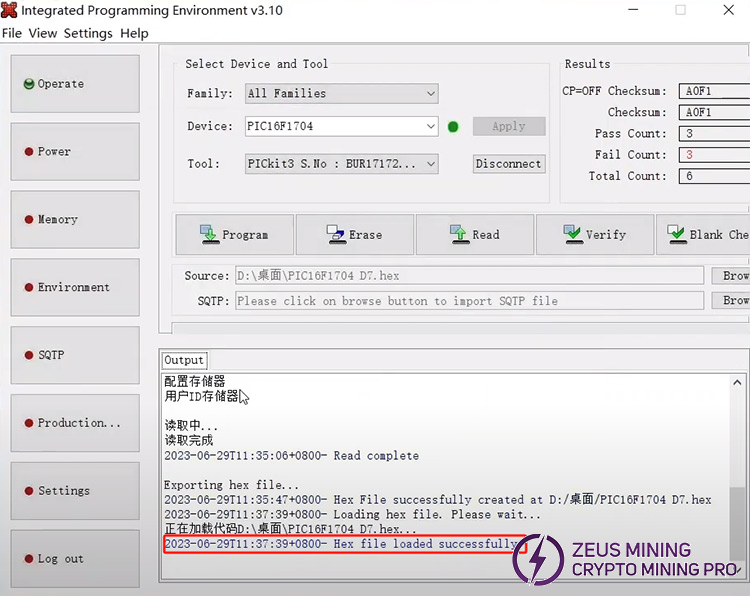
7. Next, we click on the "Read" button. When "Read complete" appears, it indicates that the PIC chip has been successfully read. We then click on "File", in the popped-up window, click on "Export" and then "Hex", allowing us to select a path to save the file on the computer.

Writing:
1. As with the initial operation, connect the PICKIT 4 programmer to another hash board that needs to be written to and simultaneously connect it to the computer.
2. Open the burning software, click "Import" under "File" and then "Hex", select the Hex file just saved. When "Hex file loaded successfully" appears, it indicates that the hex file has been imported.

3. Click the "Program" button. When "Programming complete" appears, it means the PIC chip has been successfully written.

The above is the process of reading, saving, and writing PIC files for hash board using the PICKIT 4 programmer. Using PICKIT 4 can make our programming more efficient, improve the maintenance speed, reduce the downtime of the ASIC miner, and increase the profit.