


Bitmain Antminer S19i miner upgraded the water cooling cooling system, mainly to improve cooling efficiency and hash rate, reducing noise levels and meeting environmental standards, adapting to harsh environments, lowering R&D iteration costs, and improving economic benefits. As the Bitcoin mining industry continues to evolve, liquid cooled cooling technology is poised to become the mainstream trend for miner cooling.
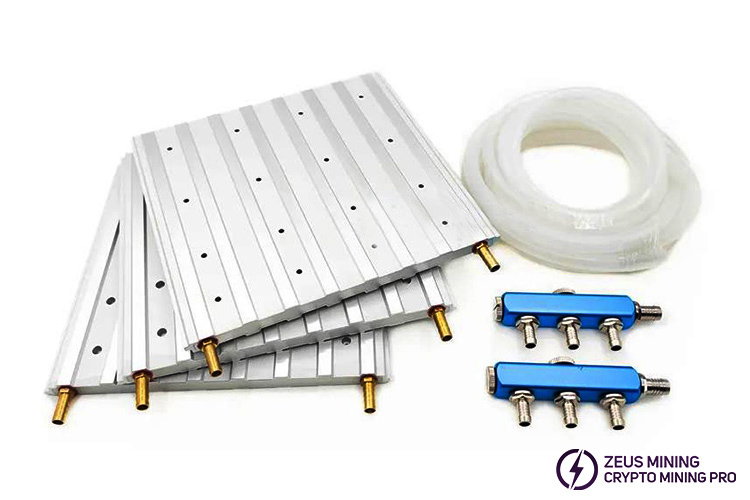
The water cooled plate for the Antminer S19i is an upgraded version of the standard aluminum liquid cooled plate, featuring improved airtightness, wider water channels, and superior heat dissipation capabilities.
Preparation:
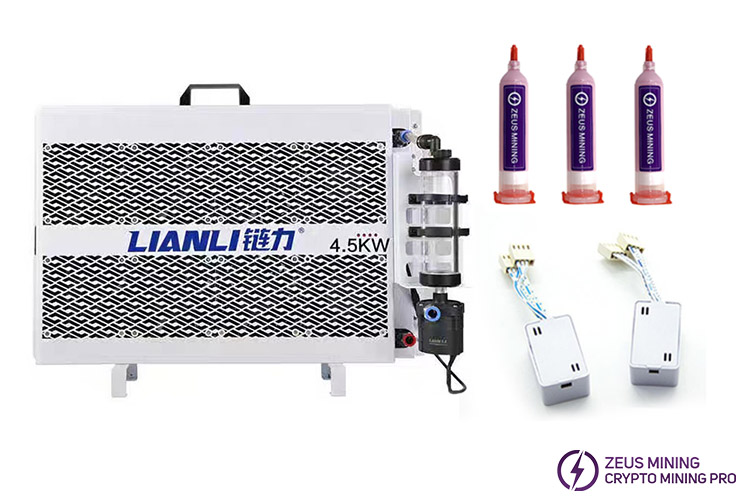
1. Liquid cooling plates * 3, 1 to 3 water manifolds * 2, multiple clamps, 2 in 1 fan simulators * 2, thermal grease * 3, 4.5kw or 8kw ASIC liquid cooled radiator * 1.
2. 10mm silicone water pipe 2m (cut into 6 short pipes with the same length), 8mm main water pipe 2m (cut into 2 long pipes with the same length).
Installing water cooling plates for hash boards:
1. Remove the miner's protective shell, detach the exhaust fans, unplug the connected cables, and pull out the three hash boards.
2. Disassemble the front heat sinks, clean the dust from the hash board surfaces, and use a circuit board cleaner to remove the thermal grease from the ASIC chip surfaces.
3. Prepare 3 bottles of HY234 4.0W/mk 110g hash board thermal grease, Apply an appropriate and even amount of thermal grease to the surface of each ASIC chip on the S19i hash boards.
4. After applying the thermal grease, align the screw holes on the water cooling plates with those on the hash boards and securely lock the water cooling plates onto the hash boards using screws.
5. Once all three hash boards have been equipped with water cooling plates, slide them back into their respective slots correctly and reconnect all cables.
6. Connect the fan speed simulator to the fan interface of the control board and install the fan baffle to the position of the original cooling fan.
Installing external water cooling circulation system:
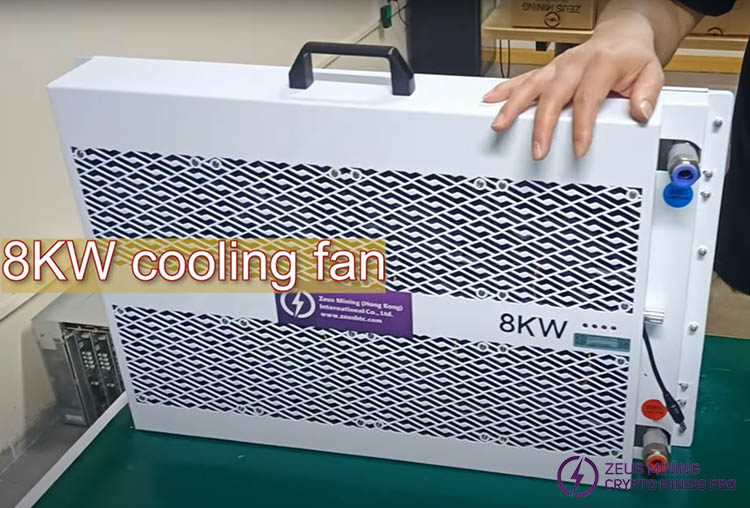
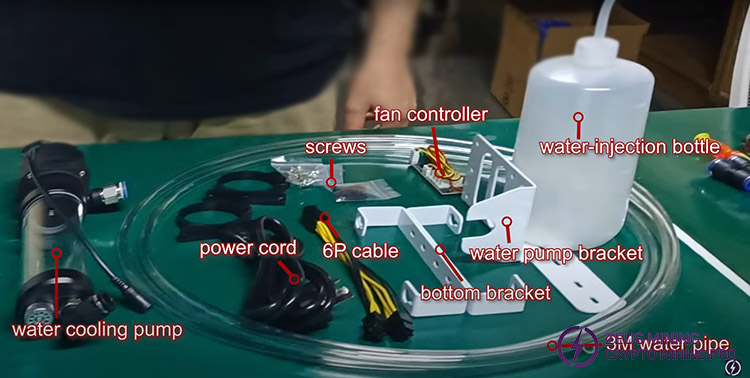
1. An 8KW water cooling radiator can be prepared, with an adjustable speed of 500-4500. Mount the water pump bracket and base onto the radiator and secure them in place, then install the liquid pump.
2. Connect one long main water pipe and three short water pipes to two 1 to 3 water separators respectively, and use clamps to fix the six short pipes to the six interfaces of the liquid cooling plate respectively.
3. Connect a long main water pipe to the liquid pump outlet and the upper diverter, which is the water inlet of the water cooling plate; another long water pipe is connected to the radiator water inlet and the lower diverter, which is the water outlet of the liquid cooling plate, Be careful to ensure that the silicone tube will not bend after connection to block the coolant.
4. Fill the water pump with coolant. When adding coolant for the first time, ensure the coolant level in the pump is approximately 5cm from the top of the pump.
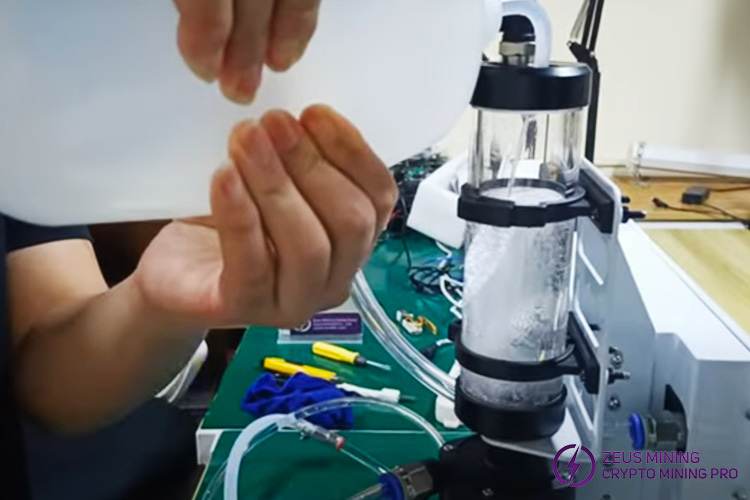
5. Connect the power cord of the liquid cooling radiator. At this point, the coolant in the water pump has already flowed into the liquid cooling plates. During the first operation, the water level may drop, requiring we to continue adding coolant until the water level stops decreasing.
Note: To prevent air bubbles and damage to the pump, it is recommended to fully insert the water inlet pipe into the pump when installing the pump.
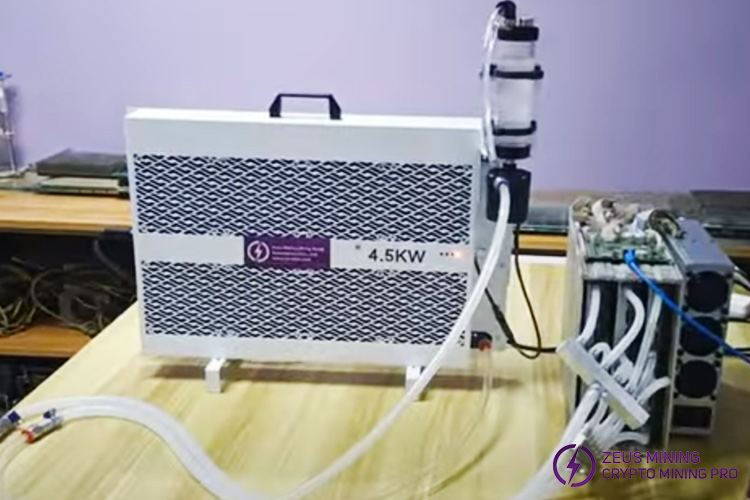
(Complete assembly example)
After successfully installing the aluminum liquid cooling plates for the Antminer S19i, we can experience the exceptional heat dissipation performance provided by the highly efficient liquid cooling system. This upgrade not only ensures an extremely quiet mining environment but also offers miners unparalleled performance and longevity advantages, significantly reducing the operating temperature of the hash boards, leading to increased profitability.
Dear Customers,
Hello, April 4, 5 and 6, 2025 (GMT+8) are the traditional Chinese festivals - Qingming Festival. Our company will suspend shipments during these 3 days and resume shipments on April 7 (GMT+8). We are deeply sorry for the inconvenience. Thank you for your understanding and support.
Best wishes,
ZEUS MINING CO., LTD