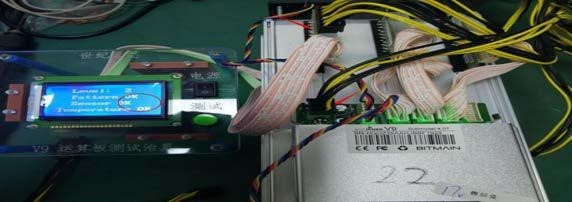


This test fixture is suitable for S9, S9i, S9j, R4, DR3, T9, Z9 series.
You can check your miner and replace the matching TF card program through the following steps. We hope the following operations will help you. If you have any questions, you can also contact us directly.
1. Preparation
1) Tools: electric soldering iron (60W).
2) Test platform: computer with win7 or win10 system.
3) Fixture: hash board test fixture.
4) Data line: 2*9PIN data cable, pin spacing 2.0mm, length 30cm.
5) Fan: 12cm cooling fan*2, used to dissipate heat from both sides of the hash board during testing.
6) Power supply (12V >4A DC, or use the power supply for the miner, please do not use the same power supply with the hash board).
7) TF card: Write the converted file to the test fixture first, and then copy the test file to the TF card.
8) USB to serial cable. It is the easiest way to connect to the serial console port of a microcontroller/Raspberry Pi/WiFi router.
2. File burning
1) Download the required files for the corresponding model:
Each fixture has two files: Conversion files and test files, some test files are common.
2) Unzip conversion files (take V9 fixture as an example)
a. Insert the card reader where the TF card is installed into the computer, then right-click the card reader and select format to format the TF card.
b. Unzip the downloaded conversion file to the root directory of the TF card.
c. When the test fixture is powered off, insert the completed TF card, and then power on.
d. After powering on, please wait patiently for 2 minutes, then power off and remove the card.
3) Unzip test files (take V9 jig as an example)
a. Insert the card reader where the TF card is installed into the computer, then right-click the card reader and select format to format the TF card.
b. Download the corresponding test files, and then unzip it to the root directory of the TF card.
c. When the test fixture is powered off, insert the TF card, and then power on.
d. After the display shows normal, start to use the fixture.
3. Hardware connection
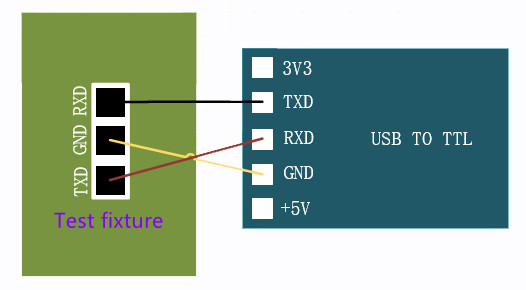
1) First, connect the serial port, the connection diagram of the control board and the USB serial port board.
2) Solder the serial port board, connect the data cable, pay attention to the voltage regulating line must be connected when the test fixture is started to be energized.
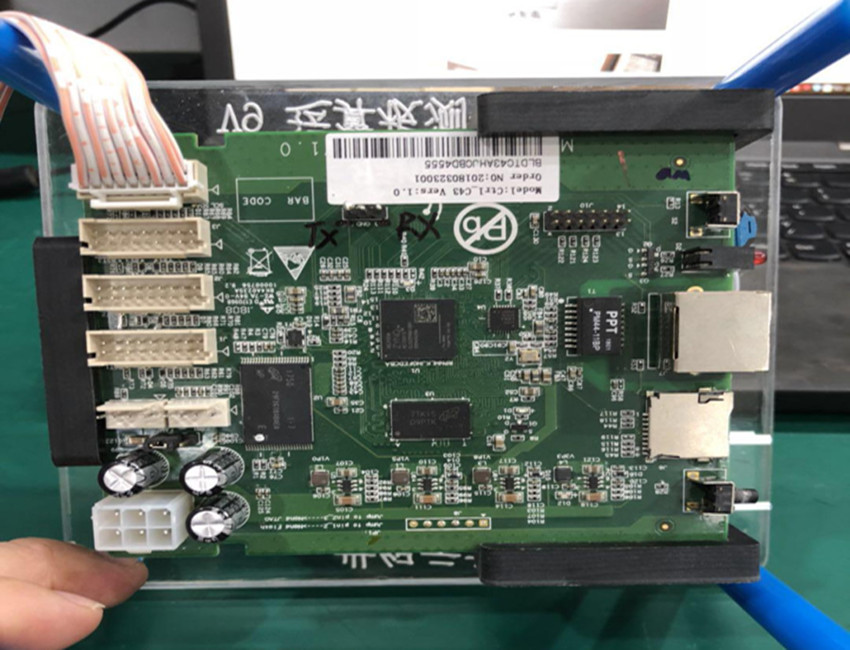
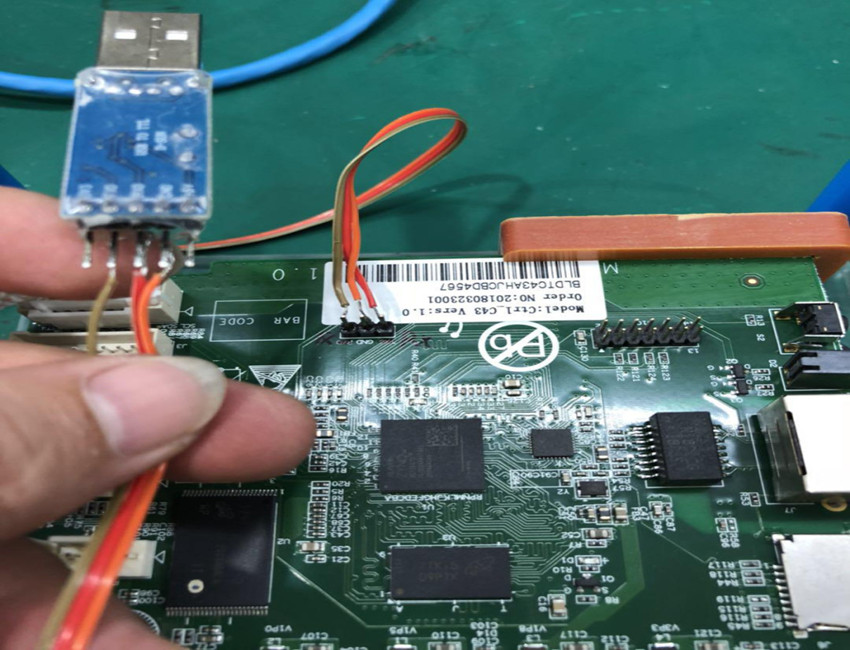
3) The connection effect diagram is as follows.
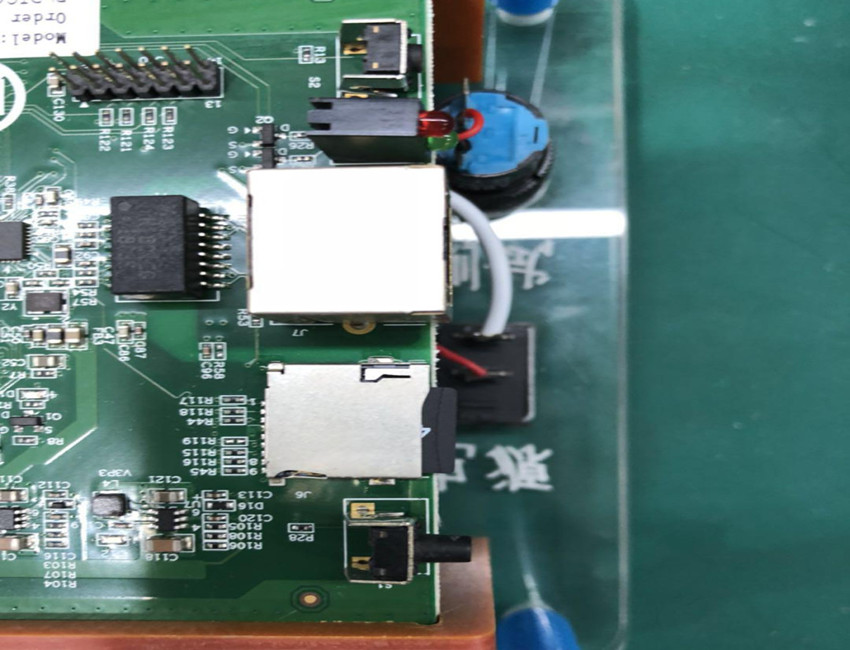
4) Insert the TF card.
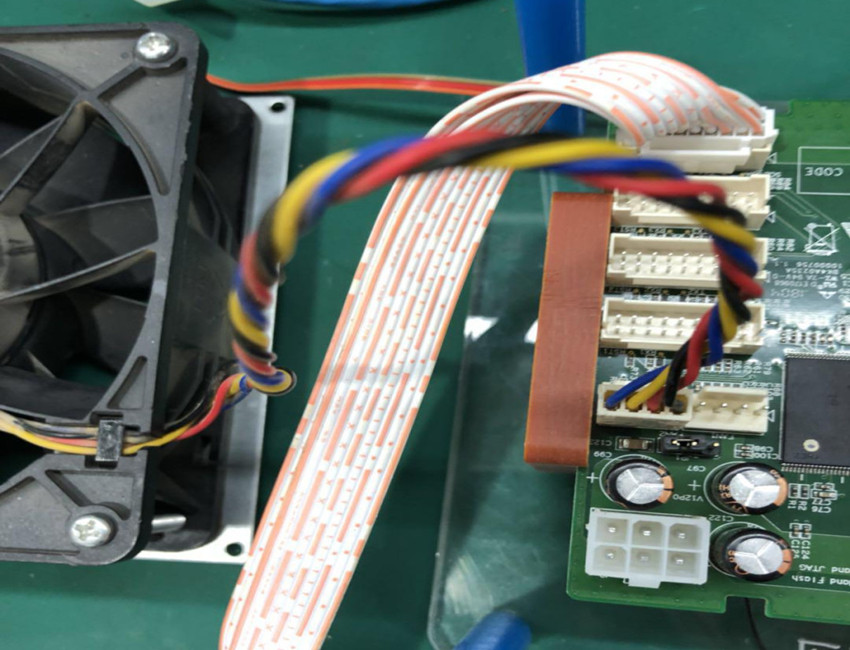
5) Connect the data line and cooling fan.
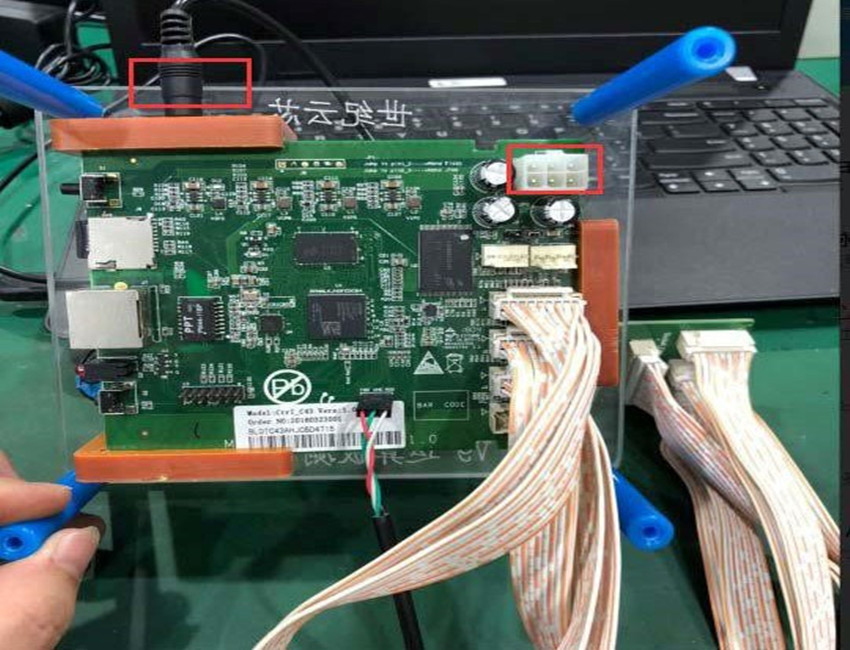
6) Plug in the power.
The black adapter power connector is in the figure below. Just plug it directly into the power connector. If you use APW3++ PSU and other miner power supply, you need to plug it into the white 6PIN interface on the control board, but the power switch of the text fixture will not work.
4.software installation
1) Download the software
a. Software: SecureCRT, CP210X driver car program (the system will automatically install it when inserted for the first time).
b. Connect the serial port to the computer. The system will automatically install the driver (if individual computers cannot actively install the driver, please download the corresponding driver by yourself and install it manually).
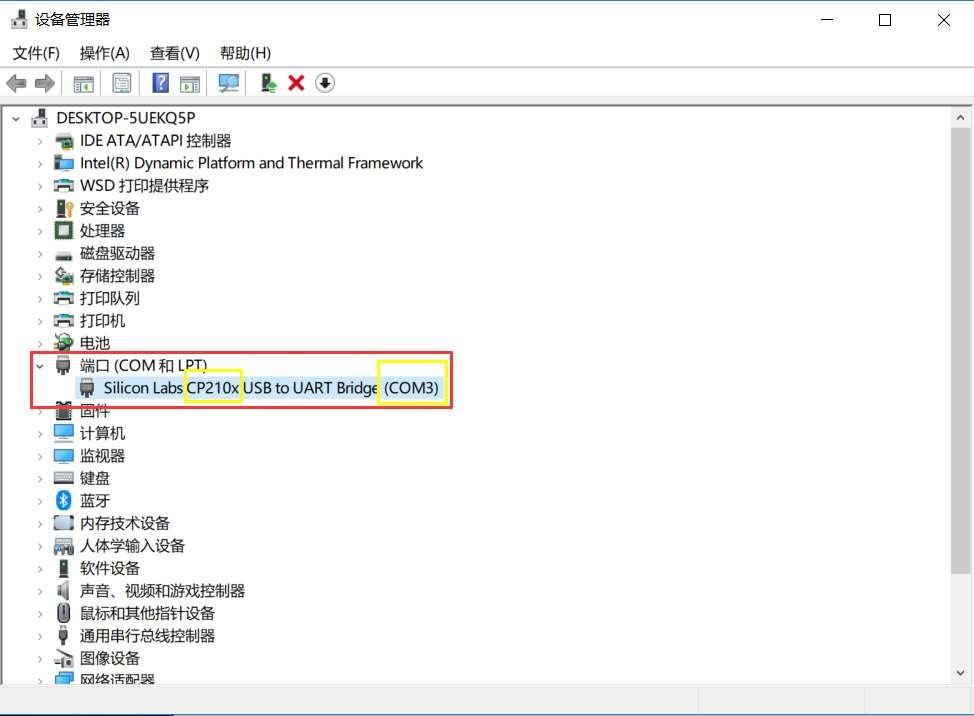
c. Click Computer--Right-click--Properties--Device Manager, and find the port option. The driver and port number are shown in the figure below. If not, you need to check the serial port board and download the corresponding driver.
d. Download the SecureCRT software and install it.

2) Software settings
a. Open the software, select the COM port, which needs to be the same as the port in the device manager, and then click connect.
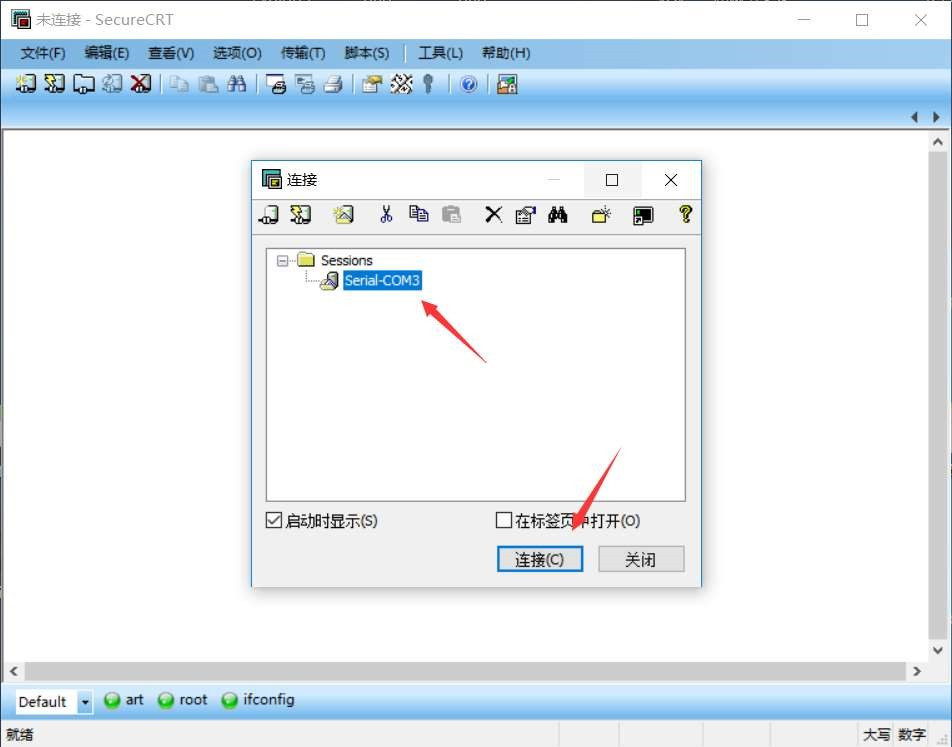
b. If it cannot be selected automatically, please set it as follows.
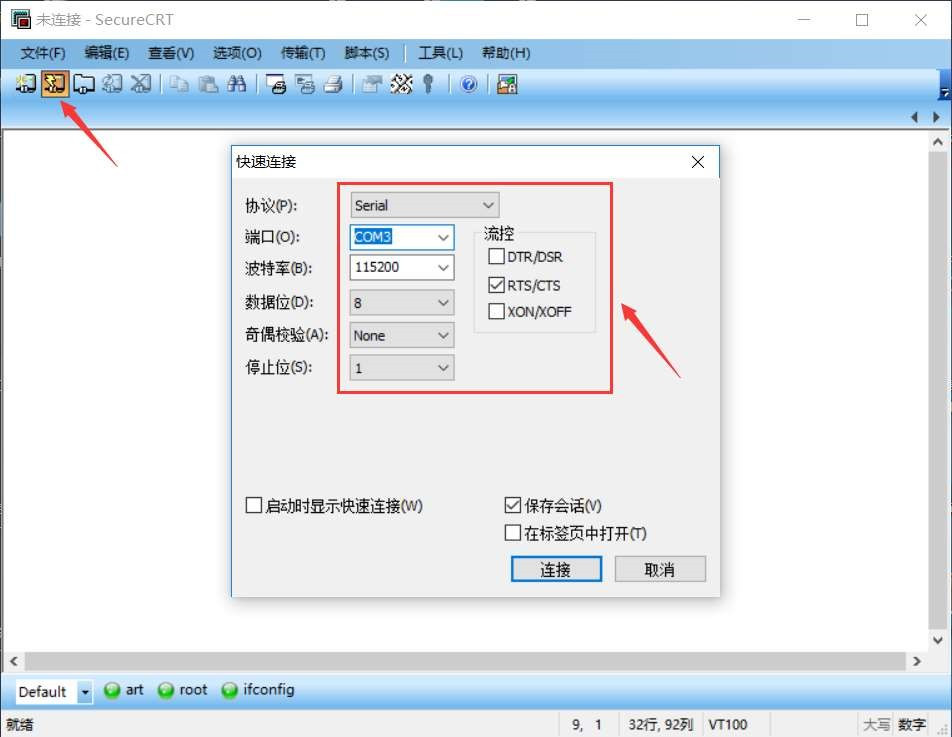
5. Start the test
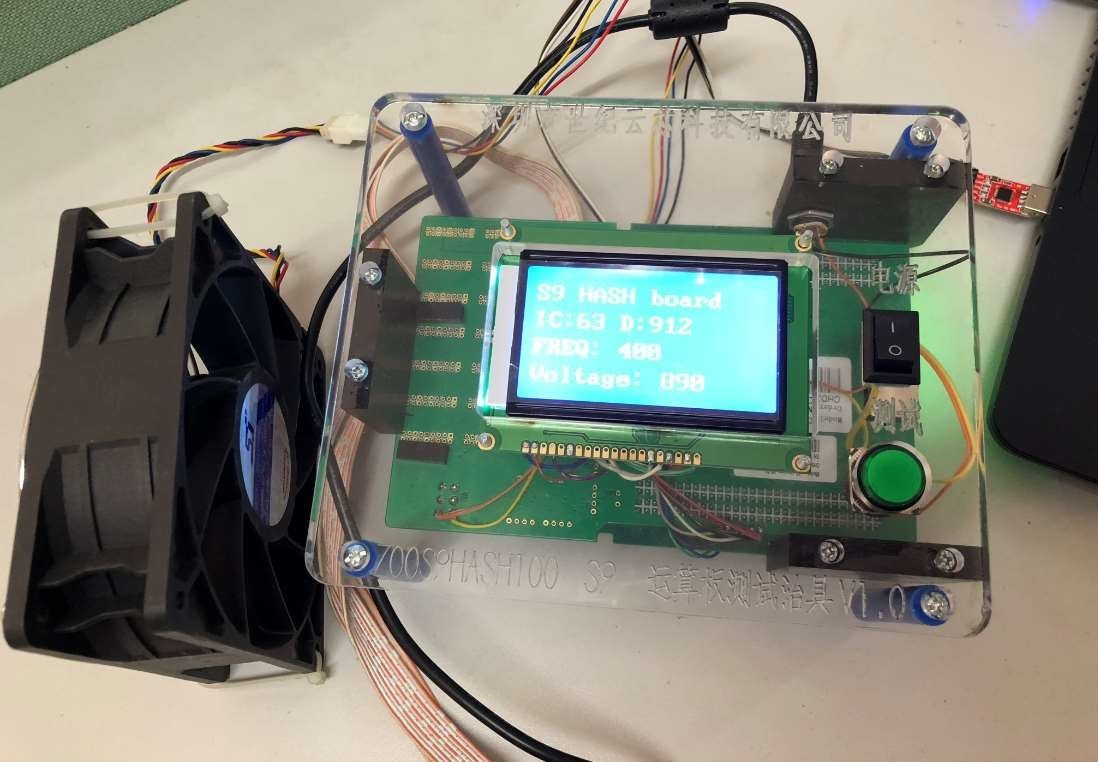
1) After connecting the data line and power supply of the fixture, turn on the power switch of the fixture. The software and test fixture will display the following screen. The test fixture will normally start, press the test button to start the test.
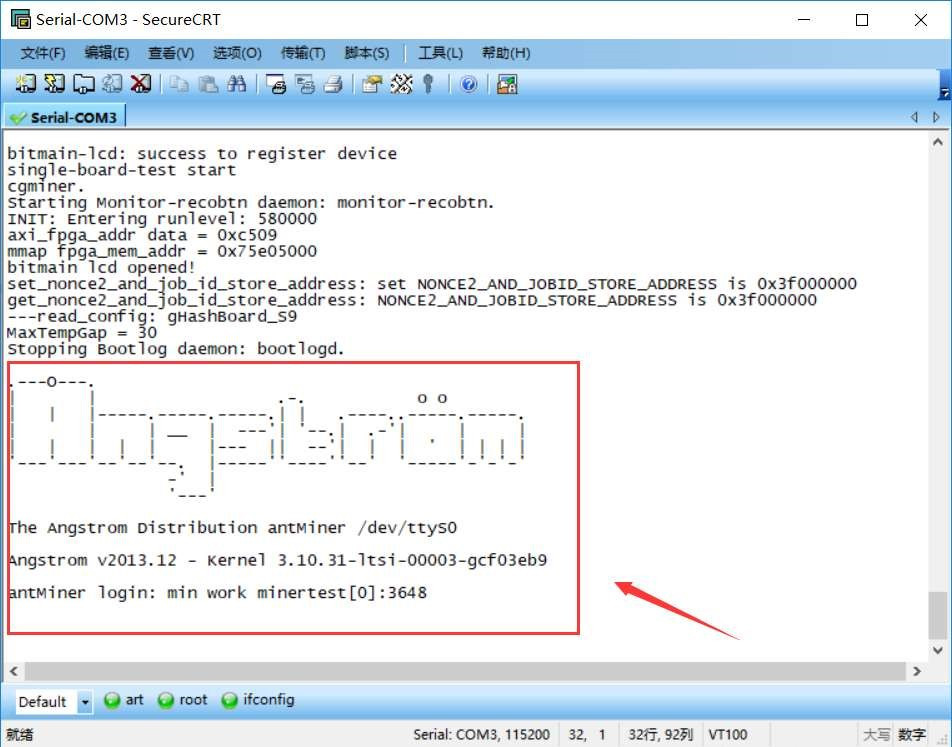
2) After the platform test is finished, the test fixture displays three OKs, indicating that the hash board is a good product.
