

In order to repair the Antminer hash board, we first need to determine the location of the damaged chip. The test fixture can help us quickly locate the fault point, but in order to ensure accuracy, we still need to use a multimeter to test the hash board, in order to better determine the damaged chip and speed up the repair speed.
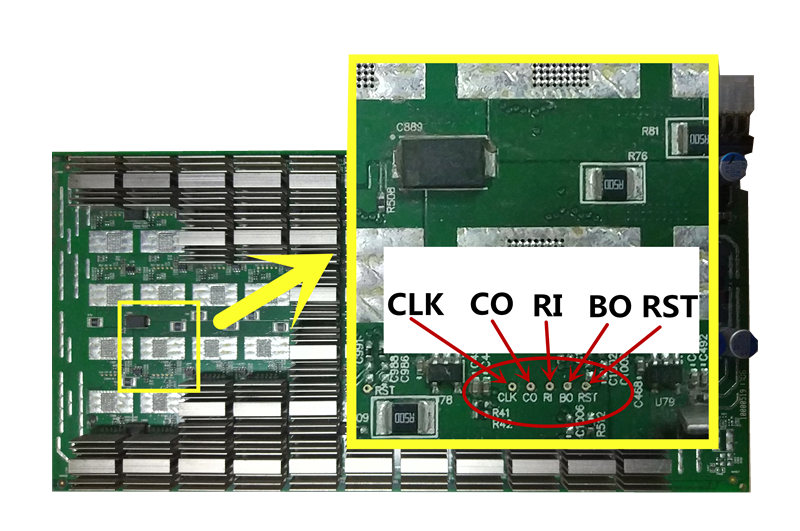
The Antminer hash board has 5 test points, they are: CLK, CO, RI, BO, RST, defined as follows:
CLK = clock signal
CO = signal transmission
RI = signal reception
BO = Pulse signal
RST = Reset signal
They are located on the back of the hash board (take S9 as an example)
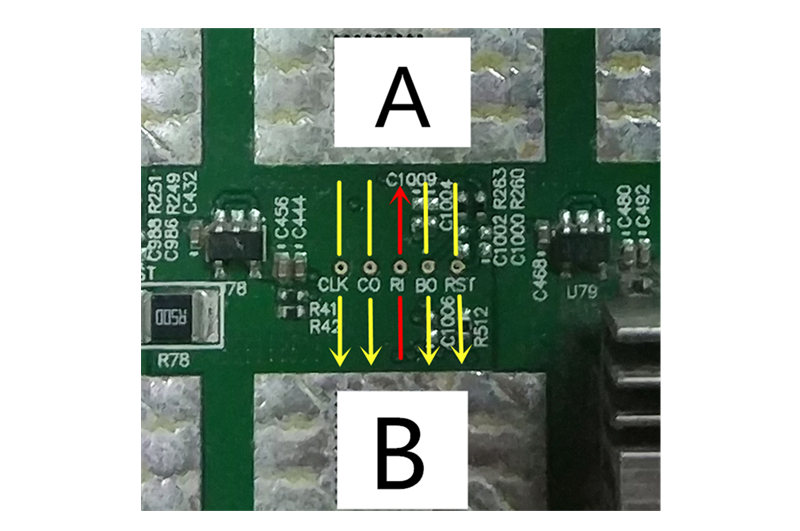
Their signal direction:
Send 4 (CLK, CO, BO, RST) signals in sequence, and send 1 (RI) signal in reverse.
Each set of test points represents a corresponding chip, we can test their voltage and resistance to determine whether they are good

The power supply needs to be disconnected when testing resistance
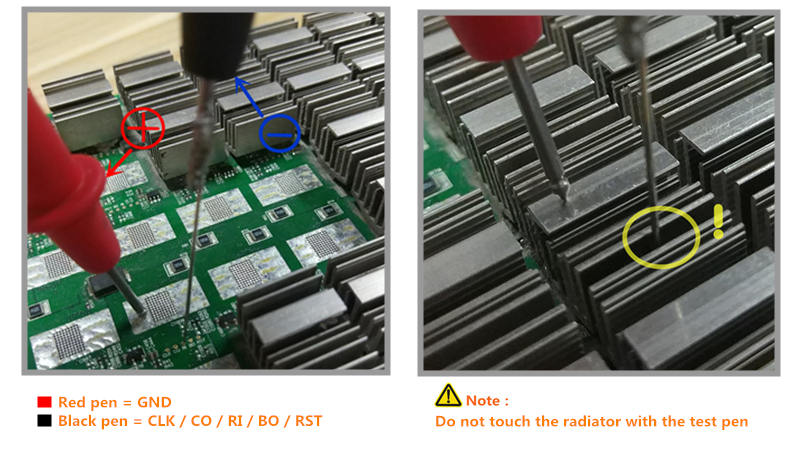
Due to the operating characteristics of the diode, we need to touch the red pen of the multimeter to the GND of the hash board, and the black pen to 5 test points.
When testing the voltage, you need to use the test fixture to start the hash board and test it while it is working.
Note:
The black test pen must not touch the radiator, otherwise it may cause a short circuit

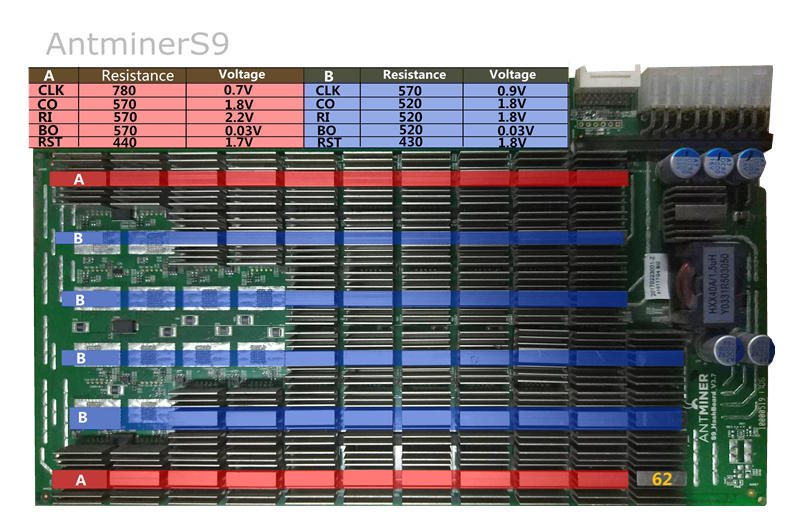
Due to different multimeter models, the recorded parameters will also be different, we use Fluke 15B + multimeter, and get the following parameters:
(The parameters of the blue part and the red part are different, this is due to the relationship of the voltage domain, we will release the description of the voltage domain separately)

Related maintenance tools: