


Hash board PIC file with critical data and setup parameters for hash board operation. If the file is abnormal or damaged, the hash board cannot operate normally, and it is recommended to replace;a new hash board.
The tools required to burn the PIC file of the hash board are: Computer, PICkit3 or PICkit3.5 or PICkit4.
First, we need to download and install the PICkit burning tool (it is recommended to download from the official website) and then connect the hash board to the computer through PICkit. Next, the USB port is connected to the computer, and the Dupont cable (6-pin) is connected to the hash board data burning test point.
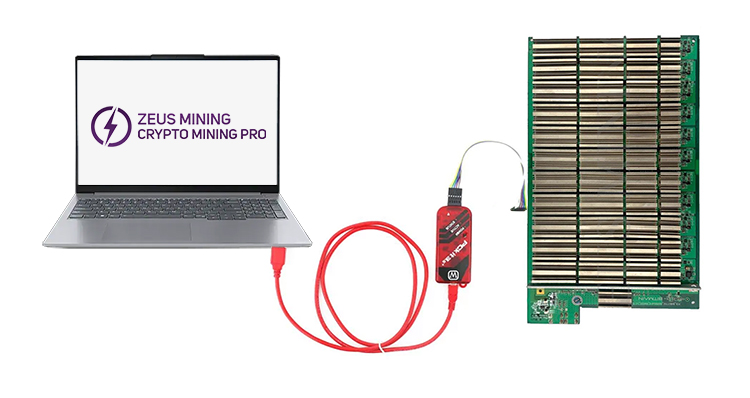
The test points on the Antminer hash board are easy to find; they are 6 points side by side; use 6 pin Dupont wire to connect these 6 points.
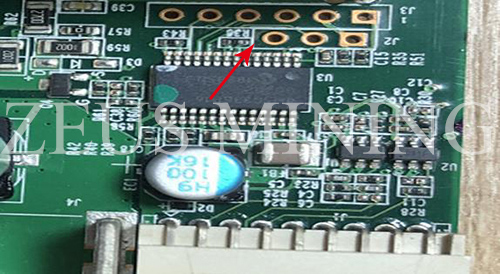
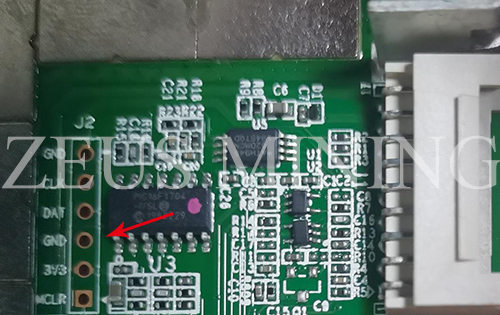
How to reprogram a PIC chip (taking PIC12F1572 as an example) using PICKit 3.5 programmer?
After the above operations are completed, burn the PIC file, the specific operation steps are as follows:
1. First, you need to install the burning driver on your computer: MPLABX-v3.10-windows-installer.exe
After installation, it will look as the following picture:

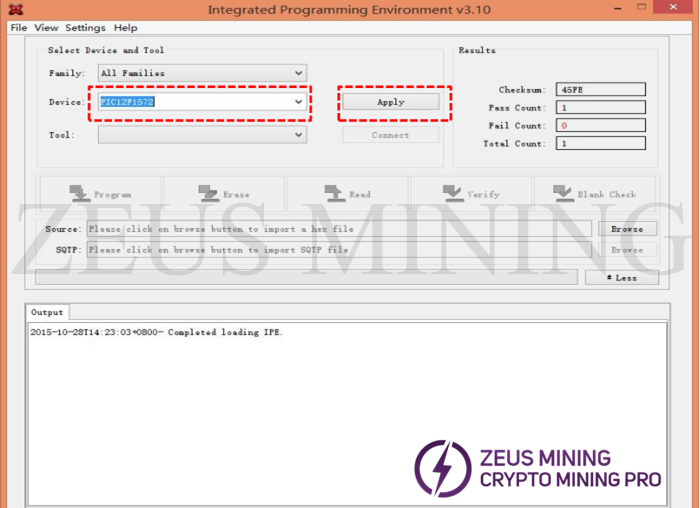
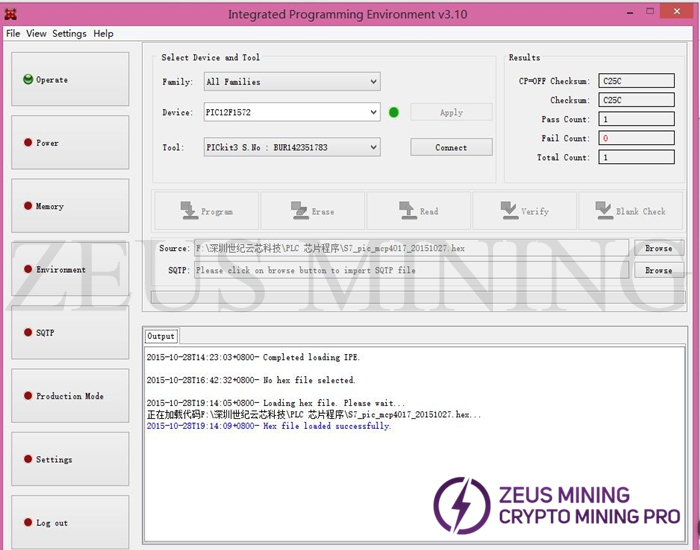
2. Set MPLAB IPE V3.10, as shown in the figure below, select PIC12F1572 as Device, and then click Apply.
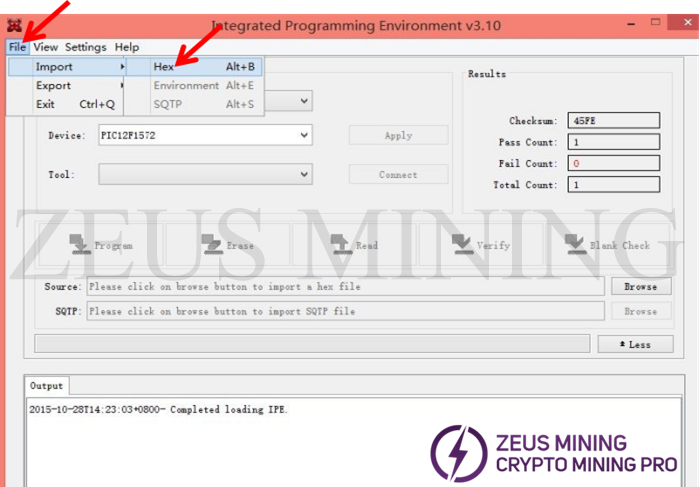
3. Click File→Import→Hex to find the program storage disk.
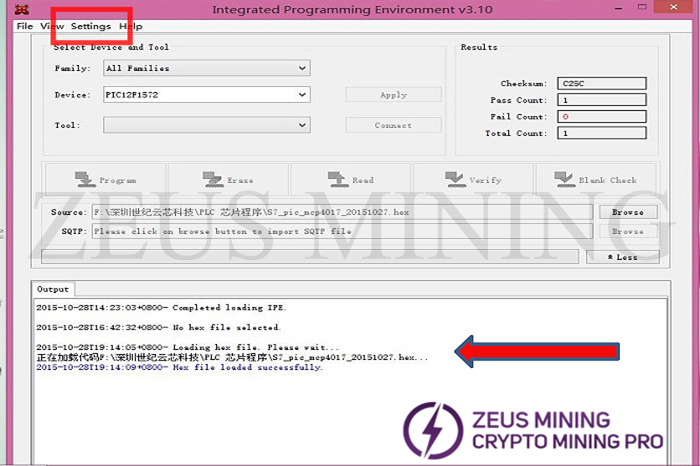
4. Select the corresponding program, open it and enter the next interface, and then select Setting→advanced mode.
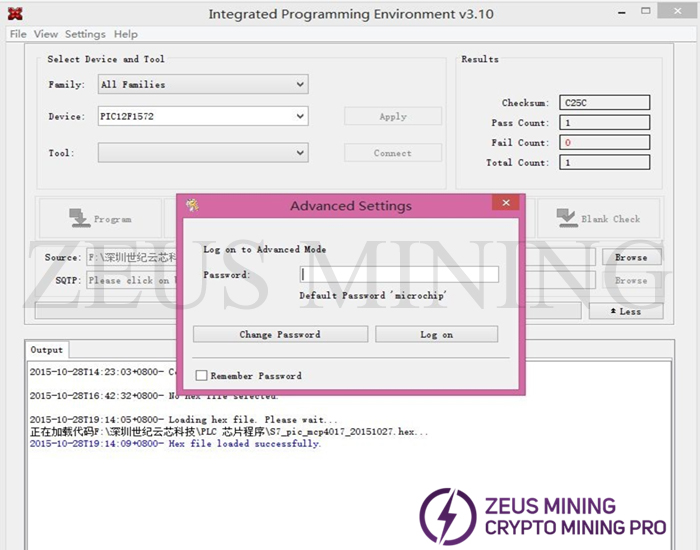
5. Enter the password microchip to enter the advanced settings.
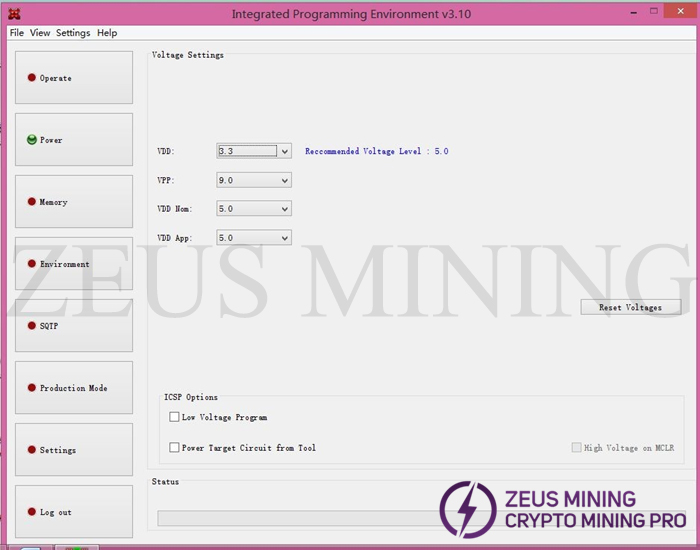
6. Click Power→VDD voltage to select 3.3V→check Power target circuit from Tool ✔→click Operate to enter the next interface.
7. Make sure that the data serial port of the PICKit 3.5 programmer is properly connected to the computer.
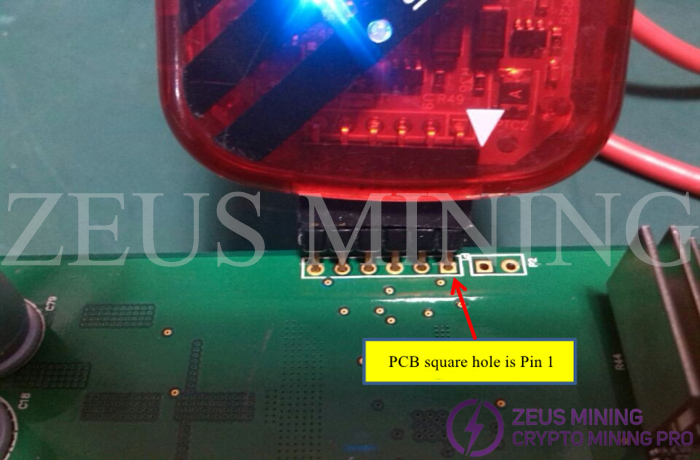
8. PICKit 3.5 programmer is directly connected to the P1 position of the hash board, and the direction ![]() on the PICKit 3.5 programmer is aligned with the P1 square hole (as shown in the picture). Note that the hash board does not need to be powered up at this point.
on the PICKit 3.5 programmer is aligned with the P1 square hole (as shown in the picture). Note that the hash board does not need to be powered up at this point.
9. Click Connect, the MPLAB IPE warning check appears, then click OK.

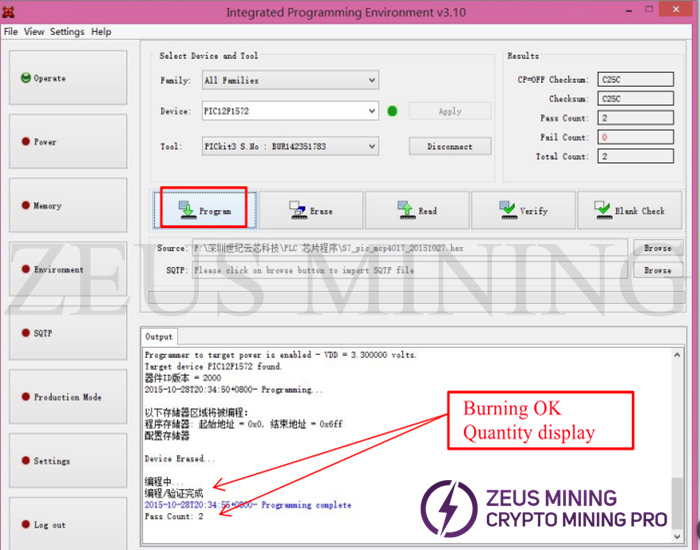
10. Click Program to start burning.
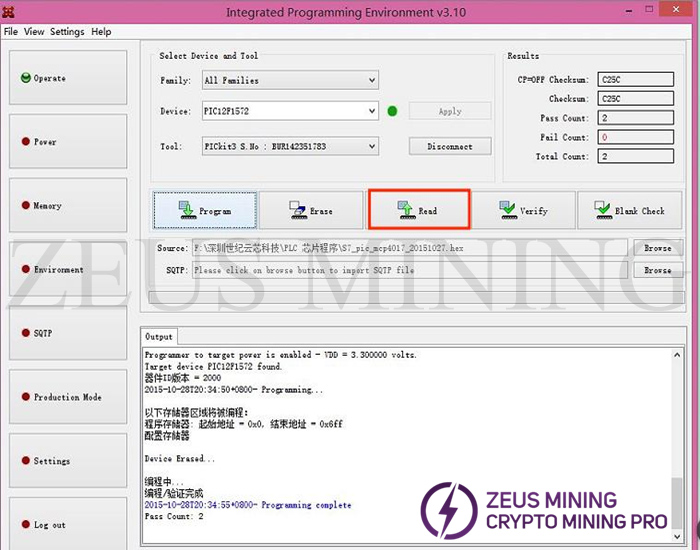
11. Click Read to view the burning information.
Notice:
(1) The voltage of the PIC16F1704 chip needs to be adjusted to 3.3V for programming.
(2) The voltage of the PIC16F1705 chip needs to be adjusted to 4.8V for programming.
(3) The voltage of the PIC12F1572 chip needs to be adjusted to 3.3V for programming.
(4) When programming the next PCBA continuously, connect the PICKit 3.5 programmer to the hash board correctly and click Program to start programming.